We all desire to look thin and have the body of our dreams. Although, it isn’t simple to achieve perfection, and it doesn’t happen overnight. Photoshop has long been regarded as a tool for experts with advanced skills. However, with a step-by-step approach, anyone can learn to make subtle yet effective adjustments to body shapes in their photographs. Understanding the fundamental tools and techniques within Adobe Photoshop is crucial for anyone involved in image manipulation, from casual users to professional retouchers. This guide will delve into some of the most common and impactful body editing techniques, providing a clear pathway to achieving desired aesthetic outcomes.
Preparing Your Image for Editing
Before diving into the more advanced manipulation tools, the initial preparation of your image is paramount. The first step in any Photoshop editing process is to open the image that you wish to edit on your Photoshop tab. As soon as the photo is seen on your screen, you will see your background layer. It is often beneficial to duplicate this layer to preserve the original image data. This can be achieved by right-clicking on the background layer and selecting "Duplicate Layer" or by using the keyboard shortcut Ctrl+J (Windows) or Cmd+J (Mac). Working on a duplicated layer ensures that you can always revert to the original if any unintended changes occur.
Sculpting the Body with the Liquify Tool
The Liquify filter is one of Photoshop's most powerful and versatile tools for reshaping and refining body forms. It allows for localized distortions that can subtly alter perceived proportions.
To begin, navigate to the Liquify filter by going to "Filter" and scrolling down to "Liquify." Now a new set of options will appear on both the right and left-hand sides of the screen. Within the Liquify dialog box, locate the "Freeze Mask Tool." The freeze mask brush will appear on your screen. Its purpose is to protect specific areas of the image from being affected by the subsequent warping tools. Once you get the freeze mask brush, paint over the areas of your image where you don’t want to get affected. This is particularly useful for preserving facial features, hair, or intricate clothing details while working on the body.
Once you have protected the areas you want to remain unchanged, select the "Forward Warp Tool." This is the primary tool for pushing and pulling pixels to create the desired shape. Before doing that, make your brush size bigger, especially for larger areas of adjustment. As you keep on doing it, you will realize the other parts which need to be adjusted as well, so continue the process until you are happy with the results. The Forward Warp Tool allows you to subtly shrink or expand areas, creating a more slender appearance or enhancing curves. Remember to use this tool with restraint; overdoing it can lead to unnatural and distorted results.
Double-click on the "Liquify" option of the layer 1 option (assuming you are working on a duplicated layer), and the properties menu will appear instantly. From there, you can zoom in on the picture and click on the "Forward Warp Tool" once again to make further changes with greater precision. Zooming in allows for meticulous adjustments to smaller areas.
Addressing Background Distortions
A common challenge when editing body shapes is the distortion of the background. As you push and pull the subject's form, the surrounding environment can become warped and unnatural. To fix this, it's essential to address these distortions to maintain the photograph's realism.
Now you need to fix your distorted background because, in some of the parts, you have pushed the dress inwards as well as outwards, so now the background needs to match with the other portion of this photo. To do that, take the "Pen Tool" and start outlining the areas that need adjustment. So, make a rough outlining around the distorted area. The Pen Tool offers precise control for creating clean selections.
Once you have created a path around the distorted area, right-click on the path and select "Make Selection." This will convert your outline into a selection. Now, click on the "New Layer" icon to create a new layer. This new layer will be used for cloning and repairing the background without affecting the original image or the edited subject.
Then, go to the "Clone Stamp Tool" (you can also press 'S' for the shortcut). This tool allows you to sample pixels from one area of an image and paint them onto another. Press and hold the "Alt" key (Windows) or "Option" key (Mac) and click on an unaffected area of the background to sample it. Then, start painting over the distorted background on your new layer. Also, you can position the crosshair "+" sign anywhere you want, and it will start painting over the distorted background exactly like the unaffected portion. By carefully sampling and painting, you can seamlessly blend the background and eliminate any visible distortions.
Clone Stamp Tool - Toolbar Explained & Demonstrated [Photoshop Tutorial for Beginners]
Refining Facial Features and Proportions
While the focus is often on body shape, Photoshop can also be used to subtly enhance facial features and overall proportions, contributing to a more harmonious aesthetic.
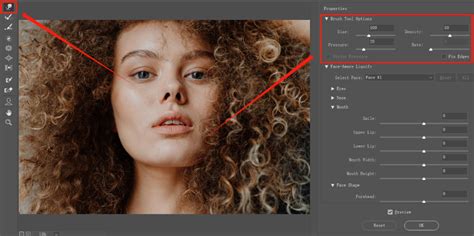
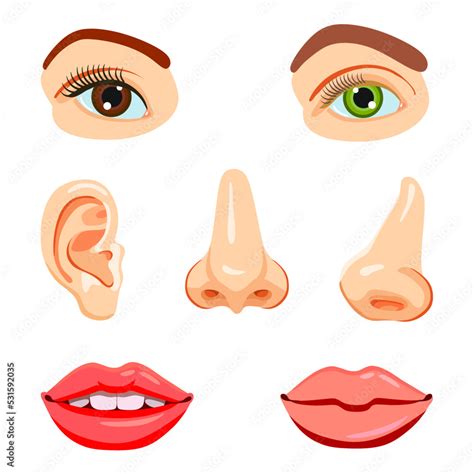
In Photoshop, open a photo containing one or more faces. To enter the dialog box for facial adjustments, click "Filter," then "Liquify." In the Tools panel, choose the "Face Tool." This intelligent tool automatically detects faces and provides sliders to adjust individual features like eye size, nose width, mouth shape, and jawline. For instance, you can subtly enlarge eyes or refine the chin for a more balanced look.
When making adjustments to facial features, it's crucial to employ the "Healing Brush Tool" for a natural finish. Add a new blank layer as the first step in your editing process. Select "Healing Brush" from the drop-down menu. Select "All Layers" as the sample option for the Healing Brush. Uncheck the "Aligned" box. To sample a good texture, click on an area with the desired skin texture, and then paint over the area you wish to refine. The Healing Brush blends the sampled texture with the underlying tones and colors, creating a seamless and realistic repair.
Enhancing Height and Overall Physique
For those aiming for an increased sense of height or a more elongated body shape, Photoshop offers tools that can achieve this without appearing artificial.
Generally, you are going for increased height in the body. A powerful technique for this is using the "Puppet Warp" tool. Duplicate the Background layer and go to "Edit" -> "Puppet Warp." With this tool, you can create anchor points for the areas that you would like to stay in place. For this image, we create points on her hips and then on the outsides of her feet. Once the anchor points are set, you can click and drag these points to subtly stretch the body, creating an illusion of greater height.
You can use Puppet Warp for stretching the neck as well. Put points around her head so that it doesn’t move, and one on each shoulder. Gently pulling the shoulders down or adjusting the neck can lead to a more refined and elongated silhouette. It's essential to use this tool with a light touch, focusing on subtle movements rather than drastic transformations.
The Art of Tummy Slimming
Tummy slimming is a common request in body editing, and Photoshop provides effective methods to achieve this.
At last, tummy slimming! We use a similar puppet technique for this as well. On a duplicate of your top layer, go to "Filter" -> "Liquify." We use the "Forward Warp Tool," which can be found at the top left of the dialogue, and allows you to push and pull the image. By carefully applying the Forward Warp Tool to the abdominal area, you can gently pull the stomach inwards, creating a smoother and more toned appearance. As with all body editing, subtlety is key. Overly aggressive manipulation can result in an unnatural flatness or distortion of the underlying anatomy. It's often beneficial to zoom in and out frequently during this process to maintain perspective and ensure the adjustments blend seamlessly with the rest of the body.
Anyone who works with images should know all of the ins and outs of Adobe Photoshop. You may need to learn how to change body shape in photoshop using a few basic Photoshop tools once you start working on various types of editing jobs. If you have liked our blog, check out some of our other posts where we discussed different picture editing services in greater depth. If you have any questions or helpful suggestions, then leave them in the comments section. Altering a model’s body proportions is a very controversial topic. Although tucking the stomach in usually comes to mind first, there are many other helping tricks for shaping bodies in Photoshop.