Creating visually engaging bubble letters in Adobe Photoshop is a versatile skill that can elevate a wide array of design projects. Whether you're aiming for the dynamic feel of a comic book or manga, the vibrant aesthetics of a pop art poster, or the playful charm of a sticker design, understanding how to manipulate text into this distinctive style opens up a world of creative possibilities. This tutorial will guide you through the process of transforming standard text into eye-catching bubble letters, incorporating various techniques to achieve polished and professional results. We will explore how to load specific assets, meticulously adjust the appearance of your letterforms, and integrate text seamlessly within these unique shapes.
Understanding the Foundation: Photoshop's Shape Tools and Text Manipulation
Before diving into the intricate details of creating bubble letters, it's essential to grasp the fundamental tools and concepts within Photoshop that facilitate this process. The journey often begins with either leveraging pre-existing shapes or constructing them from scratch, followed by the precise application of text. Photoshop offers a robust suite of tools, including the Custom Shape Tool and the Horizontal Type Tool, which are central to this endeavor.
Loading Legacy Shapes for Speech Bubbles and Beyond
For those seeking to incorporate speech bubbles into their designs, a crucial first step involves ensuring that the necessary shape libraries are accessible. If you haven't previously loaded them, the process is straightforward. Navigate to the Shapes panel, typically found under Window > Shapes. Within this panel, locate the menu button, usually positioned at the top right, and select "Legacy Shapes and More." This action integrates a comprehensive folder of older shape assets into your Shapes panel, making them readily available for use.
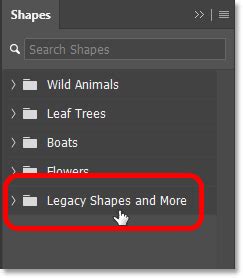
The speech bubble shapes, specifically, are nested within this legacy library. To find them, you'll navigate through the folders: "Legacy Shapes and More" > "All Legacy Default Shapes" > "Talk Bubbles." Having these pre-defined shapes can significantly expedite the design process, providing a solid foundation for incorporating dialogue or emphasis into your artwork.
Creating Custom Paths with Shape Tools
Once the desired shapes are accessible, the next phase involves drawing them onto your canvas. The Custom Shape Tool (keyboard shortcut 'U') is your primary instrument here. Crucially, ensure that "Path" is selected from the dropdown menu in the Options bar at the top of the screen. This setting instructs Photoshop to create a vector path rather than a pixel-based shape, offering greater flexibility for editing and scaling without loss of quality.
With your chosen speech bubble shape selected from the Options bar or the Shapes panel, you can then click and drag on your canvas. This action will generate the path for your speech bubble. This path serves as a blueprint, defining the outline of your shape. You can then refine this path using the Path Selection Tool (A) or the Direct Selection Tool (A) to fine-tune its curves and points.
Master The Pen Tool In Under 30 Minutes - Photoshop Tutorial
Sculpting the Appearance: Fills, Outlines, and Layer Styles
With the basic shape path established, the focus shifts to defining its visual characteristics. This involves adding color fills, creating outlines, and employing layer styles to achieve depth, dimension, and stylistic flair.
Applying Fills to Shape Paths
To add a solid color to your speech bubble path, begin by creating a new layer in the Layers panel. It's good practice to rename this layer descriptively, such as "Fill." With the new layer selected, choose either the Path Selection Tool or the Direct Selection Tool. Right-click on the canvas, and from the contextual menu, select "Fill Path." In the ensuing dialog box, choose "Foreground Color." While the initial color chosen here is secondary, as it can be easily modified later, it establishes the base color of your speech bubble. This action will render your speech bubble filled with the selected foreground color.
Crafting Distinctive Outlines
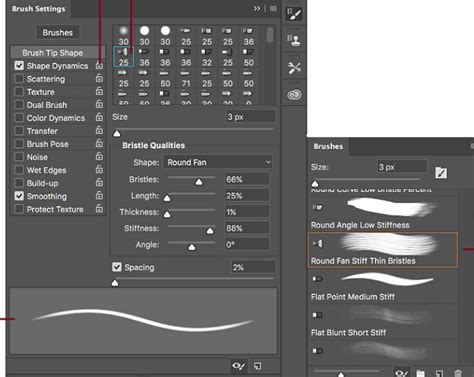
An outline is essential for defining the shape and adding visual separation. Create another new layer and name it "Outline." To define the stroke, you'll utilize Photoshop's brush capabilities. Open the Brushes panel (Window > Brushes) and select a brush that suits your desired outline style. The size of this brush can be adjusted directly within the Brushes panel. For more intricate control over the brush's behavior, delve into the advanced settings available in the Brush Settings panel.
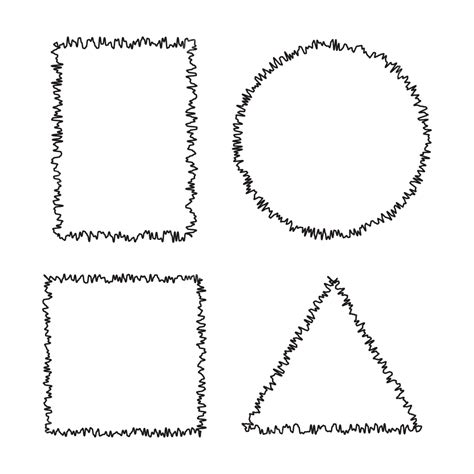
Once your brush is configured, select the Path Selection Tool or Direct Selection Tool again. Right-click on the canvas and choose "Stroke Path." In the "Stroke Path" dialog, ensure that "Brush" is selected as the tool. This will apply the chosen brush stroke along the path of your speech bubble, creating a defined outline.
Leveraging Layer Styles for Dynamic Effects
Layer styles are incredibly powerful for non-destructively altering the appearance of your fills and outlines, allowing for easy modifications and sophisticated effects. Double-click on the "Fill" layer in the Layers panel to open the Layer Style dialog box. Ensure that the "Preview" option is checked to see changes in real-time. Click on "Color Overlay" in the list of styles. By clicking the color swatch, you can select a new color, and observe how the fill of your speech bubble instantly updates.
Similarly, you can apply a "Color Overlay" to the "Outline" layer to change the color of the speech bubble's border. Beyond Color Overlay, Photoshop offers a plethora of other layer styles such as Bevel & Emboss, Stroke, Drop Shadow, and more, which can introduce depth, texture, and highlight effects, making your bubble letters truly pop. These styles can be applied and modified at any time by simply double-clicking the layer style in the Layers panel.
Integrating Text: From Basic Placement to Advanced Styling
The ultimate purpose of bubble letters is often to convey text, and Photoshop provides ample tools to achieve this with both clarity and style.
Adding and Formatting Text
Select the Horizontal Type Tool (keyboard shortcut 'T'). Click on your canvas, ideally just outside the speech bubble shape initially, and begin typing your desired text. Once your text is entered, you can refine its size and position using Free Transform (Ctrl/Cmd + T). Drag the bounding box handles to resize and click and drag the text to move it. Press Enter to commit these transformations.
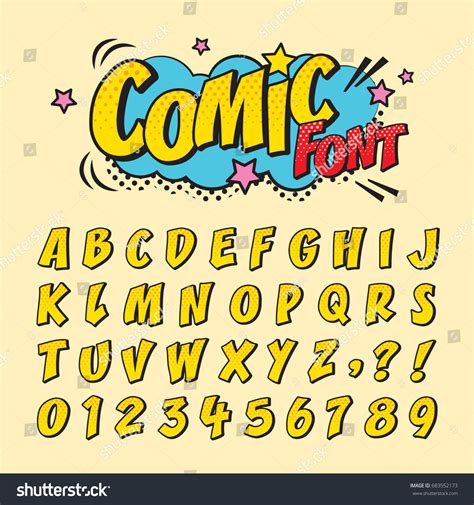
For more granular control over the text's appearance, utilize the Character and Paragraph panels (Window > Character, Window > Paragraph). Here, you can adjust font, size, leading (line spacing), kerning (space between specific letter pairs), alignment, and more. The choice of font is critical; for a comic or pop art aesthetic, bold, impactful fonts like "Raging" are often excellent choices. You can discover curated color palettes on platforms like Design Bundles, which can further enhance the visual theme of your design.
Enhancing Text with Layer Styles
Just as with the shape layers, layer styles can be applied to your text layer to imbue it with additional visual interest. For instance, adding a "Color Overlay," "Stroke," and "Drop Shadow" to the text layer can create a more dynamic and visually prominent effect, making the text stand out against the background and within the bubble.
For those aiming for a truly dimensional look, Photoshop's capabilities for creating 3D text are remarkable, especially in versions like CS6 Extended and later. This process typically involves converting your text into a 3D layer and then manipulating its properties, such as extrusion depth, bevels, and lighting, within the 3D and Properties panels. This allows for the creation of highly realistic, extruded bubble letters that possess a tangible sense of depth and form. The workflow generally involves creating a vector shape, converting it to 3D, modifying its caps for roundedness, applying materials, and finally rendering the layer for a polished output.
Advanced Techniques: Creating Bubble Brushes and Text Effects
Beyond the fundamental creation of individual bubble letters or speech bubbles, Photoshop offers more advanced methods for generating creative text effects and dynamic visual elements.
Creating Custom Bubble Brushes
A particularly creative approach involves transforming a rendered bubble shape into a custom brush. After creating and styling a basic bubble, you can define it as a brush preset. This allows you to then "paint" with bubbles onto your canvas. When using this custom brush, you can leverage the Brushes panel (F5) to control its dynamics. Adjusting "Size Jitter" and "Roundness Jitter" to 100% will introduce random variations in the size and shape of the painted bubbles, preventing them from appearing too uniform.
Furthermore, by increasing the "Scatter" amount, you can distribute the bubbles randomly across your canvas, creating organic clusters. These brushes are invaluable for generating backgrounds, adding decorative elements, or simulating effects like underwater bubbles or soap suds.
To achieve a more naturalistic look, especially for elements like underwater scenes, applying filters such as "Gaussian Blur" can soften the bubbles, making them appear more distant or out of focus. This is particularly useful for creating depth of field effects, where larger, sharper bubbles appear closer and smaller, blurred bubbles recede into the background.
Exploring Pre-made Text Effects and Styles
For users who may not have the time or inclination to meticulously craft each element, Photoshop offers a wealth of pre-made text effects and styles. Downloading and applying these effects can instantly transform standard text into complex bubble letter designs, often with a single click. These effects can range from metallic finishes to realistic soap bubble textures, providing a quick and efficient way to achieve professional-looking results.
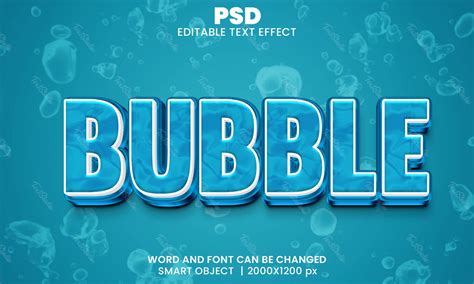
These downloadable assets often include PSD files that allow users to study the underlying layer structures and settings, providing an educational opportunity to learn how specific effects are achieved. This can then empower users to adapt and customize these effects to their unique projects. The advantage of text effects lies in their ability to deliver high-quality, intricate designs in a fraction of the time it would take to create them manually.
The Versatility of Bubble Themes
The aesthetic of bubble letters and bubble-related designs extends far beyond simple stylistic choices. They can evoke a sense of fun, playfulness, and retro charm, making them ideal for a variety of applications. From cartoon-inspired graphics and psychedelic posters to whimsical children's layouts and even designs related to cleaning and hygiene themes (evoking soap bubbles), the bubble motif is remarkably adaptable. The iridescent quality of soap bubbles, for instance, can add a touch of elegance and visual intrigue, especially when incorporated into text effects where images can be seen through the translucent bubble forms.
The process of learning and mastering these Photoshop techniques, from fundamental shape creation to advanced text effects, is a gradual journey. By breaking down complex processes into manageable steps and utilizing the powerful tools available within Photoshop, designers can confidently create compelling and visually striking bubble letter designs that enhance their creative output.