Exporting your edited photos from Adobe Lightroom is a critical step in your workflow, transforming your creations into shareable or printable files. Whether you're preparing images for social media, professional printing, or simply archiving your work, understanding Lightroom's export settings is paramount. This guide delves into the intricacies of the export process, from choosing the right file format and color space to optimizing size, sharpness, and watermarking, ensuring your images look their best across all platforms and mediums.
The Fundamentals of Lightroom Export
When you export photos from Lightroom, you are essentially creating new files that incorporate all the Develop module adjustments and other modifications you've made. This process allows you to control various aspects of the final output, including the filename, color space, pixel dimensions, and resolution. Lightroom offers a range of options to cater to diverse needs, and mastering these settings can significantly enhance the quality, sharpness, and loading times of your images, especially when sharing on social media.

Choosing the Right File Format
The first crucial decision in the export process is selecting the appropriate file format. Adobe Lightroom provides several options, each with its strengths and ideal use cases:
- JPEG (JPG): This is the most common format for web and social media use due to its excellent balance between quality and file size. It offers good compression, making files smaller and faster to load online. However, repeated saving of JPEGs can lead to a cumulative loss of quality.
- TIFF (TIF): A lossless format, TIFF files retain all image data without compression. This makes them ideal for print and for further editing, as they preserve the highest possible quality. However, TIFF files are significantly larger than JPEGs.
- PSD (Photoshop Document): This format is specifically for Adobe Photoshop and supports layers, transparency, and other advanced editing features. It's best used when you intend to continue editing the image in Photoshop.
- DNG (Digital Negative): A universal raw file format developed by Adobe, DNG offers compatibility across different software and devices. It is a good option for archiving raw data with edits embedded.
- AVIF and JXL: These are newer, highly efficient image formats that support HDR (High Dynamic Range) output. They offer superior compression compared to JPEG while retaining high quality and advanced features like HDR.
For online and social media use, selecting JPEG is generally recommended. For print and professional editing purposes, TIFF or PSD are often preferred. Lightroom for mobile (iOS) also supports exporting as Original, JPG, AVIF, JXL, TIF, and DNG, with the added benefit of HDR Output for AVIF and JXL.
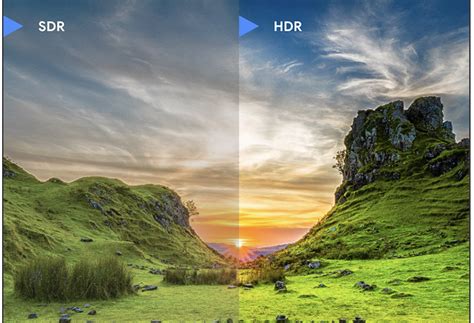
Understanding HDR Output and Gain Maps
The advent of HDR (High Dynamic Range) imaging presents new possibilities for capturing and displaying images with a wider range of brightness and color. Lightroom's support for HDR Output in formats like AVIF and JXL allows you to export images that can take advantage of displays capable of rendering this expanded dynamic range.
A key technology enabling this is Gain Map. Gain Map provides a solution for a consistent and adaptive display of HDR images. Conceptually, this method combines both SDR (Standard Dynamic Range) and HDR renditions within a single image and interpolates between the two dynamically at display time. A Gain Map essentially represents the quotient between the two renditions. The image file stores a Base rendition (which can be SDR or HDR), the Gain Map itself, and some associated metadata. At display time, the Base image is combined with a scaled version of the Gain Map, where the scale factor is determined by the image metadata and the HDR capacity of the display. Importantly, Gain Maps can be downsampled and compressed to save space, making HDR delivery more efficient. To include HDR data in your JXL and AVIF exports from Lightroom for mobile (iOS), you simply toggle the HDR Output switch.
Optimizing Your Exported Images
Beyond the file format, several other settings play a crucial role in determining the final appearance and usability of your exported photos.
Size and Resolution: Tailoring for Purpose
The size and resolution of your exported photo should align with its intended use.
- For Web and Social Media: A resolution of 72 PPI (Pixels Per Inch) is typically sufficient for web display. The image size can vary, but an image size of around 1200 pixels on the long edge is often suitable for platforms like Instagram or Facebook. Lightroom's "Small (2048 px)" option for JPGs limits the length of the exported photos to 2048 pixels, which can be a good general-purpose size for online sharing. The "Custom" option allows you to specify a pixel value for the long edge, with Lightroom automatically calculating the other edge to maintain the original aspect ratio.
- For Print: For high-quality prints, a resolution of at least 300 DPI (Dots Per Inch) is essential to avoid pixelation and ensure sharp details. The physical dimensions of the print will dictate the required pixel dimensions of the image. Exporting at the full resolution of your camera sensor is often a good starting point for print, allowing flexibility in sizing.
When exporting for print, it is extremely important to ensure images have the right resolution to avoid pixelated images and low-quality prints. To obtain a high-resolution export, set the pixels per inch to at least 300ppi.
Compression: Balancing Quality and File Size
Compression is a critical consideration, especially when exporting JPEG files. Higher compression can result in smaller file sizes, which is beneficial for saving hard drive space and for faster online uploads. However, excessive compression can lead to a noticeable reduction in image quality, introducing artifacts and softening details.
- For Web and Social Media: A compression setting of 70-80% for JPEGs generally strikes a good balance between file size and image quality.
- For Print: For print purposes, it's best to set the compression to 100% (maximum quality) to preserve as much detail as possible.
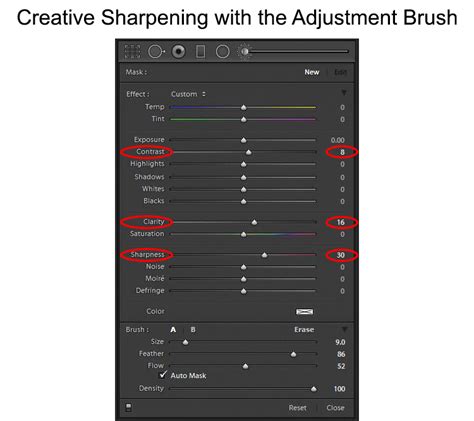
Sharpening for Output
Sharpening a photo helps to enhance details, compensating for any loss of sharpness that might occur during the export process, particularly due to compression. Lightroom offers sharpening options under the "Output Sharpening" section.
- Method: Select "Screen" as the sharpening method for web and digital display.
- Amount: Choose "Standard" or "High," depending on the level of detail in your image and the intended output. It's important to note that sharpening settings can vary depending on the image and its intended use. Over-sharpening can lead to unnatural-looking halos and artifacts.
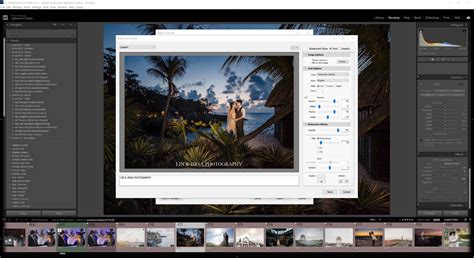
Protecting Your Work: Watermarking
Watermarking is a common practice to protect your images from unauthorized use and to promote your photography brand or business. Adobe Lightroom provides a robust watermarking feature within the export dialog box.
Text Watermarks
You can add custom text as a watermark. In the Customize Watermark screen, select the "Text" tab. You can then enter the desired text, format the font, adjust text size, rotate, change color (black or white), use drop shadow, modify opacity, and set horizontal and vertical offsets to position your watermark. To place the watermark on or near any corner of your photo, tap the dot anchor of the particular corner before placing the watermark.
Graphic Watermarks
Lightroom for mobile (iOS) also supports graphical watermarks, allowing you to add your logo or a custom graphic. In the Customize Watermark screen, tap the "Graphic" tab. Use the folders icon to upload an image you want to use as a watermark. You can then rotate the watermark, adjust its size, opacity, and set horizontal and vertical offsets for positioning.
Important Considerations for Watermarking:
- Subtlety: Ensure the watermark is not too distracting and doesn't detract from the image itself. Position it in a non-intrusive area, such as the bottom right corner.
- Opacity: Adjust the opacity to balance between visibility and subtlety.
- Effectiveness: It's important to note that adding a watermark will not necessarily prevent your photos from being stolen or reposted online; they can often be removed. However, it serves as a deterrent and a branding element.
Color Space: Ensuring Consistent Colors
Color space is a critical factor when exporting your photos, as different devices and platforms have varying color space requirements.
- For Web and Social Media: The standard color space is sRGB. This is widely compatible with most web browsers and digital displays, ensuring that your colors appear consistent across different devices and web platforms.
- For Print: For professional printing, Adobe RGB or ProPhoto RGB are generally recommended. These color spaces offer a wider gamut of colors, allowing for richer and more accurate color reproduction in prints.
When exporting for web or social media, always use sRGB as the color space.
Advanced Export Settings and Workflow Streamlining
Lightroom offers several advanced features to streamline your export workflow and manage your exported files effectively.
Metadata Management
Metadata, such as copyright information, camera settings, and keywords, can be embedded within your image files. For privacy and to speed up upload times, you can choose to exclude metadata or select "Copyright Only" in the Metadata section of the export settings. This is particularly useful if your metadata contains personal information you don't wish to reveal.
File Naming and Destination
Lightroom allows you to customize your file naming conventions and specify the destination folder for your exported images. This helps in organizing your exported files more effectively. You can create specific folders for different export purposes, such as a "Finals" folder with subfolders for social media, high-resolution images, or SEO-optimized images.
Batch Exporting and Presets
- Batch Exporting: If you need to export multiple images with the same settings, batch exporting is a significant time-saver. You can select multiple images and export them simultaneously using the "Export Selected Photos" option.
- Presets: To further streamline your workflow and ensure consistent image quality, you can create and save export presets. By setting your desired export settings â including file type, image size, resolution, compression, and watermarking â and then clicking "Add" in the Preset panel, you can save a preset for future use. This allows you to apply your preferred settings with a single click. Lightroom Classic offers several built-in presets, such as "JPEG - High Quality 240 PPI," "DNG," and "JPEG - Small Size 72 PPI."
Exporting Videos and Sharing Albums
Lightroom for mobile (iOS) also enables you to create and share short videos that showcase the edits you've made to your photos. This can be done in just a few taps. You can also learn how to share albums directly from the app.
Troubleshooting Export Issues
Occasionally, you might encounter issues during the export process. Lightroom for mobile (iOS) allows you to retry saving your photos if the export process fails. Common reasons for export failure include:
- No Internet Connection: Ensure your device is connected to the Internet, especially if you are exporting to cloud services or sharing directly.
- Not Enough Storage: Free up some storage space on your iOS device if the export process fails due to insufficient storage.
2025 Lightroom Mobile Tutorial | Everything You Need For Great Edits
Lightroom Classic Specifics
In Lightroom Classic, you don't save photos in the traditional sense; you export them. The export process creates new files incorporating your Develop module adjustments and metadata. When exporting from Lightroom Classic, you can choose:
- File Type: JPEG, PSD, PSB, TIFF, PNG, DNG, or the original format.
- Color Space: sRGB, Adobe RGB, or ProPhoto RGB.
- Pixel Dimensions and Resolution: Tailor these to your specific needs.
You can access the export dialog by choosing File > Export or by clicking the "Export" button in the Library module. Lightroom Classic also supports third-party plugins that can extend the functionality of the Export dialog box.
Export with Previous
If you've already exported some photos and want to export more using the exact same settings, the "Export With Previous" option is invaluable. This command uses the same settings as the last export and adds your newly selected photos to the previously exported batch.
Conclusion: The Power of Informed Exporting
Mastering Lightroom's export settings is not just about clicking a button; it's about understanding how each setting impacts the final output. By carefully considering your intended use for each imageâwhether it's for vibrant social media posts, professional prints, or archival purposesâyou can leverage Lightroom's powerful export tools to ensure your photographs are presented in the best possible light. Experiment with different settings, utilize presets, and always keep your final destination in mind to unlock the full potential of your edited images.