Creating a personalized calendar in Adobe InDesign can be a rewarding process, allowing for unique designs tailored to specific themes or aesthetics. While InDesign doesn't feature an automated "make me a calendar" button, the program's robust tools, particularly tables and styles, make the creation process remarkably straightforward, almost as if such a feature existed. This tutorial will guide you through the fundamental steps of building a calendar template, from setting up your document to styling individual elements, ensuring flexibility and ease of use for future customization. For those seeking a quicker route or professional designs, pre-made templates are readily available on platforms like Envato Elements, offering a variety of layouts, such as the elegant monthly calendar template perfect for showcasing artwork with its clean, open space, or business-oriented designs with ample room for notes.
Setting Up Your InDesign Document
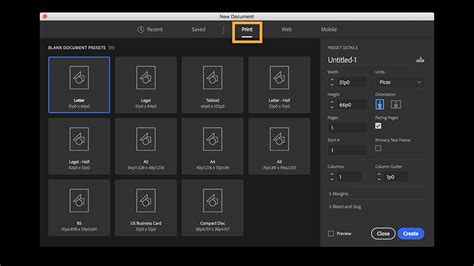
The initial step in building your InDesign calendar involves creating a new document tailored to your desired output. For a traditional folded wall calendar, a tall document is recommended. Consider dimensions such as 20 inches in height by 10 inches in width. Applying margins, for instance, a 0.5-inch margin on all sides, provides a safe zone for your content. Additionally, incorporating a 0.125-inch bleed on all sides is crucial for designs that extend to the edge of the page, ensuring a professional finish when printed. A bleed ensures that images or colors extend beyond the trim line, preventing any unprinted white space after the document is cut. If you are unsure about bleed requirements, it is always best to consult with your printer.
Once your document is created, familiarize yourself with the Parent Pages. Accessible through the Pages panel, Parent Pages (often denoted as "A-Parent") act as master templates for your document pages. Double-clicking on "A-Parent" allows you to make edits that will propagate across all pages utilizing that parent. This is where you can set up recurring elements like page numbers or consistent layout structures. If you are ever uncertain about which page you are currently editing, a glance at the bottom of the InDesign software window will indicate your current location.
Building the Calendar Grid with Tables
The core of your calendar will be constructed using InDesign's powerful table functionality. To begin, ensure your Rulers are visible (View > Show Rulers, or Cmd/Ctrl + R). You can then create guides by clicking and dragging from the rulers to help align your table precisely.
To create the table, navigate to Table > Create Table. In the dialog box that appears, specify the number of Body Rows and Columns. For a standard calendar grid, you'll typically need 5 Body Rows and 7 Columns to accommodate the days of the week. Once you have entered your desired dimensions, click OK. Your cursor will transform into a loaded text icon; click and drag on your page to place the table.
After placing the table, you can resize it by hovering over its dividing lines until your cursor changes to resize handles, then click and drag. The appearance of your blank calendar grid can be meticulously controlled using the Table panel, Table Styles, and Cell Styles. For instance, you can use the Text Tool to input the days of the week into the top row of your table.
To further refine the look, create new Cell Styles and Table Styles. The Cell Styles panel offers a plethora of options for formatting individual cells, including font, size, color, and alignment. Experiment with these settings to achieve your desired aesthetic. To apply a Cell Style, double-click within your table to activate the Text Tool, then click and drag to select the cells you wish to style, and finally, select your created Cell Style from the panel. Similarly, Table Styles allow you to define formatting for the entire table, including borders and cell padding.
Populating the Calendar with Dates
With the structural grid in place, the next step is to add the dates. While manually entering each number is possible, it's time-consuming. A more efficient method involves entering a single date and then duplicating it. Double-click the first cell where your dates should begin and type a space. InDesign often adds a period after a single typed character in a table cell, which can be managed through styling.
To style the date numbers, create a new Cell Style. Within the Cell Style Options, you can adjust the font size, add margin space within the cell, and modify other typographic properties. Once you've styled the first date cell to your satisfaction, you can copy it (Edit > Copy) and then select all the other cells in your calendar grid by clicking and dragging. Paste the copied cell content (Edit > Paste) into the selected cells. InDesign will fill the grid with sequential numbers. Although this may result in more numbers than a typical month (e.g., 35 or 42 days), excess numbers can be easily deleted.
Incorporating Imagery and Month Names
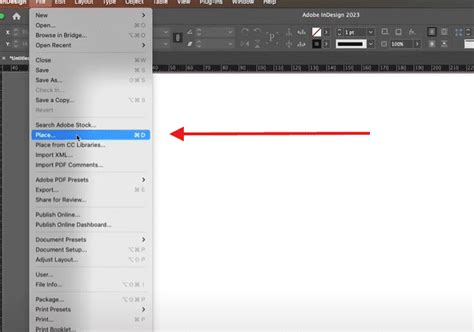
The top portion of your calendar is ideal for showcasing engaging imagery. Use the Rectangle Tool to define the area where you want your image to appear. Once the rectangular frame is selected, go to File > Place and choose your desired image. To resize the image within its frame, double-click it. A blue outline indicates the selected rectangular frame, while a red outline signifies that the image content itself is selected, allowing you to reposition or scale it independently within the frame.
To add month names, you can create separate text frames above the calendar grid or incorporate them into the table structure, perhaps in a header row above the days of the week. Experiment with different font choices and sizes to make the month names a prominent visual element.
For those seeking to enhance the visual appeal further, consider adding decorative elements or flourishes. Tweaking colors through Cell Styles and Table Styles, as previously discussed, can also significantly impact the calendar's overall aesthetic.
Managing and Customizing Calendar Pages
To manage your calendar across different months, leverage the Pages panel. Each page in your document can be based on a specific Parent Page, allowing for consistent layouts. When you need to adjust the days for a particular month, you can directly edit the content on the document page. For instance, if the first day of the month falls on a Wednesday, you can select and delete the preceding days (Monday and Tuesday) from the calendar grid. Similarly, excess days at the end of the month can be removed.
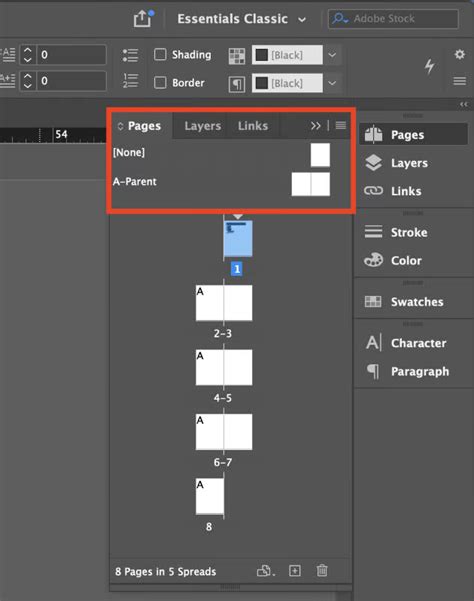
To add a new month, create a new page by clicking the "Create New Page" button in the Pages panel. Remember, direct editing of elements placed from a Parent Page on a document page requires holding Shift + Command (Mac) or Shift + Control (PC) while clicking on the element. This "unlinks" the element from its parent, allowing for individual modifications.
For months that extend into a "sixth week," you might need to use the Line Tool to visually divide the last Sunday cell, accommodating the extra days.
Advanced Techniques and Template Utilization
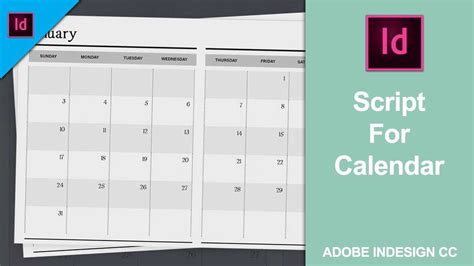
For more complex calendar designs or to streamline the creation process, consider utilizing scripts. The "Calendar Wizard" script, for example, automates much of the calendar generation, offering options for language, starting day of the week, and even the inclusion of mini-calendars for preceding and succeeding months. This script can create calendars as tables within text frames, often on separate layers for holidays and text, making customization easier.
How to Create a Calendar Template in InDesign
The script also generates paragraph and table styles that can be edited to refine the calendar's appearance. If you intend to print your calendar, ensure that the color swatches used (e.g., DayCellBackground, DayTextColor, Holiday) are set to CMYK mode rather than RGB, especially if you are working with a professional printer.
For those who need a calendar to fit a specific size and position on a page, the "fitCalendarToFrame.jsx" script can be invaluable. It resizes the calendar to match a selected frame. Another useful script, "realignCalendarTables.js," helps ensure that tables on different layers remain aligned, which is particularly helpful if you've adjusted row heights or column widths.
For users of CS3 and later versions, styles can be further refined within the Cell Styles and Table Styles panels. For instance, the "cal_header" cell style can be modified to change the fill color of the cell containing the month name.
Exploring Pre-made Templates and Resources
While building a calendar from scratch in InDesign offers maximum control, numerous resources can significantly expedite the process or provide inspiration. Searching the Adobe Exchange for "calendar" can yield a variety of free templates, though many are year-specific. More versatile options include "25-year calendars" that contain master pages for every possible monthly layout, allowing you to apply the correct layout based on the starting day of the week.
For those who prefer not to pay for templates, resources like graphmaster.com offer customizable templates for individual months. Fashion photographer Nikolay Dimitrov also provides a single-page calendar each year for public use.
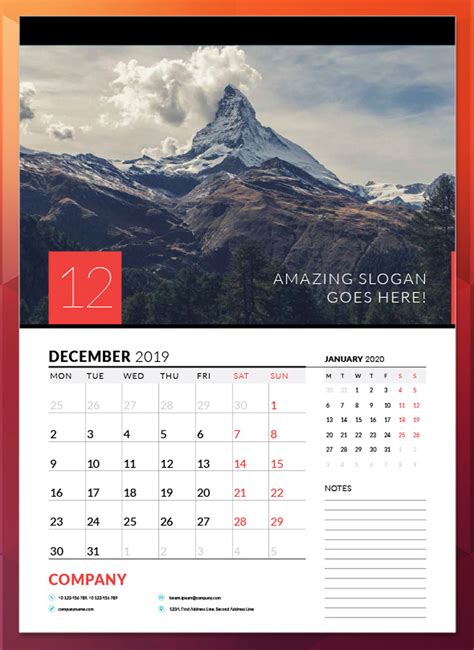
For a truly seamless experience, consider downloading a pre-built InDesign calendar template. Websites like Envato Elements offer professionally designed templates that are easily adaptable. These templates often come with meticulously formatted paragraph, table, and cell styles, saving considerable time and effort. Examples include elegant planner templates with a soft, welcoming feel, monthly calendar templates perfect for showcasing artwork, and clean, stylish designs suitable for businesses. The availability of these templates, whether free or paid, democratizes the creation of professional-looking calendars, making it accessible even to individuals with limited InDesign experience. The ease with which these templates can be adapted means that learning to make a calendar in InDesign can transition from a potentially daunting task to an efficient and enjoyable design project.