ibisPaint X, a powerful and versatile digital art application, offers an extensive array of tools for artists to express their creativity. Among its most dynamic features is the ability to create and customize brushes, allowing for unparalleled control over line work, textures, and artistic effects. This guide will delve into the intricacies of finding, creating, and utilizing brushes within ibisPaint X, from understanding fundamental brush settings to crafting unique brush patterns that can be shared with a global community of artists. Whether you're a beginner looking to navigate the brush menu or an experienced user aiming to develop specialized tools, this comprehensive exploration will equip you with the knowledge to unlock the full potential of ibisPaint X's brush system.
Understanding the Core Components of a Brush in ibisPaint X
At the heart of brush customization in ibisPaint X lie several key components that dictate how a brush behaves on the canvas. Understanding these elements is the first step towards creating brushes that precisely match your artistic vision.
The Brush Pattern is fundamental to defining the very shape of your brush tip. This pattern is repeated along the stroke as you draw, creating the visual character of your line. It's configured within the [Shape] tab's [Brush Pattern] setting. Imagine drawing with a tiny star; the brush pattern would be that star, and as you drag your stylus, the brush would lay down a series of repeating stars.
Complementing the brush tip's shape is Texture. This setting, found under the [Type] tab's [Texture Pattern], allows you to apply a paper-like texture to your brush strokes. This can add a tactile, realistic feel to your digital art, mimicking the grain of watercolor paper or the roughness of canvas.
The Blurring Shape, controlled within the [Fade] tab's [Blurring Shape] setting, governs how the brush fades at the edges of its stroke. This is crucial for creating soft, painterly effects, subtle shading, or brushes that taper elegantly.
The Versatility of Brush Pattern Types: Mono vs. Color
ibisPaint X offers two primary types for brush patterns: [Brush Pattern (Mono)] and [Brush Pattern (Color)]. Each serves distinct purposes and offers unique creative possibilities.
[Brush Pattern (Mono)] is designed for creating monochrome brush patterns. This means the pattern itself is typically black and white or grayscale, and when used as a brush, it will adopt the color you currently have selected. This is ideal for creating textured brushes, pattern brushes, or brushes that mimic traditional drawing tools like pencils or charcoal.
In contrast, [Brush Pattern (Color)] allows for the creation of patterns with multiple colors. When you use a color brush pattern, the [Color of Brush Pattern Image] is transformed based on the [Color Currently Selected] on your palette. This opens up a world of possibilities for creating vibrant, multi-hued brushes that can dynamically change color as you paint.
When creating a brush pattern from scratch, you can select a template that best suits your desired outcome. If your intention is to create a brush that functions like a stamp, using the [Brush Pattern (Color)] type and selecting the [Star] template is highly recommended. This setup provides a good starting point for stamp-like brushes.
Crafting Your Own Brush Patterns: A Step-by-Step Approach
Creating a brush pattern from scratch can seem daunting, but ibisPaint X provides intuitive tools to guide you through the process. The [Edit Pattern] option is your gateway to designing your unique brush shapes.
When you select [Edit Pattern], the canvas transforms into an editing space where anything you draw becomes the brush pattern. If you are creating a Brush Pattern (Mono) or Brush Pattern (Color) and find that your pattern isn't appearing in the test drawing, appearing only as a simple line, there are a few common culprits. Firstly, check the brush Thickness. If it's too thin, the pattern might not be discernible. Secondly, examine the Spacing. If the spacing between pattern repetitions is too small, it can also obscure the intended shape. Often, increasing the Thickness is the first and most effective adjustment. You can set the maximum brush thickness in the Max Thickness setting within the [Settings] menu.
【 tutorial 】 how to make custom brushes in Ibis Paint X
Once you are satisfied with your drawn pattern, you need to save it. When you navigate back to your gallery by selecting ⑭[Back to My Gallery], the brush pattern image is automatically uploaded to the server, making it ready for use. Confirming your selection by clicking "OK" will add your newly created brush to the ⑯[Custom] tab within the Brush Window.
It is important to note that there is a limit to the number of original brush patterns you can import from other users. This encourages users to create their own unique assets rather than relying solely on pre-made ones.
The Nuances of Color Brush Patterns: Base Color and Hue Transformation
Color brush patterns offer a sophisticated level of customization, allowing for dynamic color interactions. A crucial element in this process is the [Base Color].
When creating a color brush pattern, you'll find a [Base Color Button] within the Pattern Editing Mode. This base color plays a significant role in how the colors within your brush pattern will appear when you actually use the brush. Essentially, the [Base Color] sets the hue. To determine the appropriate base color, it's advisable to use the eyedropper tool to select a representative color from your brush pattern. For instance, if your pattern predominantly features yellow sunflowers, setting the base color to yellow will ensure that when you use the brush with yellow, you achieve the intended sunflower effect.
The magic of color brush patterns lies in how they transform the original pattern's colors based on the currently selected brush color. For example, if your base color is red, and you then select yellow as your current brush color, the pattern will be rendered in yellow hues. The relationship between colors is based on hue shifts. If you change the brush color from red (the base color) to green, the hue changes by approximately 120 degrees. Further changing it to blue results in a hue difference of about 240 degrees from red. These color shifts are relative to the base color you initially set.
It's important to remember that the colors within a color brush pattern will never appear more vivid than the original brush pattern image. The brightness and saturation of the base color and the currently selected color will influence the final output, but the inherent color depth of your pattern remains a limiting factor.
Leveraging Existing Brushes and the Power of Customization
While creating brush patterns from scratch offers ultimate control, it can be a challenging endeavor, especially for newcomers. A more accessible and often equally effective approach is to start by customizing an existing brush that you already favor.
ibisPaint X boasts hundreds of brushes in its default selection. While many advanced brushes are locked behind an ibisPaint subscription, users can still access them for a limited time (four hours, as of October 2024) by watching an advertisement. This allows you to experiment with a wide range of brush styles and textures before committing to a subscription or investing time in creating your own.
Once you find a brush that aligns with your needs, you can modify its settings - adjusting its shape, texture, fade, and other parameters - to tailor it to your specific requirements. After making your desired adjustments, you can register this customized brush as a "custom brush." This saves your modified settings, allowing you to quickly access your personalized brush without having to reconfigure it each time.
Sharing Your Creations: The Brush QR Code Feature
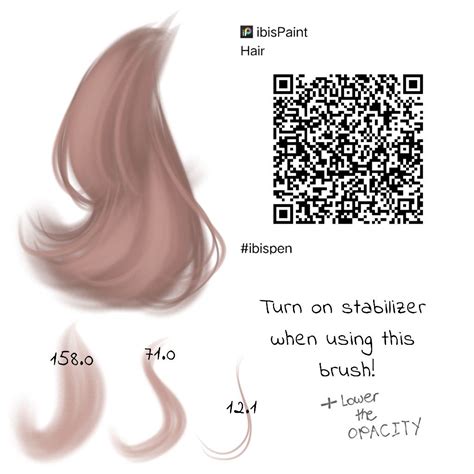
A remarkable feature within ibisPaint X is the ability to save and share your custom brushes with other users by converting them into QR Codes. This functionality is widely utilized by both individual artists and the ibisPaint developers themselves, who often share their brush creations on their YouTube channels.
To generate a brush QR Code, you need to navigate to the brush menu. From there, click on the three-dot button located in the upper right corner of the screen. This will reveal a menu where you should select "Export Brush QR Code." This action will generate a unique QR code representing your brush.
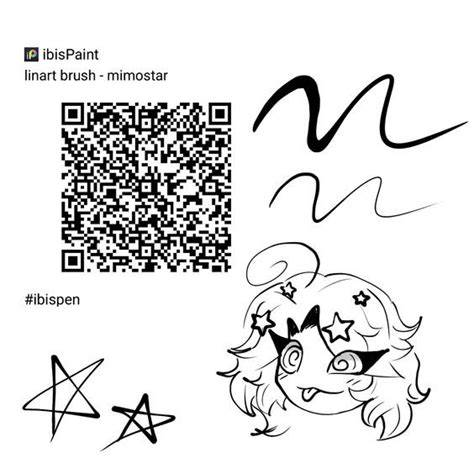
To share these QR codes online, you can simply paste the generated brush QR code into a post or a comment where others can easily access it. Other ibisPaint users can then screenshot the full QR code and import it directly into their ibisPaint X application. To import a brush, they would follow a similar process: go to the brush menu, click the three-dot button, and select "Import Brush QR Code."
The ibisPaint online gallery further enhances this sharing mechanism. If you paste a brush QR code onto a canvas and upload that canvas, ibisPaint will automatically categorize the post under "Brush QR Code." This makes it incredibly easy for users to discover and download new brushes shared by the community.
The Evolution of Brush Creation: From Copying to "Custom Brush Pattern"
Historically, the primary method for users to create brushes was by duplicating an already existing brush and then modifying its settings to suit their preferences. However, this method was constrained by the availability of existing brush shapes, and many of these foundational shapes were often locked behind a premium paywall.
A significant advancement in brush creation arrived with the release of ibisPaint X update 13.0.0 on March 5th, 2025. This update introduced a groundbreaking feature known as "Custom brush pattern." This new functionality empowered users to create entirely new brush patterns from the ground up, rather than being limited to modifying existing ones.
The process for creating a custom brush pattern begins by opening the new canvas menu and scrolling to the bottom. Here, you will find the "Brush Pattern" feature. After clicking on it and skipping the licensing information page by tapping the red 'X', a menu will appear with three key options: "Template," "Type," and "Size."
The "Template" option allows you to select a base shape upon which to build your new brush. "Size" determines the dimensions of the canvas where you will create your brush pattern. You have three choices: 256 x 256 pixels, 512 x 512 pixels, and 1024 x 1024 pixels. After selecting your desired size and clicking "OK," the brush pattern editing canvas will appear.
You can then proceed to edit your brush pattern, using the "Test Drawing" button to preview its appearance as you work. While you can create brush patterns without a premium subscription, using them typically requires watching an advertisement.
Brush pattern canvases cannot be posted as regular artworks. To share them, they must be converted into Brush QR Codes, as described in the previous section. When you download a brush with a custom pattern from the ibisPaint online gallery, that brush pattern will be found in the "Imported" section of the brush pattern menu. It's worth noting that brushes with custom patterns cannot be normally deleted while they are actively in use.
Exploring the Default Brush Library and Subscription Benefits
ibisPaint X provides a vast and diverse library of pre-designed brushes, catering to a wide spectrum of artistic needs. These default brushes cover everything from realistic pencil and watercolor effects to abstract textures and specialized line art tools.
While many of the more advanced or unique brushes are part of the ibisPaint subscription service, the application offers a generous trial period for these premium brushes. By watching an advertisement, users can unlock access to these locked brushes for a limited duration of four hours. This allows artists to thoroughly test and evaluate the capabilities of the subscription brushes, helping them make informed decisions about whether to subscribe. This limited-time access is a valuable feature, offering a glimpse into the expanded creative possibilities that the subscription unlocks.
The default brush selection is extensive enough to satisfy most artistic endeavors, and the ability to customize and create new patterns further expands this potential exponentially. The interplay between the readily available default brushes, the trial access to premium options, and the robust custom brush creation tools makes ibisPaint X a highly adaptable platform for artists of all levels.
The Role of Spacing and Thickness in Pattern Rendering
When you are actively creating or editing a brush pattern, two crucial settings that significantly impact the visual output are Spacing and Thickness. Understanding how these parameters function is key to achieving the desired brush stroke appearance.
The Spacing setting dictates the distance between repetitions of the brush pattern as it is applied to the canvas. A smaller spacing value will result in the pattern elements being placed closer together, creating a denser, more continuous stroke. Conversely, a larger spacing value will lead to more visible gaps between the pattern repetitions, which can be useful for creating dotted lines, textured trails, or effects where the individual pattern elements are meant to be distinct.
The Thickness setting, as the name suggests, controls the overall size or width of the brush stroke. When creating a brush pattern, ensuring adequate thickness is vital, especially if the pattern itself has fine details. As mentioned earlier, if your custom brush pattern appears as a simple line or is not rendering as expected in the test drawing, increasing the Thickness is often the first troubleshooting step. The maximum brush thickness can be adjusted within the [Settings] menu, providing a global control over the upper limit of brush size.
The interplay between Spacing and Thickness is critical. For instance, if you have a complex pattern and set the Spacing too small, the individual elements might overlap excessively, obscuring the intended design. On the other hand, if you have a very thin pattern and a large Spacing, the brush might appear sparse and disconnected. Experimentation with these two settings is essential to fine-tune the behavior of your custom brushes and achieve the precise visual effects you desire.
Understanding Brush Pattern Limitations and Best Practices
While ibisPaint X offers immense flexibility in brush creation, it's important to be aware of certain limitations and to adopt best practices for optimal results.
One such limitation is the number of imported original brush patterns from other users that can be stored within your application. This encourages a balance between utilizing community-shared brushes and developing your own unique assets.
When creating brush patterns, particularly color brush patterns, remember that the quality and complexity of the original pattern image directly influence the final brush's appearance. The colors used in the brush pattern will be transformed based on the selected color, but the underlying detail and resolution of your pattern are paramount.
Brush pattern canvases themselves have a unique handling within the application. They cannot be posted as standard artworks. To share them, they must be converted into Brush QR Codes. This dedicated format ensures that the brush pattern data is correctly encoded and can be accurately imported by other users.
For users who download brushes with custom patterns from the ibisPaint online gallery, these patterns will appear in the "Imported" section of the brush pattern menu. It's also worth noting that brushes with custom patterns are generally not deletable when they are currently in use. This is a safety measure to prevent accidental deletion of brushes that are actively being utilized in a project.
Adopting a systematic approach to brush creation, starting with simpler patterns and gradually increasing complexity, can be beneficial. Utilizing the [Edit Pattern] feature, experimenting with [Brush Pattern (Mono)] and [Brush Pattern (Color)], and understanding the impact of Spacing and Thickness will lead to a deeper mastery of ibisPaint X's brush system. The ability to customize and share brushes fosters a collaborative environment, allowing artists to both benefit from and contribute to a rich ecosystem of digital art tools.