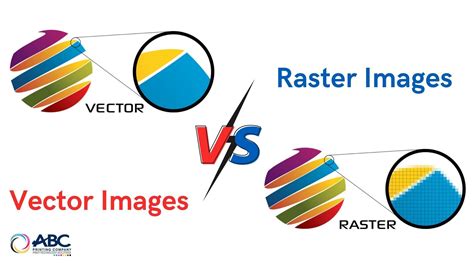
The digital art world often presents a fundamental choice: raster or vector. While Procreate has become a dominant force in raster-based illustration, particularly for iPad artists, the inherent limitations of pixel-based graphics can become a bottleneck for certain applications. This is where the concept of "Procreate vector files" emerges, not as a direct capability of Procreate itself, but as a process of transforming Procreate's raster output into scalable vector assets. Understanding this distinction is crucial for artists aiming for flexibility in their work, whether for seamless repeating patterns, logos, cut files, or large-scale prints.
The Nature of Procreate and Raster Art
Procreate, by its very design, is a raster graphics editor. This means that every artwork created within the application is composed of a grid of pixels. When you draw in Procreate, you are essentially placing and manipulating individual colored squares (pixels) on a digital canvas. This approach offers incredible detail, texture, and a natural drawing feel, which is why it has garnered such a devoted following among illustrators and digital painters.
The .procreate file format, used by default within the application, stores all this pixel data along with other valuable information, such as automatic progress saves and even video data of your drawing process, accessible through the Animation Assist feature. When you share your artwork from Procreate, you can export it in various raster formats like JPG, PNG, and TIFF.
However, the inherent characteristic of raster images is their resolution dependency. If you attempt to scale a raster image up beyond its original dimensions, the software is forced to interpolate new pixels based on the existing ones. This process inevitably leads to a loss of sharpness, resulting in a blurry or pixelated appearance. This is precisely why Procreate, in its native form, is not suitable for creating vector assets that require infinite scalability without quality degradation.
Why Vector Assets Matter for Procreate Users
Despite Procreate's raster-only nature, the demand for vector capabilities persists among its users. The primary drivers for this need often stem from practical applications where scalability and clean lines are paramount:
- Seamless Repeating Patterns: For surface pattern designers, creating patterns that can be tiled infinitely without visible seams is a core requirement. Vector assets, with their precise mathematical definitions, are ideal for this, ensuring that when a pattern is repeated, the edges align perfectly regardless of scale.
- Logos and Branding: Logos need to be reproduced across a vast range of media, from tiny business cards to large billboards. A vector format ensures that a logo remains crisp and legible at any size.
- Cut Files for Machines: For users of cutting machines like Cricut or Silhouette, vector files are essential. These machines follow paths defined by vector points to precisely cut materials. Raster images would result in jagged, un-cuttable lines.
- Large-Scale Prints and Merchandise: When artwork is intended for large prints, apparel, or other merchandise, the ability to scale without quality loss is critical to maintaining a professional look.
- Font Creation: Designing custom fonts or lettering for logos often requires vector output for clean, scalable glyphs.
The desire to leverage Procreate's intuitive drawing interface while still achieving these vector-dependent outcomes leads artists to seek methods for converting their Procreate artwork into vector formats.
The "Vectorize Your Procreate Art" Workflow
The good news for Procreate users is that creating vector assets from their raster creations is achievable, and it doesn't necessarily require expensive software. The process typically involves drawing your assets in Procreate and then using a separate application to convert these raster drawings into vector paths.
Step 1: Create Your Artwork in Procreate
Begin by drawing your desired elements in Procreate. Whether it's lettering, illustrations, or icon designs, focus on creating clean lines and well-defined shapes. For the purpose of vectorization, consider how your artwork will translate into paths.
- Brush Selection: Experiment with brushes that produce relatively clean lines. While Procreate offers a vast array of textured brushes, for vectorization, brushes that mimic ink pens or simple line art tend to yield better results.
- Backgrounds: If you intend to cut out specific elements or use them as transparent assets, ensure your background in Procreate is set to transparent. This is crucial for the subsequent export.
- Color Considerations: It's important to note that many vectorization tools, like Adobe Capture, primarily focus on converting images to black and white or a limited color palette. Therefore, if you're aiming for colorful vector lettering or graphics, it's often best to apply colors after the vectorization process in a dedicated vector editor. Attempting to color intricately in Procreate for a vector conversion might result in the colors being lost or simplified during the process.
How to Create Clean Line Art in Procreate
Step 2: Export from Procreate
Once your artwork is complete in Procreate, the next step is to export it in a format suitable for vectorization. The most common and recommended format for this purpose is PNG (Portable Network Graphics).
- Why PNG? PNG files preserve transparency. This means that any white or transparent areas in your Procreate canvas will be maintained, allowing the vectorization app to focus on the actual artwork without being obstructed by a solid background. This is essential for isolating your design.
- Export Process: In Procreate, navigate to the "Actions" menu (the wrench icon), then select "Share." Choose "PNG" from the available formats. You can then save it to your iPad's Files app, AirDrop it to another device, or send it to a cloud storage service.
Step 3: Vectorization with Third-Party Apps
This is where the magic happens, transforming your pixel-based Procreate drawing into a scalable vector file. Several applications are available, many of them free, that excel at this task.
Adobe Capture: A Powerful Free Option
Adobe Capture is a highly recommended and free application that makes vectorizing artwork straightforward. It leverages Adobe's image processing technology to convert raster images into vector paths.
- Open Your PNG in Adobe Capture: After downloading Adobe Capture from the App Store, you can typically open your exported PNG directly from within the Procreate app or by accessing it through your iPad's Files app.
- Adjusting the Threshold: Once your image is loaded into Adobe Capture, you'll encounter a sliding toolbar, usually on the right-hand side. This is the "threshold" control. Adjusting this slider determines how much of the image Adobe Capture scans and converts into vector paths.
- Lower Threshold: At the bottom end of the slider, only the most prominent outlines might be captured.
- Higher Threshold: Moving the slider towards the top ensures that more detail, including finer lines and internal shapes, is recognized and converted.
- Finding the Balance: The optimal setting depends on your artwork. For lettering, you generally want to slide it towards the top to ensure all parts of your design are captured. Experimentation is key to finding the sweet spot that captures your artwork accurately without introducing excessive noise or artifacts.
- Refine and Smooth: After initial conversion, Adobe Capture offers options to refine and smooth your vector.
- Refine: This option can sometimes be ignored if you plan on doing more detailed editing in a dedicated vector editor later.
- Smooth: This tool can be very useful for cleaning up jagged edges. Toggling the smooth button can reveal how it makes the edges of your lettering less bumpy and more refined. However, be cautious with the smoothing tool, especially for delicate calligraphy or detailed linework, as excessive smoothing can drastically alter the character of the design, making it appear overly simplified or losing its intended artistic flair.
- Save as SVG: Once you are satisfied with the preview, save your file. Adobe Capture will prompt you to save it as an SVG (Scalable Vector Graphics) file. This is the universal vector format that preserves your vector data. Save it to your iPad or a cloud storage service.
Linearity Curve: Advanced Auto Trace
For those who regularly work with detailed color art or require more sophisticated vectorization, Linearity Curve presents a compelling option. Its "Auto Trace" feature is particularly adept at handling full-color vectorization beautifully, offering a more nuanced conversion than some simpler tools. While it may have a steeper learning curve than Adobe Capture, its capabilities can be invaluable for complex projects.
Vectornator: A Free and Powerful Vector Editor
Vectornator (now known as Linearity Move) is another free and powerful application that serves as an excellent companion to Adobe Capture for Procreate users. It functions as a full-fledged vector-based editor, akin to Adobe Illustrator but accessible on your iPad.
- Open SVG in Vectornator: Import the SVG file you saved from Adobe Capture into Vectornator.
- Adjusting Your Lettering/Artwork: Once imported, your artwork is now composed of editable vector shapes and paths.
- Selection Tool: Use the "Selection tool" (usually found at the top of the left toolbar) to tap on individual letters or shapes. This allows you to move them around freely, reposition elements, or even separate them if needed.
- Direct Selection Tool: For fine-tuning, the "Direct Selection tool" (located below the Selection tool) is indispensable. Tapping an edge of your lettering will reveal "anchor points" â the nodes that define the vector paths. Each anchor point can be individually selected and moved.
- Editing Curves: You can further manipulate the curves and smoothness of your vector paths by accessing different anchor point options, often found within the "Paint Brush tool" or similar editing panels. This allows you to precisely adjust the curvature, add or remove points, and achieve the perfect smooth or sharp lines required for your design.
- Export Your Vector File: When you're happy with the edits, it's time to export.
- Choose Vector Formats: Navigate to the export options (usually via an arrow or "Share" icon). Crucially, avoid saving as JPG or PNG at this stage. These are raster formats and will convert your vector data back into pixels, negating all your hard work and reintroducing scalability issues.
- SVG is Key: The best format for preserving your vector data and ensuring maximum compatibility is SVG. This universal vector format will allow you to scale your artwork infinitely without any loss of quality and can be used in a wide range of design software and applications. Other vector formats like AI (Adobe Illustrator) or EPS might also be available and suitable depending on your workflow.
Procreate Vector Files: The Pros and Cons
While the process of converting Procreate artwork to vector files opens up a world of possibilities, it's important to acknowledge both the advantages and disadvantages.
Pros:
- Scalability: The primary benefit is the ability to scale your artwork to any size without losing quality, essential for print, logos, and cut files.
- Editability: Vector paths offer a high degree of editability. Anchor points can be moved, added, or deleted to refine curves and shapes with precision.
- Clean Lines: Vector graphics are inherently clean and crisp, ideal for designs that require sharp, defined edges.
- Smaller File Sizes (for simple graphics): For designs with fewer complex shapes, vector files can sometimes be smaller than their high-resolution raster counterparts.
- Accessibility: Free tools like Adobe Capture and Vectornator make this process accessible to a wide range of artists without requiring expensive software subscriptions.
- Leveraging Procreate's Strengths: You can still utilize Procreate's intuitive drawing interface and extensive brush library for the initial creative process.
Cons:
- Loss of Texture and Detail: The vectorization process often simplifies or removes intricate raster textures, gradients, and subtle color variations that are easily achievable in Procreate. Recreating these in a vector editor can be time-consuming.
- "Jaggedness" in Complex Brushes: Brushes designed to create complex textures or painterly effects in Procreate may not vectorize cleanly. The conversion process can sometimes result in overly complex paths or undesirable artifacts when applied to such brushes.
- Color Limitations: As mentioned, many automatic vectorization tools convert images to a limited color palette or grayscale. Applying full, rich color often needs to be done in the vector editor.
- Learning Curve for Vector Editing: While drawing in Procreate is generally intuitive, mastering vector editing software like Vectornator or Adobe Illustrator requires learning new concepts like anchor points, Bezier curves, and path manipulation.
- Not a Direct Procreate Feature: It's crucial to remember that Procreate itself does not create vector files. The process is an external conversion, which adds an extra step to your workflow.
When to Stick with Raster and When to Convert to Vector
The decision of whether to convert your Procreate artwork to vector format should be guided by the intended use of the final piece.
Use Procreate's Raster Output When:
- Detailed Textures and Painterly Effects are Key: If your artwork relies heavily on subtle gradients, organic textures, and a painterly aesthetic, Procreate's native raster output is likely the best choice.
- Digital Display is the Primary Medium: For social media, web graphics (where file size is a consideration and scalability isn't paramount), or digital illustrations viewed on screens, high-resolution PNGs or JPGs from Procreate are perfectly adequate.
- Time is Limited and Vector Needs are Minimal: If you don't require infinite scalability and are simply creating art for personal enjoyment or basic digital sharing, the extra step of vectorization might not be necessary.
Convert to Vector When:
- Logos and Branding: Essential for consistent branding across all mediums.
- Cut Files for Machines: Absolutely necessary for Cricut, Silhouette, and other cutting plotters.
- Surface Pattern Design: For seamless, repeatable patterns that can be scaled for fabric, wallpaper, etc.
- Large-Format Printing: When artwork needs to be printed at very large sizes without pixelation.
- Creating Scalable Icons or UI Elements: For digital interfaces where elements might be resized.
- Designing Custom Fonts: To ensure clean, scalable letterforms.
Conclusion
While Procreate remains a powerful raster-based drawing application, the ability to convert its output into vector files bridges a critical gap for artists. By understanding the distinction between raster and vector, and by utilizing free and accessible tools like Adobe Capture and Vectornator, Procreate users can expand the versatility and professional application of their digital artwork. This workflow allows artists to harness the intuitive creative environment of Procreate while achieving the scalability and precision demanded by various design industries, from pattern design to branding and beyond.