Achieving crisp, defined edges in digital images is a cornerstone of professional photo editing. While many users familiar with Lightroom might appreciate its ability to mask sharpening to specific areas, Photoshop offers a powerful, albeit sometimes less intuitive, set of tools to achieve similar, if not superior, results. This tutorial delves into various techniques for sharpening edges in Photoshop, from straightforward filter applications to sophisticated masking methods, ensuring your images possess that sought-after clarity without sacrificing natural appearance.
The Challenge of Global Sharpening
Sharpening filters in Photoshop, by default, are applied to the entire image. This can lead to undesirable artifacts, particularly in areas of flat color such as skies, skin tones, or smooth gradients. These areas, lacking distinct edges, can become noisy or exhibit halos when subjected to global sharpening. The goal, therefore, is to isolate and selectively sharpen the actual edges within an image, a capability that Lightroom users are accustomed to through its masking features.
Emulating Lightroom's Edge Masking with "Find Edges"
One effective method to approximate Lightroom's edge-aware sharpening in Photoshop involves leveraging the "Find Edges" filter. This approach allows for more aggressive sharpening than would be advisable without masking, as it effectively shields areas of flat color from unwanted enhancement.
To implement this technique, begin by ensuring your image processing in Photoshop is complete. Flatten the image to a single layer, or create a consolidated layer by adding a new layer at the top of the Layer palette and pressing Ctrl + Alt + Shift + E (or Command + Option + Shift + E on a Mac). This action generates a flattened version of your edited image on this new, topmost layer.
Next, duplicate this flattened layer twice. The topmost layer will serve as the foundation for your sharpening mask. Convert this layer to black and white by navigating to Image > Adjustments > Desaturate. Subsequently, apply the Filter > Stylize > Find Edges filter. This crucial step isolates the edges within your image, rendering them in stark contrast.
The resulting image will likely have bright edges on a dark background. To prepare this for masking, invert the colors by choosing Image > Adjustments > Invert. This transforms the bright edges into white and the darker areas into black.
Now, refine this edge map using Image > Adjustments > Levels. Adjust the sliders to ensure that the areas you intend to sharpen are predominantly white, while areas you wish to leave untouched are black. This meticulous adjustment is key to a precise mask.
Once you have a satisfactory mask, it's often beneficial to slightly soften its edges to prevent harsh transitions. Apply a subtle blur by choosing Filter > Blur > Gaussian Blur and setting a radius of 1 or 2 pixels.
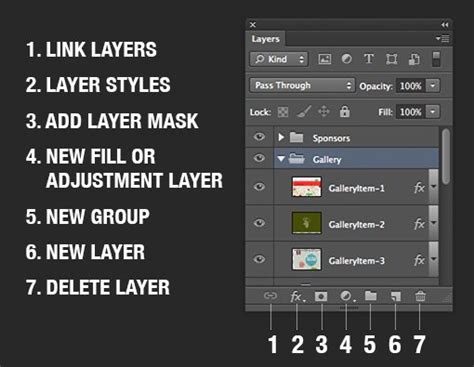
After creating and refining your edge mask, hide this layer by turning off its visibility icon in the Layer palette. Now, target the layer containing your hidden sharpening mask by clicking on its thumbnail. Navigate to Image > Apply Image to open the Apply Image dialog. In the "Layer" dropdown menu, select the layer that holds your hidden sharpening mask and click "OK."
With the mask effectively applied to the active layer, you can now apply your chosen sharpening filter to this layer. Select either Smart Sharpen or Unsharp Mask as desired. Crucially, when setting the slider values, observe the effect directly on the image itself, not within the preview window of the sharpening dialog. The dialog's preview often does not account for the applied mask, leading to misinterpretations of the final result. Click "OK" once satisfied.
To compare the sharpened image with the original, you can temporarily disable the mask layer by Shift + Clicking on its thumbnail. This allows you to see the image as it would appear with global sharpening and then re-enable the mask to observe the refined, edge-focused sharpening.
Smoothing Rough Edges and Achieving Realism
Beyond sharpening, there are numerous scenarios where smoothing rough edges in Photoshop is essential for creating a polished, realistic image. This is particularly true when compositing elements, removing unwanted objects, or refining the boundaries of subjects.
Anti-Aliasing for Subtle Refinement
Photoshop's anti-aliasing feature offers a straightforward method to smooth edges. This tool gently reduces the opacity at the edges of an object, making them appear finer and smoother against their surroundings. While simple to use, a potential drawback of aggressive anti-aliasing is that it can sometimes be detectable upon close inspection, revealing the manipulation. However, for subtle smoothing, it's an invaluable tool, often providing clean edges with interesting light effects.
Feathering for Harmonious Blending
Feathering is another highly effective technique for softening edges and achieving a harmonious blend between an image element and its background. This method involves blending the pixels of the borders with their surroundings. While feathering can lead to a minor loss of detail at the edges, when applied judiciously, it contributes significantly to a natural and masterfully edited look.
The "Feather Radius" setting in Photoshop controls the extent of this effect. This value determines how far from the edge the feathering tool will influence the pixels, dictating the softness of the transition.
The Blur Tool: Precision and Experience
The Blur tool, when wielded with skill and attention to detail, can yield exceptional results in smoothing edges. It efficiently blurs the transitions between different elements in an image. The strength of the brush can be adjusted from a dropdown menu, allowing for precise control over the blurring effect.
The key to mastering these smoothing techniques, like all aspects of image editing, lies in consistent practice. Regularly experimenting with Photoshop's tools will hone your skills and allow you to achieve the desired results with greater confidence.
Exploring Photoshop's Built-in Sharpening Tools
Photoshop offers a variety of built-in filters and tools designed to enhance image sharpness. Understanding their nuances is crucial for effective edge refinement.
The "Sharpen Edges" Command: A Cautionary Note
The "Sharpen Edges" command, found under the Filter menu, is a direct but often problematic tool. It aims to smoothen edges by detecting abrupt changes in pixel values. However, it lacks any adjustable controls, making it difficult to manage the intensity and often resulting in weak or inconsistent sharpening. Furthermore, it can be tempting to apply this filter multiple times, which can quickly lead to over-sharpening and undesirable artifacts. For these reasons, it is generally not recommended as a primary method for edge sharpening, with better alternatives readily available.
Unsharp Mask: A Versatile Option
The Unsharp Mask filter is a more powerful and versatile tool for sharpening. Its effectiveness lies in its ability to enhance edges by increasing the contrast between adjacent pixels. The filter operates with two key sliders:
- Radius: This setting determines the number of pixels surrounding the center pixel that will be affected by the sharpening. A higher radius value extends the sharpening effect to a wider area around the edge.
- Threshold: This slider controls the strength of the sharpening by defining the minimum contrast difference required between adjacent pixels before sharpening is applied. Setting the threshold to 0 will sharpen all pixels, while increasing it will only sharpen areas with significant contrast differences, effectively ignoring areas of flat color and thus acting as a form of edge detection.
While Unsharp Mask can be a destructive edit when applied directly to a layer, it can be used non-destructively by converting the layer to a Smart Object before applying the filter. This allows for future adjustments to the sharpening parameters.
Smart Sharpen: Advanced Control
The Smart Sharpen filter provides even more advanced control over the sharpening process. It offers options to specify the sharpening method (e.g., Gaussian Blur, Lens Blur) and allows for fine-tuning of the shadow and highlight details, offering a more sophisticated approach to edge enhancement. Similar to Unsharp Mask, applying Smart Sharpen to a Smart Object layer ensures non-destructive editing.
Advanced Manual Edge Sharpening with Layer Masks
For the most precise control over edge sharpening, a manual approach using layer masks is often the most effective. This method involves creating an explicit mask that dictates precisely where sharpening will be applied.
Begin by duplicating your image layer or creating a consolidated layer, as described earlier. With this new layer selected, apply your chosen sharpening filter, such as Unsharp Mask or Smart Sharpen.
Next, you'll create a mask that isolates the edges. A common method involves using the "Find Edges" filter on a separate layer, inverting it, and then adjusting its levels to create a clean edge mask. Once the mask is refined, you can apply it to your sharpened layer.
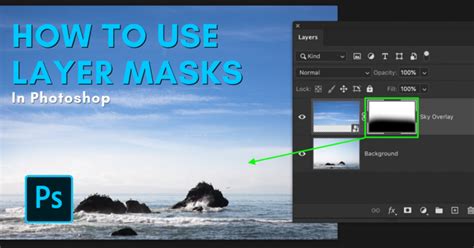
An alternative, and often more robust, method uses the Channels palette. Duplicate your sharpened layer. Then, Alt-click (or Option-click on a Mac) on the RGB channel thumbnail in the Channels palette. This loads the luminosity of the image as a selection. With the selection active, click on the layer you sharpened in the Layers panel, and then click the "Add Layer Mask" icon at the bottom of the Layers panel. This will create a layer mask based on the luminosity of the image, effectively sharpening brighter areas more intensely.
For further refinement, you can paint directly on the layer mask with a black brush to exclude areas from sharpening or a white brush to add them back.
Third-Party Tools for Specialized Sharpening
Beyond Photoshop's native capabilities, specialized third-party plugins offer advanced sharpening solutions. Tools like Nik Sharpener Pro and Topaz Sharpen AI are designed to provide sophisticated control and often employ intelligent algorithms to enhance detail and reduce artifacts, making them valuable assets for professionals seeking the highest quality results.
Understanding the Mechanics of Sharpening
At its core, Photoshop's sharpening process involves identifying edges within an image and exaggerating them. This is typically achieved by analyzing the contrast differences between adjacent pixels. When sharpening is applied, the software increases the contrast along these detected edges, giving the visual impression of increased detail.
However, this process can sometimes lead to halos or artifacts, particularly around high-contrast areas or when excessive sharpening is applied. The methods discussed, especially those involving masking, are designed to mitigate these issues by ensuring that sharpening is applied judiciously and only where it is most beneficial.
Sharpening in Practice: A Step-by-Step Example
Let's illustrate the "Find Edges" masking technique with a practical example. Imagine you have a photograph of a lighthouse against a grey sky.
- Prepare the Image: Open your image in Photoshop. Duplicate the background layer or create a new consolidated layer (
Ctrl+Alt+Shift+E/Cmd+Option+Shift+E). - Isolate Edges: On this new layer, go to
Filter > Stylize > Find Edges. You will see the edges of the lighthouse and other elements highlighted. - Refine the Mask: Invert the colors (
Image > Adjustments > Invert). Now, the edges are white. Adjust theLevels(Image > Adjustments > Levels) to make the edges cleaner and more defined, ensuring the lighthouse edges are white and the sky is black. You might need to move the black slider to the right and the white slider to the left to achieve this. - Soften the Mask: Apply a slight
Gaussian Blur(1-2 pixels) to smooth the mask's edges. - Apply the Mask: Hide the edge mask layer. Select your original sharpened layer (or the layer you intend to sharpen). Go to
Image > Apply Image. In the dialog, select the layer containing your hidden edge mask from the "Layer" dropdown and click "OK." This applies the mask as a luminosity mask to the current layer. - Sharpen: Now, apply your preferred sharpening filter (e.g.,
Smart SharpenorUnsharp Mask) to this layer. Because of the applied mask, the sharpening will predominantly affect the areas defined by the white parts of the mask â the edges of the lighthouse. Remember to observe the results directly on the image.
The ONLY Sharpening Tool You Need In Photoshop
Conclusion: The Art of Selective Sharpening
Mastering edge sharpening in Photoshop is an art form that combines technical understanding with creative application. By moving beyond simple global sharpening and embracing techniques like edge masking, anti-aliasing, and feathering, you can elevate your images to new levels of clarity and realism. Consistent practice with these tools will undoubtedly refine your skills, enabling you to produce consistently professional and visually stunning results.