While DaVinci Resolve is primarily recognized for its robust video editing and color grading capabilities, it also offers a powerful, albeit sometimes overlooked, feature for extracting high-resolution still images directly from your video clips. This functionality is incredibly valuable for a wide array of creative and practical applications, extending the utility of your video projects into the realms of digital and print media. Whether you need to create compelling custom thumbnails, eye-catching promotional posters, or simply share a key visual moment with collaborators, understanding how to capture and export stills from DaVinci Resolve is an essential skill for any video professional. This guide will provide a detailed walkthrough of the process, including both native methods within the software and efficient workarounds for quicker needs.
The Power of the Still Image in Video Production
In today's content-driven landscape, the ability to repurpose video assets into static images offers significant advantages. For instance, a striking freeze-frame can serve as a custom thumbnail that immediately grabs attention on platforms like YouTube, encouraging more viewers to click. Similarly, a high-quality still can be transformed into a poster or flyer to promote an upcoming film or event, reaching audiences who may not engage with video content as readily. Social media, in particular, often benefits from static visuals; not all platforms are optimized for video playback, making stills a reliable way to maintain a consistent online presence and engage a broader audience. Beyond marketing, stills are invaluable for communication. Sharing a specific frame with clients or collaborators for review and approval streamlines the feedback process, ensuring everyone is aligned on visual direction. Ultimately, leveraging single clips for a multitude of content can help make you a one-person marketing machine on social media, and it's simply a useful skill to have for being able to send preview images to co-collaborators for review and approval.
Method 1: Grabbing and Exporting Stills Natively in DaVinci Resolve
This method ensures the highest possible image quality, as it utilizes Resolve's rendering engine to extract the frame. While it involves a few more steps than a quick screenshot, the results are superior for professional use.
Step 1: Load Your Clip and Navigate to the Timeline
Begin by dragging the video clip from which you wish to extract a still into your DaVinci Resolve timeline. This places the clip in a sequence where you can precisely select the frame you need.
Step 2: Pinpoint the Desired Frame
Once your clip is on the timeline, carefully move the playhead (the vertical marker on the timeline) to the exact frame you want to capture. You can scrub through the footage frame by frame using the arrow keys or the playback controls to ensure precision.
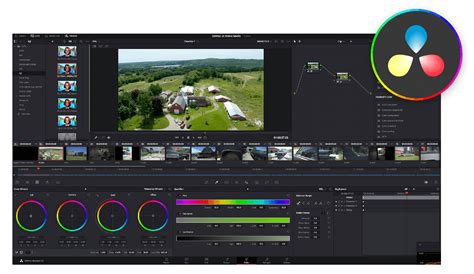
Step 3: Enter the Color Workspace
To access the still-grabbing functionality, you need to switch to the "Color" workspace. Click on the Color workspace icon, typically located at the bottom of the DaVinci Resolve interface. This workspace is dedicated to color grading and correction but also houses the Gallery feature.
Step 4: Open the Gallery
Within the Color workspace, look for the "Gallery" option. It's usually located in the top right corner of the interface. Click on "Gallery" to open the gallery window, which will serve as your repository for captured stills.
Step 5: Grab the Still
Now, with the desired frame visible in the viewer, right-click (or Ctrl + click on a Mac) directly on the preview window. A drop-down menu will appear. From this menu, select the "Grab Still" option.
The selected frame will now be captured and appear as a thumbnail within your Gallery bin, typically to the left of the viewer. This still is now stored within your DaVinci Resolve project.
Step 6: Export the Captured Still
To save this still image as a standalone file, navigate to the still you just captured in the Gallery bin. Right-click (or Ctrl + click) on the still thumbnail to bring up another drop-down menu. This time, select the "Export" option.
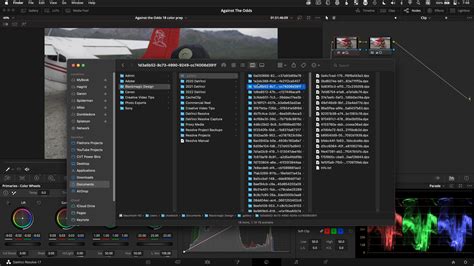
Step 7: Configure Export Settings
An export window will appear, offering several crucial options. First, name your image file descriptively. Next, choose a save location on your computer where you want to store the still. The most important setting here is the "Format" drop-down menu.
It's vital to select an image format that suits your intended use. DaVinci Resolve's default export format for stills can sometimes be DPX (Digital Picture Exchange), which is a high-quality format but not widely compatible with standard image editing or web applications. For broader usability, consider exporting as JPEG for web and general use, or TIFF for high-resolution print work.
Step 8: Finalize the Export
After configuring the file name, save location, and format, click the "Export" button. DaVinci Resolve will then render and save the high-resolution still image from your selected video frame. You now possess a high-resolution export of a single frame from your clip, ready for any application.
Method 2: The Quick Screenshot Hack for Expedited Needs
If your requirement is not for the absolute highest resolution and you need a quick still for purposes like a draft thumbnail or a rapid preview for a colleague, a screenshot can be an effective and time-saving alternative. This method bypasses many of the steps involved in the native export.
Step 1: Locate the Frame and Maximize the Viewer
First, navigate to the specific frame you want to capture on your timeline as described in Method 1, Step 2. Then, to ensure you capture the largest possible view of the frame, make your preview window full-screen. This can typically be achieved using the shortcut Ctrl + F (or Cmd + F on a Mac).
Step 2: Capture the Screenshot
With the frame displayed full-screen, use your operating system's screenshot utility to capture the image.
On macOS:
- Press Shift + Cmd + 3 to capture the entire screen.
- Press Shift + Cmd + 4 to select a specific area of the screen to capture.
On Windows:
- Press the Print Screen key (often labeled "PrtScn" or similar) to capture the entire screen.
- Press Windows key + Shift + S to use the Snipping Tool and select a specific area of the screen to capture.
Step 3: Save Your Screenshot
Depending on your operating system and configured settings, the screenshot may be automatically saved to a designated folder (like your Desktop or Pictures folder), or you may be prompted to select a save location and name for the file.
This screenshot hack is excellent when ultra-high resolution isn't a critical concern. It's perfect for creating thumbnail images that have size limitations or for quickly sending a visual reference. It significantly reduces the time spent navigating DaVinci Resolve's interface, saving you a lot of clicking. However, it's important to reiterate that for professional print work or any application demanding the highest fidelity, the native "Grab Still" function is far superior, providing a higher resolution image that can be expanded and manipulated with fewer restrictions.
How To Grab a Still in Davinci Resolve 18 | extract a high-quality image from video | Tutorial
Understanding Still Image Formats for Export
A common point of confusion for video editors who don't frequently work with still images is selecting the optimal export format. The "best" format truly depends on the intended application of the image. Here's a breakdown of frequently used formats and their typical use cases:
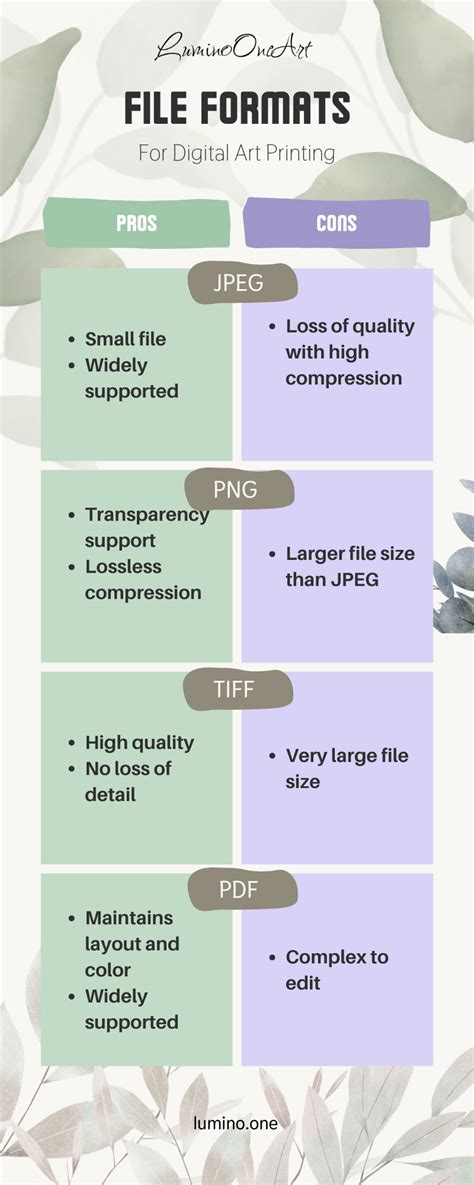
JPEG (Joint Photographic Experts Group)
- Description: JPEG is the most ubiquitous image format globally, known for its broad compatibility across devices and software. It employs "lossy" compression, meaning that each time an image is saved or copied, some image data is discarded to reduce file size.
- Best Uses: Ideal for web use, social media, and general-purpose sharing where file size and fast loading times are prioritized. Its compression makes it efficient for saving storage space and speeding up upload times.
- Downsides: Quality degrades with repeated saving or significant resizing due to its lossy nature.
PNG (Portable Network Graphics)
- Description: PNG is a "lossless" format, meaning it preserves all image data regardless of how many times it's copied or resized. This makes it excellent for maintaining image integrity.
- Best Uses: Primarily used for digital applications, especially when a transparent background is required for graphics or logos. It's a good choice for web graphics that need to retain sharp detail.
- Downsides: While lossless, PNGs are generally lower resolution compared to formats like TIFF and can result in larger file sizes than JPEGs.
TIFF (Tagged Image File Format)
- Description: TIFF is a high-resolution, lossless image format that retains all original image information, making it suitable for professional printing and archival purposes. It preserves the quality grade of the image no matter how many times it is copied or manipulated.
- Best Uses: Excellent for creating large-format print images, professional photography, and any application where maximum detail and quality are paramount. It preserves the color depth and fidelity of the original capture.
- Downsides: TIFF files can be significantly larger than JPEGs or PNGs, making them less practical for web use or applications where file size is a constraint.
Addressing Resolution and DPI for Print
When exporting stills for print, especially from high-resolution footage like 4K, discussions about resolution and DPI (dots per inch) often arise. It's important to clarify how these concepts apply to video captures.
The resolution of a still image captured directly from video is fundamentally determined by the resolution of your DaVinci Resolve timeline and the source footage. If your timeline resolution matches your source footage (e.g., 3840 x 2160 for 4K UHD), then exporting as a TIFF will yield the highest possible pixel data from that frame.
The Myth of Video DPI
Video, by its nature, does not have a DPI value. DPI is a print-specific measurement that dictates how many ink dots are placed within one linear inch of printed material. It influences the physical print size relative to the image's pixel dimensions. For example, a 3840 x 2160 pixel image at 300 DPI will print smaller than the same image at 72 DPI. Graphic artists can and should change the DPI setting in image editing software (like Photoshop) to suit the desired print size without altering the underlying pixel resolution.
Upscaling for Print
If a print requires a higher DPI than what is inherently provided by the video frame, or if the desired print size necessitates more detail, upscaling software can be employed. Tools like Adobe Photoshop's "Super Resolution" or dedicated AI-powered upscaling software such as Topaz Labs' Gigapixel AI can intelligently enlarge the image, adding detail and preserving quality to a remarkable degree, up to 6X or more. This is a far more effective approach than simply changing the DPI setting in image editing software, which does not add more pixel information.
Streamlining Remote Collaboration with DaVinci Resolve
For teams working remotely, seamless collaboration is key to efficient video production. Platforms like Evercast are designed to bridge geographical distances, allowing for real-time collaboration directly within DaVinci Resolve. Evercast enables secure streaming of edit sessions in up to 4K resolution, facilitating live video chat with team members, exchange of notes, and immediate adjustments. This integrated approach ensures that your remote video production team can work together more closely and effectively, regardless of their physical location, making processes like reviewing and approving stills much more dynamic.
Advanced Considerations and Workflow Tips
- Studio vs. App Store Version: Some users have noted that the App Store version of DaVinci Resolve may have slightly restricted features compared to the Studio (paid) version. If you encounter grayed-out options for grabbing stills, ensure you are using the version that best suits your needs.
- Deliver Page for Multiple Stills: For exporting multiple stills at once, consider using the Deliver page. You can mark in and out points around specific frames or sections, select TIFF export, and add them to the render queue. This is particularly useful if you need to bake in your color grade for each still.
- Experimentation: As with any software, experimentation is key. If you're unsure about specific settings or options, take time to test different export formats and settings with sample footage to understand their impact on quality and file size.
By mastering the techniques for capturing and exporting stills from DaVinci Resolve, you unlock a powerful way to extend the value of your video content, creating a versatile toolkit for marketing, communication, and creative expression.