Creating engaging visuals in Photoshop often involves adding elements that convey information or emotion directly. Speech bubbles, or "talk bubbles," are a fundamental tool for this purpose, especially in comic book design, illustrations, and even marketing materials. This tutorial will guide you through various methods of crafting these visual cues, from simple shape tools to more advanced techniques, ensuring you can effectively communicate with your audience through your designs.
Understanding the Fundamentals: Speech Bubble Anatomy and Placement
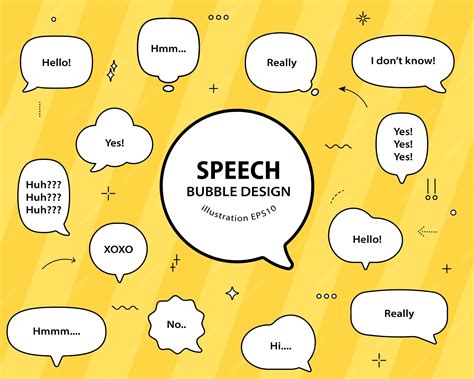
Before diving into the technical aspects, it's crucial to understand the purpose and common forms of speech bubbles. They are visual representations of dialogue or thoughts within a narrative. The shape of a bubble can subtly influence its meaning. For instance, a standard rounded rectangle or oval is typical for spoken words. Jagged or spiky shapes can indicate shouting or anger, while cloud-like or irregular shapes often denote thoughts or whispers. The "tail" of the bubble points towards the speaker or the source of the thought.
The placement of speech bubbles is also a critical design consideration. In comic book layouts, they are usually positioned early in the process, often during the initial sketching or storyboarding phase. This proactive approach helps prevent the panel from becoming overcrowded with dialogue and ensures a natural flow of information. The size and orientation of a bubble can also be influenced by the language it represents. For example, Japanese manga often features taller, more rounded balloons due to the vertical writing style, whereas Western comics, with their left-to-right text flow, tend to use wider bubbles.
Leveraging Photoshop's Built-in Shapes for Quick Bubbles
Photoshop offers a straightforward way to create basic speech bubbles using its custom shape tools. This method is ideal for beginners or when speed is of the essence.
Accessing Legacy Shapes
In Photoshop 2020 and later versions, the "Talk Bubble" shapes are no longer readily accessible in the main Shapes panel. To find them, you'll need to access the legacy assets.
- Open the Shapes Panel: Navigate to
Window > Shapes. - Locate Legacy Shapes: Scroll to the bottom of the Shapes panel and expand the
Legacy Shapes and Morefolder. - Expand Default Shapes: Within
Legacy Shapes and More, expand theAll Legacy Default Shapesfolder. - Find Talk Bubbles: Finally, scroll down and expand the
Talk Bubblesfolder.
Creating and Manipulating a Basic Bubble
Once you have located the desired talk bubble shape:
- Drag and Drop: Drag the chosen talk bubble shape from the Shapes panel directly onto your canvas. This will create a new Shape layer in your Layers panel.
- Transforming the Shape: With the shape layer selected, choose the Move tool from the Toolbar. Then, go to
Edit > Free Transform Path(or pressCommand+Ton macOS orControl+Ton Windows). You can then drag the anchor points on the text bubble to resize or reshape it to your liking. - Styling the Bubble: To customize the bubble's appearance:
- In the Properties panel, click the Color field and select the "no fill" icon to make the bubble transparent.
- Click the Stroke field and choose a desired color for the outline.
- Use the Size slider to set the thickness of the stroke.
- Alternatively, you can use
Edit > Free Transform(orCommand+T/Control+T) to freely resize the entire object, not just its path.
This method provides a quick way to generate a basic speech bubble that can then be further refined.
Crafting Custom Speech Bubbles with Shape and Pen Tools
For more control and unique designs, you can construct speech bubbles using Photoshop's fundamental shape and path tools. This approach allows for complete customization of form and style.
Setting Up Your Document
- New Document: Create a new document by pressing
Control-N(Windows) orCommand-N(macOS). - Dimensions: Set the Width to 850 pixels and the Height to 700 pixels. Ensure Pixels are selected from the Units drop-down menu.
- Grid and Snapping: Enable the Grid (
View > Show > Grid) and Snap to Grid (View > Snap to > Grid). To refine the grid for precise work, go toEdit > Preferences > Guides, Grid & Slices. Enter5in theGridline everybox and1in theSubdivisionsbox. This will create a detailed grid that aids in accurate shape creation.
Creating a Standard Speech Bubble
- Ellipse Tool: Select the Ellipse Tool (
U) from your toolbar and create a shape that is approximately 180 x 140 pixels. This will form the main body of your bubble. - Switch to Rectangle Tool: With the ellipse shape still selected, switch to the Rectangle Tool (
U). This might seem counterintuitive, but it allows us to work with multiple shapes. - Combine Shapes: In the Layers panel, select both shapes you've created so far. You can then combine them or use them as a basis for further manipulation. The exact method depends on your desired outcome, but often involves using path operations within the Options bar when shape tools are active. For instance, you might use the ellipse for the rounded body and then use the rectangle tool with a subtractive path operation to create a more squared-off bottom if desired, or to cut out a section for the tail.
Adding a Tail with the Pen Tool
A more robust method for creating the tail involves the Pen Tool:
- Path Mode: Select the Pen Tool (
P) and ensure it's set to "Path" mode in the Options bar. - Draw the Tail: Click and drag to draw the desired shape for your speech bubble's tail, connecting it to the main body.
- Convert Path to Shape: Once the path is complete, you can convert it into a shape. With the Pen Tool still active and the path selected, you can use path operations (like "Combine Shapes") to merge the tail with the bubble body if they were created as separate paths. If you created the main bubble using a shape tool, you might need to convert that shape layer into a path first, or draw the tail as a separate path and then use path operations to integrate it.
Styling the Bubble
- Fill and Stroke: Once your basic bubble shape is formed, you can style it.
- Fill: Select the shape layer and use the Color field in the Properties panel to choose a fill color.
- Stroke: Click the Stroke field to select an outline color and adjust its thickness using the Size slider.
- Layer Styles: For more advanced styling, you can apply Layer Styles:
- Double-click on the shape layer in the Layers panel.
- Color Overlay: Use
Color Overlayto change the fill color easily. - Stroke: Apply a
Strokelayer style to add an outline. You can control its color, size, and blend mode. - Drop Shadow: For a bit of depth, add a
Drop Shadowlayer style. Adjust the opacity, angle, distance, and spread to achieve the desired effect.
How To Create Speech Bubbles In Photoshop
Advanced Techniques: 3D Speech Bubbles and Brush Creation
For those seeking more dynamic and realistic effects, Photoshop offers 3D capabilities and the ability to create custom brushes.
Creating 3D Speech Bubbles
Photoshop CS6 Extended and later versions provide powerful 3D tools that can transform flat shapes into volumetric objects.
- Vector Shape: Start by creating your speech bubble shape using vector tools (like the Pen Tool or Custom Shape Tool). It's best to begin with a vector shape as it can be easily converted to a 3D layer.
- Convert to 3D: Select your vector shape layer and convert it into a 3D layer. This can usually be found under
3D > New Shape From Layer. - 3D and Properties Panels: You will primarily work with the
3DandPropertiespanels. - Extrusion Depth: In the
Propertiespanel, with the 3D shape selected, adjust theExtrusion Depthto give your bubble thickness. A value like 10 can be a good starting point. - Cap and Inflation: Select
Capfrom thePropertiespanel. Here you can adjust theInflation(or "Puffiness") using either the input fields or the on-canvas HUD controls. The Bevel (on the left) controls the edge rounding, and Inflation (on the right) controls the bulge. These changes happen in real-time, allowing for immediate visual feedback. - Material and Lighting: You can further enhance the 3D bubble by applying different materials, adjusting lighting, and even using the
Deformoptions. - Render: Once you are satisfied with the real-time preview, you will need to
Renderthe 3D layer. This process takes more time but produces significantly better results than the real-time OpenGL preview.
This method allows for non-destructive editing, meaning you can go back and change the path, text, or other properties at any stage before rendering.
Creating a Speech Bubble Brush
Transforming your created speech bubble into a brush allows for rapid, repeatable application in your designs.
- Draw Your Bubble: Create your speech bubble as described in previous sections. Ensure it has the desired fill and stroke.
- Save as Brush: With the layer containing your speech bubble selected, go to
Edit > Define Brush Preset. Give your brush a descriptive name. - Applying the Brush:
- Open the image you want to add bubbles to.
- Create a new blank layer above your existing layers.
- Select the Brush Tool (
B). - Open the Brush Preset picker (right-click on the canvas or open the Brushes panel
Window > Brushes). Select your newly created speech bubble brush from the list (it will likely be at the end).
- Brush Dynamics: To make the brush more versatile and create varied bubble effects (like clusters of bubbles in an underwater scene):
- Open the main Brushes panel by pressing
F5. - Shape Dynamics: Increase
Size Jitterto 100% for random variations in bubble size. IncreaseRoundness Jitterto 100% for random variations in shape, preventing all bubbles from being perfectly round. - Scattering: Increase the
Scatteramount to around 250% to spread the bubbles randomly across the canvas rather than in a straight line.
- Open the main Brushes panel by pressing
- Painting Bubbles:
- Set your Foreground color to white (or your desired bubble color).
- Adjust the brush size using the left bracket key (
[) to make it smaller or the right bracket key (]) to make it larger. - With the new layer selected, paint your bubbles. For organic clusters, paint in short strokes from bottom to top and leave some space between strokes.
- Use
Ctrl+Z(Windows) orCommand+Z(macOS) to undo a single stroke, orCtrl+Alt+Z/Command+Option+Zfor multiple undo steps.
Adding Atmospheric Effects to Bubbles
If you're creating a specific scene, like an underwater environment, you might want to enhance the bubbles to match the atmosphere.
- Gaussian Blur: To make bubbles appear more "murky" or out of focus, select the layer containing your painted bubbles. Go to
Filter > Blur > Gaussian Blur. Adjust the radius to achieve the desired blur effect. - Multiple Layers for Depth: For a more realistic depth effect, you can create multiple layers of bubbles. Paint larger bubbles on separate layers and place them closer to the foreground, and use blur effects on layers further away to simulate distance. Applying
Gaussian Bluragain withCtrl+F(Windows) orCommand+F(macOS) can intensify the blur effect.
Adding Text to Your Speech Bubbles
Once your speech bubble is created, the next step is to add the text it will contain.
Using the Horizontal Type Tool
- Select Type Tool: Choose the Horizontal Type Tool (
T) from the toolbar. - Click and Type: Click on your canvas, preferably outside the speech bubble shape initially, and begin typing your text.
- Resizing and Positioning: To adjust the size and position of your text:
- Enable
Free Transformby pressingCtrl+T(Windows) orCommand+T(macOS). - Use the bounding box handles to resize the text.
- Click and drag the text to move it within the bubble.
- Press
Enterto commit the changes.
- Enable
- Character and Paragraph Panels: For finer control over text appearance, use the
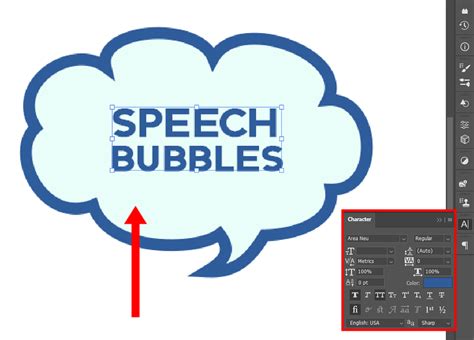
CharacterandParagraphpanels (Window > Character,Window > Paragraph). Here you can adjust font, size, leading (line spacing), kerning, alignment, and more.
Font Choices for Speech Bubbles
The font you choose significantly impacts the overall feel of your speech bubble.
- Comic Fonts: For comic book or manga styles, consider bold, impactful fonts. Resources like Envato Elements offer packs of custom shapes and fonts suitable for comic design, including various talk bubbles, blank speech bubbles, action speech bubbles, and thought bubbles. Fonts like "Raging" are often recommended for a bold comic style.
- Font Pairing: When choosing a font, consider how it pairs with the overall design aesthetic. A catchy font can be the final touch that perfects your Photoshop speech bubble.
- Language Considerations: As mentioned earlier, the natural flow of language can influence font choice and bubble shape. For Western languages, wider bubbles and fonts that are easily readable from left to right are common. For languages like Japanese, taller bubbles and fonts that suit vertical text are more appropriate.
Advanced Text Styling with Layer Styles
To make your text stand out, you can apply layer styles to the text layer:
- Access Layer Styles: Double-click on the text layer in the Layers panel.
- Apply Styles: Experiment with styles such as:
- Color Overlay: To change the text color.
- Stroke: To add an outline to the text.
- Drop Shadow: To create depth and separation from the bubble.
- Bevel and Emboss: For a more 3D or embossed effect.
Alternatively, you could explore Photoshop tutorials on creating 3D comic text for a more integrated and stylized text effect that complements your 3D speech bubble.
By mastering these techniques, you can create a wide variety of cartoon speech bubbles in Photoshop, enhancing your illustrations and designs with clear and dynamic visual communication. Whether you need a simple dialogue indicator or a complex 3D element, Photoshop provides the tools to bring your ideas to life.