In the ever-evolving landscape of digital art, composite photography stands as a testament to creative vision, allowing artists to weave together disparate elements into a cohesive and believable whole. While artificial intelligence continues to make inroads into various photographic domains, the nuanced art of seamlessly integrating subjects and ensuring their realistic presence within a composite image remains a domain where human skill and artistic intuition truly shine. The critical differentiator between a compelling composite and one that appears jarringly artificial often lies in the masterful rendering of shadows. When executed poorly, shadows can instantly betray the illusion, making a piece look "ridiculously fake." Conversely, well-placed and accurately depicted shadows are the silent architects of realism, providing essential visual cues for scale, depth, and the direction of light, thereby anchoring the composite subject firmly within its new environment. This article delves into the techniques for casting realistic shadows in Adobe Photoshop, drawing upon established workflows and offering insights into the physics and perception that underpin effective shadow creation.

The Foundation of Realism: Understanding Light and Shadow
Before diving into Photoshop's tools, it's crucial to grasp the fundamental principles governing how shadows behave in the real world. Shadows are not merely dark patches; they are direct consequences of light interacting with an object. The direction, intensity, and quality of the light source dictate the shadow's shape, sharpness, and fall-off.
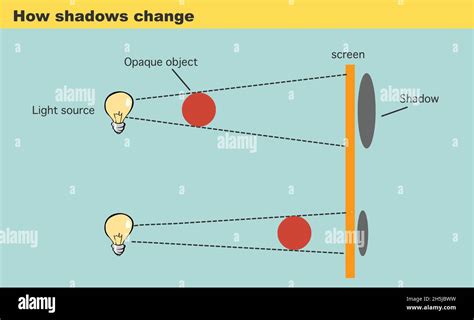
The direction of the light is paramount. A light source directly above an object will cast a shadow directly beneath it. As the light source moves to the side, the shadow will stretch out in the opposite direction. This needs to be meticulously matched to the lighting present in the background plate of a composite image.
The distance of the light source influences the shadow's edge. A very high light source, such as the sun at its zenith, tends to produce sharper shadows because the rays are nearly parallel. Lower light sources, or those closer to the subject, result in softer, more diffused edges. This phenomenon is often described as "edge sharpness drop-off."
Furthermore, the intensity of the light affects the shadow's density. Brighter light creates darker, more pronounced shadows. However, shadows are rarely completely opaque. They are a lack of light, and this absence often has a degree of transparency, particularly near the subject.
A key aspect often overlooked is the fall-off of the shadow. Light radiates outwards spherically from its source. As light travels further, it weakens according to the inverse square law: double the distance from the source, and the light intensity drops to a quarter of its original power. This principle, akin to gravity, means that light intensity, and by extension shadow density and sharpness, diminishes with distance. Shadows tend to widen and dissipate over distances, rather than maintain a consistent darkness and narrowness. A shadow that appears to get narrower and maintain its darkness even when moving away from the source will immediately look unnatural. The ideal shadow often resembles a truncated cone, wider at its base and narrowing towards the subject.
Painting Light and Form
Preparing Your Subject and Canvas for Shadow Casting
The process of adding a shadow in Photoshop begins with a well-prepared subject. This typically involves isolating the subject from its original background and placing it onto the target background where the composite will be assembled.
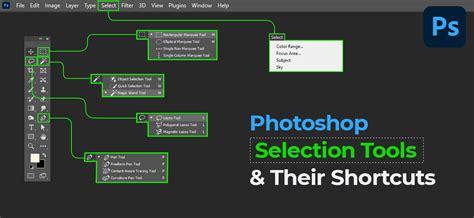
The first step in Photoshop is to accurately select the subject. Various selection tools can be employed, including the Lasso Tool for freehand selections, the Quick Selection Tool for rapid, edge-aware selections, or the Pen Tool for the most precise and controllable outlines. Once the subject is selected, it's common practice to copy it to a new layer using Ctrl+J (Windows) or Command+J (Mac). This isolates the subject, making it easier to manipulate without affecting other elements of the image.
Often, the original image canvas might not provide sufficient space to accommodate the shadow that will be cast. To address this, the Crop Tool can be used, but in a way that expands the canvas rather than trims it. By dragging the handles outwards, extra space can be added to the sides, top, or bottom. It's often helpful to switch to one of Photoshop's full-screen modes (by pressing F) to better visualize the available space and the potential placement of the shadow. When accepting the crop, Photoshop will fill the new areas with the background color, which is typically white by default.
Creating the Base Shadow Layer
With the subject isolated and the canvas prepared, the next step is to create the foundational shadow layer. This is often achieved by duplicating the subject layer or creating a new layer beneath it.
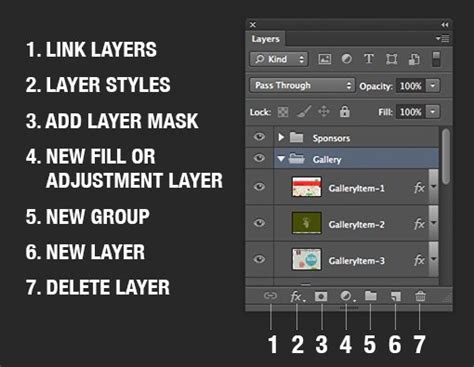
A common and effective method involves creating a new layer directly underneath the subject layer. This layer will serve as the canvas for the shadow. To ensure the shadow has the correct shape and is positioned appropriately, a selection of the subject is crucial. Holding down Ctrl (Windows) or Command (Mac) and clicking on the subject layer's thumbnail in the Layers panel instantly loads a selection around its opaque pixels.
This selection can then be filled with black on the newly created shadow layer. While a pure black shadow is a starting point, it's often beneficial to choose a more nuanced color for the shadow. This can be done by accessing the Color Picker, often found by clicking a black rectangle next to the blend mode options in dialog boxes like the "Drop Shadow" settings, or by directly selecting a color from the Tools panel. A dark gray is frequently a more realistic choice than pure black, especially if the ambient light in the scene is not extremely intense. The "B" value (Brightness) in the Color Picker can be adjusted to achieve the desired shade, for instance, setting it to 70% for a lighter gray.
Shaping and Positioning the Shadow
Once the base shadow is created, it needs to be reshaped and positioned to align with the perceived light source and the perspective of the scene. Photoshop's Free Transform tool (Ctrl+T or Cmd+T) is indispensable here.
After initiating Free Transform, right-clicking (or Cmd-clicking on a Mac) within the bounding box reveals a context menu with various transformation options. Distort is particularly useful for manipulating the shadow's shape. By dragging the corner handles of the bounding box, the shadow can be skewed, stretched, or compressed to match the perspective of the scene and the direction of the light. For instance, if the light source is to the left and slightly behind the subject, the shadow will extend to the right and forward. The bottom corners of the shadow might need to be adjusted to accurately reflect how the shadow falls on uneven surfaces.
The orientation of the shadow is also vital. Rotating the shadow, perhaps clockwise or counterclockwise, can help it align more convincingly with other elements in the scene, such as the direction of a car or the flow of a landscape. The goal is to create a shadow that "passes the eye test" for realism.
Refining Shadow Edges and Fall-off
A common pitfall in creating artificial shadows is their overly crisp and uniform edges. Real-world shadows, especially those cast by objects not in direct contact with the surface they fall upon, exhibit varying degrees of softness.
The Gaussian Blur filter is the primary tool for softening shadow edges. Applying a subtle blur, perhaps with a Radius of around 1.5 pixels, can immediately make the shadow appear more natural. The exact setting will depend on the resolution and scale of the image.
However, simply applying a uniform blur doesn't fully replicate the way shadows dissipate. The further a shadow extends from the subject, the softer and more diffused its edges typically become. To achieve this gradual fall-off, a combination of blur and masking is often employed.
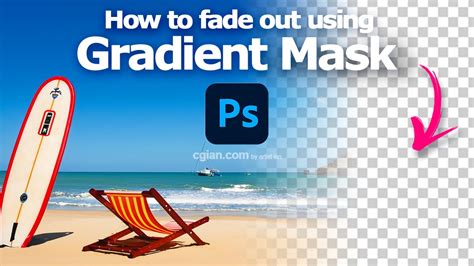
One effective technique involves using Quick Mask mode to create a gradient selection. After resetting the Foreground and Background colors to black and white (D key), entering Quick Mask mode (Q key) allows for painting with a gradient. Using the Gradient Tool with the default black-to-white setting and dragging from the bottom of the shadow upwards, a mask is created where the shadow is opaque at the bottom (black in Quick Mask) and gradually becomes more transparent towards the top (white in Quick Mask). Exiting Quick Mask mode (Q key) converts this into a selection.
With this selection active, the Gaussian Blur filter can be reapplied. Because the selection is stronger at the bottom and fades towards the top, the blur will be more pronounced in the areas that were more transparent in the Quick Mask, effectively creating a softer fall-off. This can be quickly reapplied using the shortcut Ctrl+Alt+F (Windows) or Command+Option+F (Mac).
Alternatively, a Layer Mask can be directly applied to the shadow layer. Using the Gradient Tool on this mask, similar to the Quick Mask method, allows for precise control over the shadow's transparency. Dragging a gradient from the bottom of the shadow upwards will make the shadow fade out as it extends away from the subject. This mask can be further refined by painting with black or white brushes to selectively hide or reveal parts of the shadow.
Addressing Specific Shadow Challenges
Even with these techniques, certain scenarios present unique challenges. For instance, if the surface receiving the shadow has contours or changes in elevation, the shadow's shape and fall-off must adapt accordingly. The "tip of her head wouldn't stay the same over the lip of the road, as there is distance there" highlights this. In such cases, the Free Transform tool, combined with careful observation and potentially the Liquify filter, might be necessary to distort the shadow to conform to the background's topography.
Another common issue is the color of the shadow. While black or dark gray is a good starting point, the ambient light of the scene influences the shadow's hue. If the background plate has a warm color cast, the shadow might benefit from a subtle warm tint. This can be achieved by adjusting the color balance of the shadow layer or by using blend modes and color overlays.
Finally, the opacity of the shadow near the subject is crucial. Shadows are rarely completely solid. Lowering the overall opacity of the shadow layer, or using the layer mask to reduce opacity in specific areas, ensures that the shadow doesn't appear too stark or opaque directly beneath the subject. This subtle transparency further enhances the illusion of realism.
The Art of Observation
Ultimately, creating convincing shadows in Photoshop is an art form that relies heavily on observation. Becoming a student of how light and shadow behave in the real world is paramount. By studying how shadows are cast in different lighting conditions, on various surfaces, and by different objects, artists develop an intuitive understanding that informs their digital manipulations. This keen observation allows for the creation of shadows that not only look realistic but also serve to integrate the composite subject seamlessly into its environment, anchoring it visually and contributing significantly to the overall believability of the final image. The ability to accurately replicate these natural phenomena is what elevates a composite from a mere collection of images to a compelling visual narrative.