Blurring specific elements within an image is a powerful technique used for various creative and practical purposes. Whether you need to protect privacy, draw attention to a particular subject, or achieve a specific aesthetic, Adobe Photoshop offers a robust suite of tools to accomplish this. This guide will walk you through several methods for blurring parts of an image, catering to different needs and skill levels, from the absolute beginner to the more experienced editor. You'll discover how to selectively obscure faces, text, or any other area, ensuring your images convey the intended message while maintaining a professional look.
The Subtle Art of Privacy and Emphasis: Why Blur?
In the digital age, images are shared constantly, and with that comes the responsibility of managing the information they contain. You might need to blur a part of an image in Photoshop for personal or work-related reasons. For instance, if you need to post a photo of your coworkers on a social media account, but some of them aren't comfortable with this, blurring their faces respects their privacy. Similarly, when sharing a photo of yourself in an airport holding your boarding pass, the text on the pass can reveal personal information and your destination. Blurring this text conceals sensitive details, allowing for a more controlled reveal or simply a bit of mystery for your followers.
Beyond privacy, blurring can be a crucial artistic tool. In nude photography, for example, social media platforms often have strict rules regarding nudity, which can lead to shadow bans on platforms like Instagram. Blurring specific parts of a naked body, such as a woman's breasts, can help avoid these restrictions while still allowing for artistic expression. Essentially, blurring a part of an image is an aesthetically pleasing and unobtrusive way of hiding sensitive information.
Method 1: The Direct Approach with the Blur Tool
Photoshop's toolkit is vast, and it includes a dedicated tool for blurring objects. This method is straightforward and ideal for applying a light, localized blur.
Here’s what you need to do:
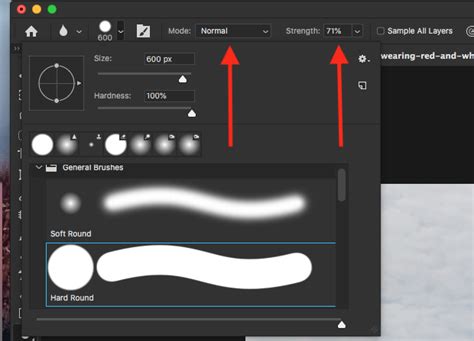
- Select the Blur Tool: Locate and click on the Blur Tool icon in the Photoshop toolkit. It often resembles a water droplet.
- Configure Options: At the top of the Photoshop window, you'll find the Options bar. Here, you can switch to different blending modes if needed, though for simple blurring, the default is usually fine. Crucially, you can adjust the strength of the blur.
- Adjust Brush Size: The size of the brush stroke can also be changed in the Options menu. For a quicker adjustment, use the keyboard shortcuts: press the left bracket key (
[) to decrease the brush size and the right bracket key (]) to increase it. - Apply the Blur: Once you're ready, simply paint over the object or area you want to conceal in your image. If you desire a more intense blur, paint over the object multiple times.
While this method is undeniably easy, it has a significant limitation. Even if you set the strength to 100% and paint over an area numerous times, the blur produced by this tool can be quite mild. It might not be sufficient to make an object completely unrecognizable or text entirely unreadable. Therefore, if your goal is to truly conceal something, you might need to explore other options. This tool is best suited for situations where a subtle softening or a light blur is desired.
Method 2: Precise Control with Selections and Gaussian Blur
For more control over the intensity of the blur and to ensure that sensitive information is genuinely obscured, using selections in conjunction with the Gaussian Blur filter is a highly effective method. This approach requires a bit more time than the Blur Tool but offers a more pronounced and controllable result.
Follow these steps:
- Open Your Image: Load your image into Photoshop.
- Select the Area:
- Choose the Marquee Tool by pressing
Mon your keyboard. By default, it's often set to a rectangular selection. - If you need to blur a square or rectangular area, the default tool is perfect.
- However, if you need to blur a face or any other oval or circular object, right-click on the Marquee Tool icon in the toolbar. From the fly-out menu, select the Elliptical Marquee Tool.
- With your cursor, draw a selection around the object that needs to be concealed. Holding down the
SHIFTkey while drawing will help you create a perfect square or a perfect circle.
- Choose the Marquee Tool by pressing
- Refine Your Selection (Optional): If you need to make adjustments to your selection, right-click inside it. In the drop-down menu, select Transform Selection. Your selection will now be outlined with blue borders. You can reposition and resize the selection using your cursor. It's also possible to change its angle of rotation, which is useful if you need to blur a tilted object. Once you're satisfied, press
Enter. - Apply Gaussian Blur:
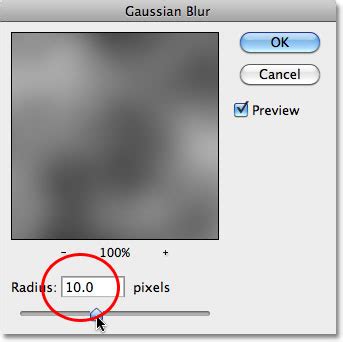
- Navigate to the menu bar and select Filter > Blur > Gaussian Blur.
- A dialog box will appear. Here, you can control the intensity of the blur by adjusting the Radius value. Enter the necessary number of pixels or simply use the slider.
- A preview window within the dialog box allows you to see the effect in real-time, helping you determine if the blur is intense enough.
- Click OK to apply the changes.
- Deselect: To remove the active selection outline, press
CTRL + D(Windows) orCOMMAND + D(Mac). - Export Your Image: Go to File > Export > Export As to save your modified image. You can specify settings like image size and quality before clicking "Export" again.
This method ensures that the blurred area is intense enough to make text unreadable or faces unrecognizable. However, a notable drawback is that the blurred area will have a sharp, defined edge. This can look somewhat unnatural and distracting, detracting from a professional finish. Furthermore, if you need to blur multiple objects in an image, you must repeat this entire selection and blurring process for each individual object, which can be quite time-consuming.
Method 3: Seamless Blurring with Layer Masks
Achieving a blur with soft, natural-looking edges is often preferred for a more polished aesthetic. This method utilizes layer masks to create a seamless transition between blurred and sharp areas, offering greater flexibility and a smoother result.
Here’s how to do it:
- Import and Duplicate: Open your image in Photoshop and create a copy of the Background layer by pressing
CTRL + J(Windows) orCOMMAND + J(Mac). Select this newly duplicated layer in the Layers Panel. - Apply Blur to the Entire Layer:
- Go to Filter > Blur > Gaussian Blur.
- Adjust the Radius slider or enter a pixel value to make the blur intense enough for your needs. Click OK. At this point, your entire image will appear blurred. Don't worry; this is intentional.
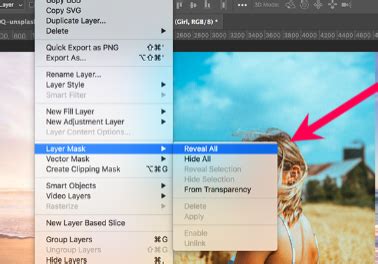
- Create an Inverse Layer Mask:
- While the blurred layer is selected, click on the "Add Layer Mask" icon at the bottom of the Layers Panel.
- Crucially, hold down the
ALTkey (Windows) orOPTIONkey (Mac) while clicking the icon. This will create a black layer mask, effectively hiding the entire blurred layer. If you don't holdALT/OPTION, you'll get a white mask, and the entire image will remain blurred.
- Reveal the Blur:
- Select the Brush Tool from the Toolbar.
- Ensure your foreground color is set to white. White paint on a black layer mask reveals the underlying layer (in this case, the blurred layer). The black color should be on top of any other color.
- For a soft, seamless transition, set the hardness of your brush to 10% or less in the Options bar. A hardness of 0% is often perfect. This is the key to achieving that smooth blend.
- With the black layer mask selected in the Layers Panel, paint over the part of the image that you want to blur. You can experiment with the opacity of the brush and paint over the same area multiple times to control the intensity of the blur. For example, one face might be painted over three times with 98% opacity, while another could be painted over twice with 54% opacity, creating subtle variations.
- Export: Once you're satisfied, proceed to export your image using File > Export > Export As.
This method offers significant flexibility, allowing you to blur multiple objects within a single image quickly and with soft, natural edges. The absence of sharp, distracting edges makes the result look much more professional. The primary drawback of this method is that creating a precisely rectangular blur can be more challenging compared to using the Marquee Tool.
Beyond Photoshop: An Easier Alternative for Basic Blurring
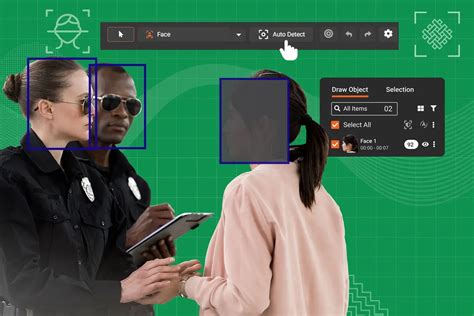
While Photoshop is incredibly powerful, performing simple tasks like selective blurring can sometimes feel overly complex due to its advanced nature. If your primary goal is quick and straightforward blurring, especially for common tasks like obscuring faces or license plates, there are more streamlined options available.
Visual Watermark is a free application that offers a simplified approach to image editing, including a blur tool.
Key advantages of Visual Watermark for blurring include:
- AI-Powered Detection: For common elements like faces and license plates, Visual Watermark can automatically detect and apply blur, saving significant time. You can then deselect any areas you don't want blurred.
- Batch Processing: This is a major advantage over Photoshop for repetitive tasks. Visual Watermark allows you to apply blur effects to multiple images simultaneously with ease. In Photoshop, this would typically require creating complex actions.
- Web-Based and Accessible: Visual Watermark operates online in a browser, meaning no installation is required, and it consumes no local storage. It's accessible from any device with an internet connection.
- Soft Edges by Default: The blur tool in Visual Watermark automatically produces blurred areas with soft edges, eliminating the need for manual masking or complex brushwork.
- Intuitive Controls: While offering less granular control than Photoshop, Visual Watermark provides intuitive on-image controls for adjusting the intensity, shape (rectangular or oval), and rotation of the blurred areas.
While Visual Watermark excels at basic blurring tasks, it's important to note its limitations. It does not offer the advanced retouching capabilities of Photoshop, such as color correction or exposure adjustments. For complex edits, Photoshop remains the industry standard. However, for quick, repetitive tasks like blurring multiple faces across numerous photos, Visual Watermark can be a significant time-saver.
Stunning Gaussian Blur Effect - Photoshop Tutorial
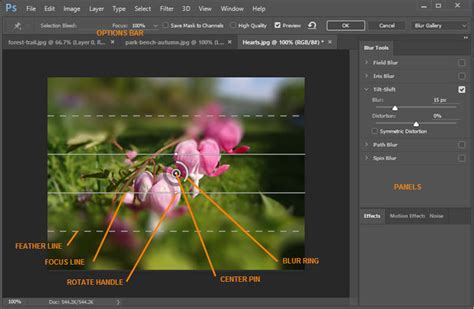
Advanced Blurring Techniques in Photoshop's Blur Gallery
Photoshop's Blur Gallery offers a more dynamic and sophisticated way to apply blurs, allowing for complex gradient blurs, depth-of-field effects, and motion simulations. These filters can be applied non-destructively as Smart Filters, meaning you can revisit and adjust them at any time.
Field Blur
This tool allows you to create a gradient of blurs across an image by placing multiple blur points, each with a different blur intensity. The final effect is a combination of all these pins. You can drag the blur handle on each pin to control the amount of blur.
Iris Blur
Iris Blur simulates a shallow depth-of-field effect, drawing focus to a central area while progressively blurring the surroundings. The default Iris blur pin is placed on the image, with distinct areas for sharpness, fading blur, and full blur. You can adjust the blur intensity by dragging the blur handle.
Tilt-Shift Blur
Mimicking the effect of a tilt-shift lens, this blur creates a sharp area that then fades to a blur at the edges. Similar to Iris Blur, you can define the sharp area and the transition to blur, controlling the intensity with a blur handle.
Path Blur
Path Blur is used to create motion blurs along defined paths. You can choose between a basic blur or a "Rear Sync Flash" blur. The Speed slider controls the amount of path blur, and a taper value can be adjusted. You can also control the shape of the blur path, creating curves and corners. The Strobe Strength and Strobe Flashes settings allow for simulating effects like camera flash during motion.
Spin Blur
This effect allows you to create radial blurs around one or more points, simulating rotation. The Blur Angle control dictates the amount of blurring in degrees. Similar to Path Blur, you can also incorporate strobe effects to simulate flashes during rotation.
When applying these advanced blurs, it's important to consider how they interact with the image. Sometimes, the blurred areas might appear synthetic. To combat this, the Blur Gallery includes a Noise tab. By adding a subtle amount of noise that matches the original image, you can make the blurred areas look more natural and integrated. The Amount, Roughness, Color, and Highlight settings allow for fine-tuning this noise.
Fixing Slightly Blurry Photos
While this article focuses on intentionally blurring parts of an image, it's worth noting that Photoshop can also help correct photos that are unintentionally slightly blurry.
If you've just slightly missed the focal point, a photo might still be salvageable.
- Duplicate Layer: Open your blurry photo and duplicate the layer (
CTRL/COMMAND + J). This allows for non-destructive editing. - Unsharp Mask: Navigate to Filter > Sharpen > Unsharp Mask.
- Set the Amount to around 150% and the Threshold to 0.
- Adjust the Radius slider. Start at 1 pixel and gradually increase it until the sharpening feels right for the image. A preview window will show the effect.
- Click OK.
- Evaluate: Toggle the visibility of the duplicated layer to compare the sharpened version with the original. You can also adjust the layer's opacity for a more subtle effect.
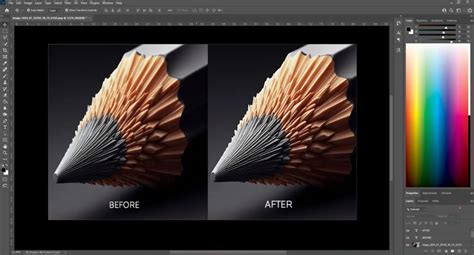
It's crucial to understand that the Unsharp Mask works by adding contrast to edges. If an image is so blurry that edges are indiscernible, this tool will not be effective. It's best for photos where the focus was only slightly missed. For severely blurry images, you might need to consider third-party AI-powered software like Topaz Sharpen AI.
Preventing Blurriness in the First Place
The best way to deal with blurry images is to avoid them during the shooting process. Here are some key considerations:
- Shutter Speed: In low light, when you might use a slower shutter speed to let in more light, a general rule of thumb is to avoid shutter speeds slower than your focal length (e.g., for an 80mm lens, use at least 1/80th of a second when shooting handheld). Faster shutter speeds are essential for freezing motion, whether of your subject or your own movement.
- Tripod Use: A tripod is invaluable for ensuring sharpness, especially with static subjects. It forces you to slow down and compose carefully. Once focused, you can often turn autofocus off to prevent the camera from hunting.
- Autofocus and Eye-AF: Ensure your autofocus is working correctly. Newer cameras often feature Eye Autofocus (for humans and animals), which is excellent for ensuring the eyes are perfectly sharp.
- Image Review: Regularly review your photos on the camera's LCD screen, zooming in to check focus and sharpness.
- Resolution and Lighting: Always shoot at the highest possible resolution. Ensure adequate lighting, as poor lighting often necessitates slower shutter speeds, increasing the risk of blur.
By understanding these techniques in Photoshop and implementing good photographic practices, you can effectively manage blur in your images, whether you intend to apply it for artistic effect or correct unintentional softness.