The festive season is a prime time for photographers to capture holiday magic, and adding a touch of sparkle to Christmas photos can significantly enhance their appeal. This tutorial will guide you through the process of creating animated Christmas lights in Adobe Photoshop, transforming your static holiday images into captivating animated GIFs. We will delve into creating custom brushes for realistic light effects, animating these lights to simulate blinking, and refining the overall look to achieve professional-quality results. Whether you're aiming to create personalized Christmas cards or wow clients with dynamic holiday imagery, this guide will equip you with the skills to bring your festive photos to life.
Step 1: Designing the Twinkle Light Brush Preset
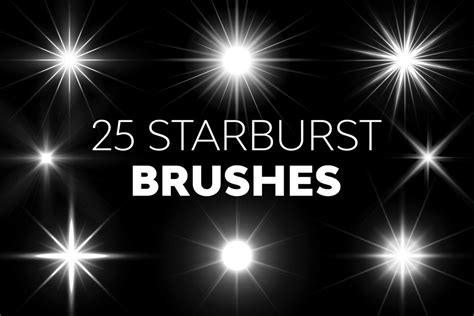
To achieve a convincing twinkle effect, the first crucial step is to create a custom brush preset that mimics the appearance of Christmas lights. This process, while detailed, is fundamental to adding realistic light sources to your images.
Begin by creating a new document in Photoshop. The dimensions of this document are not critical, but ensure that you are not using artboards and that the resolution is set to 300dpi for optimal quality. Once the document is ready, navigate to the Brush Settings panel. Select a basic round brush and set its hardness to zero. In the brush menu, this is often designated as brush number 3. Within the Brush Settings, adjust the roundness of the brush to approximately 8%.
Next, focus on defining the angles of your brush. To create a five-pointed starburst effect, akin to a light flare, set the angles to 90, 180, 45, and -45 degrees. You can utilize a ruler to ensure these lines intersect precisely in the center of your brush tip, guiding the formation of the points. Once you have established the desired number of points for your twinkle effect, return to the Brush Settings and reset the roundness back to 100%.
At this stage, you have the option to introduce a blur to your starburst. This is a matter of preference; you can create one brush with a blur and another without, providing you with more creative flexibility. Adding a blur can contribute to a softer, more diffused glow. After these adjustments, you will have a well-defined twinkle light brush.
The final part of this step is to create the Brush Preset pattern. This ensures that your custom brush can be saved and reused on any image in Photoshop in the future. By saving this as a brush preset, you are essentially creating your own reusable tool for adding festive sparkle.
Step 2: Incorporating Realistic Light Sources
Simply adding twinkle lights to a photo can sometimes result in an effect that appears out of place. This is because the lights need a believable light source to emanate from, an actual point of illumination within the scene. To address this, we will simulate the presence of these light sources.
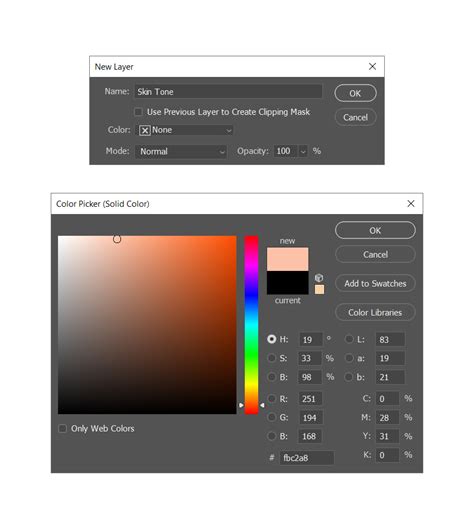
First, create a new layer. This is essential because it allows the twinkle lights to be easily moved and manipulated after they are applied to the image.
Now, return to the layer containing your original Christmas photo. Select the Stamp Tool. In the menu bar at the top of the Photoshop interface, ensure that the "Aligned" option is unchecked. This setting dictates whether the cloned source updates with your brush strokes.
Next, hold down the Alt (or Option on Mac) key and click on an existing light source within your original image. This action samples the color and texture of that light. Once you have selected your desired light to clone, switch back to the new layer you created. Click on the areas of the image where you want to add new lights. It’s important to understand that you are not directly cloning onto the original image itself. This new layer is transparent, allowing you to see the underlying photograph and effectively placing new light elements without altering the base image.
With more lights conceptually added to your tree or scene, you are now prepared to apply your custom twinkle light brush. Select the Brush Tool and choose the twinkle light brush you created in Step 1. Ensure that the brush color is set to white. Alternatively, you can use the color picker to select a warmer yellow hue that harmonizes with the existing lights in your photograph. The choice of color is yours. Leave the hardness and opacity of the brush at 100% for now.
Navigate back to the new layer where you have conceptually added the lights. Proceed to click on each of these simulated light sources and apply your twinkle brush to it. This will create the characteristic starburst effect around each illuminated point.
Step 3: Adding Color and Animation to Twinkle Lights
The true magic of animated Christmas lights comes alive when you introduce color and movement. The ability to duplicate and modify the twinkle light layers offers immense creative potential.
Duplicate the layer containing your twinkle lights. This allows you to create variations without affecting the original. You can then move these duplicated layers around the canvas. To create colored twinkle lights, add a new fill layer by going to Layer > New Fill Layer > Solid Color. Choose a desired color, such as blue, green, or red, to add a festive palette.
Once a solid color fill layer is applied, you will notice that it covers your entire image. To integrate this color with your twinkle lights, adjust the Blending Modes at the top of the layer window. Select "Color" from the dropdown menu. This blending mode will apply the hue of the solid color layer to the twinkle lights while preserving their luminosity and detail.
A highly effective tip for managing these colored lights is to merge each color fill layer with its corresponding twinkle lights layer. This can simplify the process of removing or adjusting them later on. By merging, you consolidate the color and the twinkle effect into a single layer, making subsequent edits more streamlined.
The result of these steps will be colored twinkle lights that appear to emanate from your simulated light sources, adding depth and vibrancy to your image. You can repeat this process with different colors to create a multicolor string of lights.
To further enhance the realism and visual appeal, consider setting the blending mode of your twinkle lights layer to "Overlay." This mode interacts with the underlying image in a way that can create a more integrated and luminous effect, making the lights appear to glow within the scene.
The great advantage of this technique is that you are essentially creating your own brush preset from scratch. You can go back to Step One and experiment with adding more angles and more points to your brush definition. This allows for greater customization and can lead to unique and intricate light effects tailored to your specific image. The result can be a dramatic before-and-after transformation, showcasing the added sparkle and dynamism to your photographs.
It may seem intricate the first time you attempt it, but with practice and experimentation, this process becomes significantly easier and more intuitive.
Step 4: Creating the Animated GIF
Now that you have your static image with beautifully rendered Christmas lights, it’s time to bring them to life through animation. This is where the core of creating an animated Christmas lights GIF in Photoshop lies.
To begin, open the Animation panel. In newer versions of Photoshop, this is referred to as the Timeline. You can access it by going to Window > Animation (or Timeline). This panel is where you will control the timing and visibility of your layers to create the illusion of blinking lights.
For the first frame of your animation, decide which layers should be visible and which should be hidden. For instance, you might want certain lights to be on while others are off, or to have varying levels of brightness. Set the opacity of your "Sparkle" layer (or your main twinkle lights layer) to a specific value, for example, 59%, for this initial frame.
Photoshop Tutorial | QUICK TIP | Basic Frame by Frame Animation
To create the blinking effect, you will duplicate this first frame and make modifications for subsequent frames. For the second frame, you might hide certain twinkle light layers or reduce their opacity to simulate them being "off" or dimmer. For the third frame, you might bring them back to full visibility or introduce a different blinking pattern. Continue this process, creating multiple frames, each representing a slightly different state of your Christmas lights. For example, you could have frames showing:
- Frame 1: All lights on at full opacity.
- Frame 2: Some lights dimmed or hidden.
- Frame 3: All lights on again, perhaps with a slight shift in brightness.
- Frame 4: A different set of lights dimmed or hidden, creating a more complex blinking sequence.
The number of frames and the duration of each frame will determine the speed and smoothness of your animation. You can adjust the time delay for each frame within the Animation/Timeline panel.
Before saving your GIF animation, it is crucial to test it to preview how it will look. Click on the "Play Animation" button within the Animation/Timeline panel. This allows you to see the sequence of frames and identify any issues with timing or visibility.
Once you are satisfied with the animation, you can save it as a GIF file. Go to File > Save for Web and Devices. In the dialog box that appears, select GIF as the output format. You can also adjust various GIF optimization settings here, such as the number of colors and dither, to control file size and visual quality. Choose a suitable preset or manually adjust these settings to achieve the best balance. Ensure that the "Looping Options" are set to "Forever" if you want the animation to repeat continuously.
The image can then be saved as an animated GIF or, if you prefer a static version, as a JPEG. This process allows you to add animated Christmas lights to your photos, making them dynamic and engaging.
Step 5: Enhancing the Glow and Blending
To make the Christmas lights glow more brightly and blend seamlessly with the image, further adjustments can be made. A simple yet effective technique is to duplicate the "Light Bulbs" layer (or your primary twinkle lights layer). This duplication will intensify the glow and add more visual weight to the lights.
To ensure the lights integrate better with the overall photograph, you can utilize selection tools like the Lasso tool. Select any areas where the lights might appear to be unnaturally placed or disconnected from the main image. Once an area is selected, you can apply a Gaussian Blur filter (Filter > Gaussian Blur). Applying this blur to both the "Strings" layer (if you have one for the wires) and the "Light Bulbs" layer can help match the depth of field and focus of the original photograph, making the added lights appear more natural.
Finally, to refine the overall darkening effect you might have applied earlier in the process (e.g., using adjustment layers like Exposure or Curves), you can use a soft round black Brush with a low Flow rate. Apply this brush to mask away some of the darkening effect in specific areas. This allows you to selectively bring back brightness and detail, ensuring that the added lights and the overall mood of the image are well-balanced.
This comprehensive approach to creating and animating Christmas lights in Photoshop, from custom brush creation to final blending, provides a powerful set of tools for enhancing holiday photography. Remember, the same techniques can be applied to various images where you wish to add a touch of magical glow, not just Christmas trees. The custom brushes used are incredibly versatile and can be employed for effects ranging from delicate fairy lights to creating a general magical atmosphere.
Advanced Techniques and Considerations
For those seeking even more sophisticated Christmas light effects, Photoshop offers premium actions that can automate many of these steps, providing a quick way to add animated Christmas lights to your photos. These actions are pre-programmed sets of commands that can apply complex lighting and animation effects with a single click.
When creating your custom brushes, consider experimenting with different brush tip shapes and dynamics beyond the basic roundness and angle. Explore settings like scattering, texture, and dual brush to achieve unique light patterns. The goal is to create brushes that not only look like lights but also have a naturalistic quality to their emission.
If you are working with images that have strong ambient light or reflections, consider how your added lights would interact with these existing elements. You might need to use additional adjustment layers or blending modes to simulate reflections on surfaces or subtle color casts from nearby objects.
The concept of "first principles" thinking can be applied here by breaking down what makes a light look like a light. It emits from a source, it has a color, it has intensity, it casts a glow, and it can flicker or blink. By addressing each of these components systematically, you can build up a highly realistic effect.
Thinking laterally, consider how these techniques could be applied to non-Christmas contexts. The custom twinkle brushes could be used to create starry skies, magical portals, or even dynamic fire effects, demonstrating the transferable nature of these Photoshop skills.
Considering second and third-order implications, a well-executed animated light effect can significantly increase engagement with your holiday content. This could lead to more shares, likes, and ultimately, a stronger connection with your audience or clients. For photographers, this translates to increased client satisfaction and potentially more bookings for holiday-themed shoots.
To ensure your tutorial is understandable for a wide audience, it's beneficial to explain technical terms clearly and provide visual aids at each stage. For a 5th-grade student, focusing on the "fun" aspect of making lights blink and change color would be key. For a professional photographer, delving into the nuances of color theory, light falloff, and file optimization would be more relevant. The current structure aims to build from foundational steps to more complex animation and refinement, catering to a progressive learning curve.
Avoiding clichés and common misconceptions is also important. For instance, a common misconception is that adding lights simply involves painting white dots. This tutorial emphasizes creating believable light sources and dynamic blinking, moving beyond basic painting to sophisticated manipulation of light and color. Another cliché to avoid is overly simplistic animation, where lights blink uniformly and predictably. Introducing variations in timing, intensity, and color creates a more organic and visually appealing result.
The process of creating these animated Christmas lights is not just about following steps; it's about understanding the underlying principles of light, color, and animation within Photoshop. By mastering these techniques, you can elevate your holiday imagery from ordinary to extraordinary, creating captivating visuals that truly capture the spirit of the season.