In today's interconnected world, artists and creators often juggle multiple devices, from powerful desktops to portable tablets and smartphones. Clip Studio Paint, a leading digital art software, recognizes this reality and offers a robust cloud service designed to streamline creative workflows across these diverse platforms. This service, known as Clip Studio Cloud, aims to eliminate the friction of file management and synchronization, allowing artists to focus on their craft rather than on the logistics of keeping their projects accessible and up-to-date. By leveraging Clip Studio Cloud, users can ensure their work is not only readily available on any device but also securely backed up, providing peace of mind and unparalleled flexibility.
Understanding Clip Studio Cloud Essentials
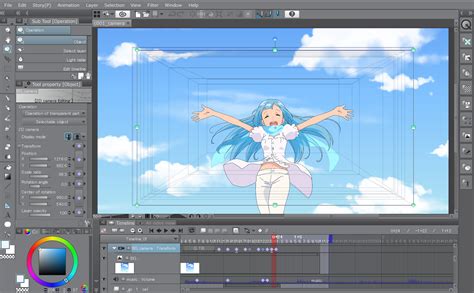
At its core, Clip Studio Cloud is built around the concept of synchronizing your creative assets and application settings across your various devices. To utilize this service, the first and most crucial step is to have a Clip Studio account and ensure you are signed in. Upon launching Clip Studio Paint, you'll be presented with an interface where the top right area typically displays your account status. If you are not logged in, a "Sign In" button will be visible. Adjacent to this, you'll find an icon featuring a cloud symbol and a usage bar. Clicking on this cloud icon is your gateway to the Clip Studio Cloud screen, the central hub for managing your synchronization preferences.
Within this Cloud screen, users have granular control over how and when their work is synchronized. Options are available to set whether your works automatically sync each time you start up Clip Studio, when you log in to your CSP account, or when you shut down the program. This flexibility caters to different user preferences and workflow habits, ensuring that synchronization happens at a point that is least disruptive to the creative process. Beyond just project files, the Cloud screen also allows you to enable or disable the backing up of your Materials library and your application settings. These backups are invaluable for recovering your personalized workspace and essential assets should you encounter hardware issues or transition to a new device.
Once you have adjusted your Cloud settings to your satisfaction, it is imperative to click "Save settings" at the bottom of the screen. This action confirms and applies your chosen configurations.
Managing Your Creative Works with Cloud Sync
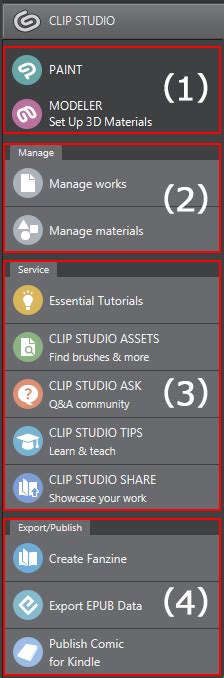
The Clip Studio Cloud service extends its utility to the management of your individual works. After configuring your general cloud settings, navigate to the "Manage works" option, typically found on the left side of the Clip Studio window. This screen presents a visual overview of your latest files, displayed as thumbnails. At the top of the "Manage works" screen, you will find two primary tabs: "This device" and "Cloud."
The "This device" tab provides a clear view of recent works that have been opened or created on the specific device you are currently using. This is particularly helpful for tracking your immediate progress. Conversely, clicking on the "Cloud" tab reveals the files that are currently stored and accessible within the Clip Studio Cloud. If this is your first time using the cloud service, this tab might initially appear empty until you begin uploading files.
Beneath these tabs, Clip Studio Paint offers organizational tools to help you manage your projects efficiently. You'll find several icons and folder options that allow you to sort your works. The "+" icon is particularly useful for adding new folders, enabling you to meticulously organize your projects by specific titles, subject matter, or any other criteria that best suits your workflow. This feature is a significant benefit for users handling numerous projects simultaneously, as it allows for quick and easy retrieval of files related to a particular endeavor. The trash can icon, as one might expect, is used to delete selected folders, providing a straightforward way to declutter your workspace.
Initiating and Monitoring Cloud Synchronization
The process of transferring your work to the cloud is designed to be intuitive. Within the "Manage works" screen, beneath each file preview, you'll find several icons. One of these icons, often depicted as a heart, is part of the synchronization controls. To initiate the sync to the Cloud, locate the file you wish to transfer. You have two primary methods to enable cloud syncing.
The first method involves going to "Switch syncing" and then selecting "Syncing On" for the desired file. A confirmation dialog will appear, asking if you are sure you want to sync this file to the Cloud. Clicking "OK" will commence the process. The second method, often more direct, involves clicking on a toggle switch icon situated to the left of the file preview image. This switch visually indicates the syncing status: a colored-in switch typically signifies that syncing is active, while a grayed-out switch means it is off. Clicking this toggle will switch the syncing to on or off, depending on its current state.
It's important to note that uploading a file to the Cloud can take a few minutes. The duration is influenced by several factors, including the size of the file, the processing power of your hardware, and the speed of your internet connection. Patience during this initial upload is key to ensuring a successful transfer.
Seamless Cross-Device Workflow
The true power of Clip Studio Cloud shines when you need to transition between devices. Imagine you've been working on your desktop at home, and now you're on the go with your tablet or smartphone. Clip Studio Paint's cloud service ensures that your progress isn't lost and that you can pick up exactly where you left off.
For instance, if you've uploaded a project from your desktop to the Cloud, you can then access it on your iPhone or iPad. Upon opening the Clip Studio Paint app on your secondary device, you'll need to sign into your Clip Studio account. Once logged in, navigate to the "Manage works" section. Here, you'll select the "Cloud" tab to view the files that have been synchronized.
To begin working on a file from the cloud on your mobile device, you'll typically tap on an icon that resembles a little cloud with a downward-pointing arrow. This action initiates the download of the file from the cloud to your current device. This download step is necessary before you can actively edit the file. Once the download is complete, the icons beneath the file preview will update to reflect the status and options available on that specific device, mirroring the interface you'd see on your desktop.
Syncing Changes Back to the Cloud
After you've finished working on your mobile device and are ready to return to your primary workstation, the process is reversed. You'll need to save your changes and sync the updated file back to the Cloud. On the mobile app, this usually involves accessing the Menu, navigating to File commands, and then returning to "Manage works" to find the file you've modified. Once the upload to the cloud is complete from your mobile device, you can head back to your desktop.
On your desktop, open the "Manage works" tab. If the changes you made on your mobile device aren't immediately visible, look for a "Sync now" icon. This icon often resembles a cloud with a circular arrow, indicating a refresh or synchronization action. Clicking this will prompt your computer to communicate with the Cloud, downloading the latest version of your file. Once the file is updated, you can double-click to open it in Clip Studio Paint, ready to continue your work.

Beyond Project Files: Backing Up Settings and Materials
Clip Studio Cloud's benefits extend beyond just synchronizing your artwork. A critical, often overlooked, feature is the ability to back up your application settings and Material libraries. This is particularly valuable for maintaining a consistent and personalized working environment across all your devices, regardless of their operating system.
The Cloud screen within Clip Studio Paint provides options to enable automatic backups of your Materials library and application settings. If you prefer not to automate this process, you can also perform manual backups. On the Cloud main screen, you'll find a button labeled "Back up app settings now." Clicking this initiates a manual backup of your current application settings.
It's crucial to be aware of a specific warning associated with manual backups of application settings. Before starting a backup, ensure that Clip Studio Paint itself is not running. If you launch the main application and begin working on art while the settings backup is in progress, the backup process will be aborted. Always wait for the application settings backup to complete before launching Clip Studio Paint. A confirmation dialog will appear, allowing you to proceed with the backup or cancel it to perform it at a later, more opportune time.
The ability to back up and restore application settings can be a lifesaver. If you're restoring your environment on a new device or after a system reinstallation, simply accessing the "Restore app settings" option within the cloud service will bring back your customized window layouts, tool preferences, and other essential configurations.
However, it's important to note some nuances regarding settings synchronization. While window locations can generally be restored across different operating systems, this is more reliably achieved when applying settings across smartphones. Differences in monitor setups or operating system architectures can sometimes lead to settings not being restored perfectly. Furthermore, settings that are intrinsically tied to a specific work environment or file-saving behaviors cannot be synced.
Materials synchronization also has specific considerations. Materials converted from older software versions, such as IllustStudio or Manga Studio 4.0, or specific Japanese-only tone material collections, may not be compatible with the cloud sync. Additionally, if materials rely on brush shapes or textures stored in the Sub Tool Detail settings, and these assets are not present on the device where you are restoring the materials, they may revert to their default settings. Understanding these limitations ensures a smoother experience and avoids potential frustrations.
Storage, Plans, and Accessibility
Clip Studio Paint offers a tiered approach to cloud storage, catering to varying user needs. All users with a Clip Studio account, regardless of their chosen subscription plan for the software itself, are provided with a base of 10 GB of cloud storage at no additional cost. This free tier is a generous starting point for many artists who primarily need to sync essential project files and settings.
For users who require more extensive storage capacity, Clip Studio offers paid plans that significantly increase the available cloud space. These plans typically come in larger increments, such as 100 GB or 300 GB, providing ample room for extensive material libraries, large project files, and numerous backup versions. These storage upgrades are often bundled with or offered as add-ons to the various Clip Studio Paint subscription tiers, which include monthly and annual payment options.
When considering a plan change, it's important to understand how Clip Studio handles the transition. The difference in cost between your current plan and the new plan is calculated on a pro-rated basis, often per second, for the remaining duration of your billing cycle. If this pro-rated calculation results in a negative amount (meaning the new plan is cheaper), that difference is typically granted as a free use period for the new plan. This free period effectively extends your subscription at the new, lower rate. The final date of this granted free period then becomes your new regular payment date.
For users who subscribed through third-party app stores like the App Store, Google Play, or Galaxy Store, the process for managing their plans, including cancellations and upgrades, will follow the specific procedures outlined by those respective platforms. Generally, cancellations do not take effect immediately but rather at the end of the current billing cycle, allowing you to continue using the service until your next scheduled payment date. It's also often possible to undo a cancellation request before it becomes final.
The underlying goal of Clip Studio Cloud is to provide a unified and accessible creative environment. Whether you're working on a powerful Windows PC, a macOS machine, an iPad, or an Android tablet, the cloud service ensures that your project files are compatible and readily available. This cross-platform compatibility eliminates the need for manual file transfers, complex network setups, or reliance on third-party cloud storage solutions that may not be optimized for creative workflows. The company has stated its commitment to continuing to provide and enhance its cloud services, acknowledging the increasing difficulty due to factors like exchange rates and general price increases, while emphasizing their dedication to user convenience.
Conclusion: Embracing a Connected Creative Future
Clip Studio Cloud represents a significant advancement in how digital artists manage their projects and maintain their creative environments. By offering seamless synchronization of works, robust backup capabilities for settings and materials, and flexible storage options, the service empowers creators to work without boundaries. The ability to effortlessly transition between devices, coupled with the security of knowing your valuable assets are safely stored and backed up, allows artists to embrace a truly mobile and connected creative future. This integrated approach not only enhances productivity but also reduces the stress associated with file management, enabling artists to dedicate more time and energy to what they do best: creating.