The process of drawing panels for your comic might seem a little intimidating when you first try it out in CLIP STUDIO Paint. We all feel that way. Once you get used to it, you’ll be flying around. CLIP Studio Paint (CSP) offers robust tools for comic creation, and understanding its grid and paneling system is fundamental to efficient workflow. This guide will delve into the intricacies of creating panels, leveraging both built-in features and manual drawing techniques, ensuring you can slice and dice your pages precisely as you see fit.
The Frame Border Tool: Your Primary Panel Creation Instrument
CLIP Studio Paint provides a dedicated tool for creating comic panels: the Frame Border tool. This tool is your gateway to defining the boundaries of your narrative space, and it offers a surprising amount of flexibility. To begin, locate the Frame Border tool in your Sub Tool panel. It's easily identifiable by its icon, which often depicts a miniature comic page with borders.

Every tool in CSP comes with a set of options that can be customized in the Settings and Sub Tool Panels. The Frame Border tool is no exception. Within the Sub Tool panel, you can select how you wish to initiate the creation of a frame. Your options include drawing a precise rectangle, a polyline for more angular designs, or a freehand shape for organic panel layouts. This choice dictates the fundamental behavior of the tool as you draw.
Beyond the drawing method, the Settings tab for the Frame Border tool offers crucial post-drawing configurations. Here, you can decide whether to automatically create a new folder for your panel's contents, which is highly recommended for organization. You can also specify whether to draw a visible frame border itself, and if so, define its color and thickness. Furthermore, you can choose whether the panel area should be a raster layer or not, and if you want to fill the newly created frame with a specific color. This last option is particularly useful as it can add a new paper color layer, effectively setting a background for your panel.
Leveraging the Grid for Precision and Consistency
While the Frame Border tool is excellent for manual drawing, CLIP Studio Paint also provides powerful grid functionalities that can significantly enhance your panel creation process. The ruler bar, which typically appears by default when a canvas window is open, displays measurements along the top and left edges of your canvas. To toggle the visibility of the ruler bar, navigate to View > Ruler bar.
By default, the zero point of these rulers is located at the top-left corner of the canvas, and the unit of measurement is millimeters (mm). You have the flexibility to alter the starting position of these rulers through View > Grid/Ruler Bar Settings. Additionally, the "Move layer" > Move grid sub tool can be employed to precisely adjust the canvas ruler.
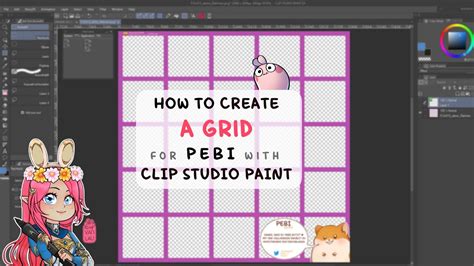
For a more structured approach to layout, CLIP Studio Paint allows you to create a quick grid overlay. Access this feature via View > Grid. Similar to the rulers, the grid by default starts at the top-left of the canvas. The default grid size is set to 10.00 mm with 4 divisions. However, you can easily customize both the starting position and the grid size within the View > Grid/Ruler Bar Settings menu.
The true power of the grid lies in its snapping capabilities. When the grid is visible, you can draw while snapping your lines and shapes to its intersections and divisions. This is invaluable for creating perfectly aligned panels, ensuring consistency across your comic pages. If you are also using a perspective ruler grid, you can even toggle whether or not to snap to that perspective grid, allowing for complex, multi-dimensional layouts.
Advanced Panel Techniques and Considerations
Beyond the basic frame creation, CLIP Studio Paint offers advanced options for refining your panels. For instance, when using the Frame Border tool, you can hold down the Shift key while drawing a rectangle to constrain it to a perfect square or to draw perfectly horizontal or vertical lines. Similarly, holding Alt can allow you to draw from the center outwards.
The "Divide Frame" option within the Frame Border tool's sub-tool options is another incredibly useful feature. After drawing a larger frame, you can use this to subdivide it into smaller panels with a single click or drag. This is perfect for creating sequences of smaller panels within a larger narrative block.
How to make comic panels in seconds! | Vampbyte
It's also worth noting the distinction between raster and vector layers in CLIP Studio Paint. When creating panels, you can choose whether the drawn frame itself resides on a raster layer or a vector layer. Vector layers offer the significant advantage of being resolution-independent, meaning you can scale and transform them without any loss of quality. This is crucial for maintaining crisp lines, especially if you plan to print your comic at various sizes.
The "Create folder" option, when enabled, automatically places the contents of your panel within a designated folder. This folder acts as a mask, ensuring that any drawing or element you place inside it will only be visible within the boundaries of that panel. This is a fundamental aspect of comic panel workflow, allowing for intricate backgrounds and character placement without them spilling over into adjacent panels.
Understanding the User Interface and Settings
CLIP Studio Paint's interface can seem dense at first, but understanding its core components is key to efficient use. The Sub Tool panel houses all your drawing and editing tools, while the Tool Settings panel, typically located beneath the Sub Tool panel, displays the specific options for the currently selected tool. The main canvas area is where you'll do your work, and the menu bar at the top provides access to a wide range of commands and settings.
The View menu is your central hub for controlling canvas display elements like rulers, grids, and guides. Within View > Grid/Ruler Bar Settings, you gain granular control over the appearance and behavior of these essential layout aids. Experimenting with these settings is highly encouraged to find a setup that best suits your personal workflow.
It's also important to be aware of how CLIP Studio Paint handles user data and support. Information like "Replies sent from Celsys are only for individual customers’ use" suggests a focus on personalized support and community interaction. The mention of "MVPs" and "Moderators" indicates a community-driven support system where experienced users and official staff contribute to assisting others. However, it's crucial to remember that "Moderators are not experts on the software or illustration, so they are not able to directly answer your questions." This means while the community is a valuable resource, direct technical support might require seeking official channels.
Beyond the Basics: Workflow and Optimization
As you become more comfortable with CLIP Studio Paint's paneling tools, consider how they integrate into your overall comic creation workflow. For instance, setting up default canvas sizes and resolution appropriate for your intended output (webcomic, print publication) can save considerable time later on. You can also save custom tool presets for the Frame Border tool, allowing you to quickly access your preferred settings for different types of panels.
The ability to "slice and dice the page as you see fit" is the core principle. Whether you're creating a dynamic, action-packed spread with irregularly shaped panels or a structured, grid-based layout, CLIP Studio Paint provides the tools to achieve your vision. Don't be afraid to experiment with the freehand and polyline options for unique panel shapes that can enhance the storytelling and visual flow of your comic.
Remember that practice is key. The more you work with the Frame Border tool, the grid, and the various layer options, the more intuitive panel creation will become. Each new comic project will present opportunities to refine your process and discover new ways to utilize CLIP Studio Paint's powerful features. The initial intimidation will fade, replaced by a confident command of your digital comic-making environment.