The allure of retro gaming graphics, with their charmingly pixelated aesthetic, has seen a significant resurgence in modern digital art. From the iconic environments of classic adventure games like Monkey Island and Indiana Jones and the Fate of Atlantis to the gritty realism of Full Throttle, pixel art offers a unique blend of nostalgia and contemporary appeal. While limitations in early graphics technology dictated this style, today, a pixelated look is often a deliberate artistic choice. This tutorial will guide you through the process of creating a distinctive pixel art environment using Clip Studio Paint, suitable for concept art or final illustrations in video games.
Why Clip Studio Paint for Pixel Art?
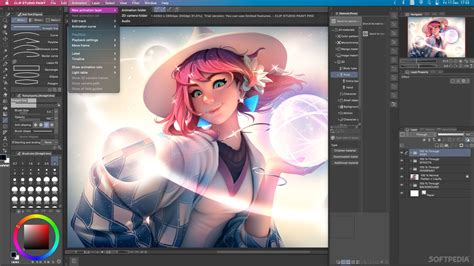
Clip Studio Paint, originally known as Manga Studio 5, is a versatile software designed for digital painting, illustration, and comic creation. Its robust feature set makes it an excellent choice for pixel art, offering a powerful brush engine with stabilizers, a wide array of built-in brushes (watercolors, oils, pencils, markers), gradient maps, and sophisticated layer blending modes. For pixel art specifically, Clip Studio Paint provides:
- Perspective Rulers: Essential for creating realistic and well-proportioned illustrations.
- 3D Models: Customizable figures that can be posed to achieve perfect anatomy and posture, serving as excellent reference for pixel art characters or elements.
- AI Coloring Mode (in development): A promising feature that could rapidly color images with a few brushstrokes.
- Smart Fill Bucket Tool: Automatically closes gaps in line art, a crucial time-saver.
- Vector Pen Tool: Mimics the natural feel of a traditional pencil.
While comparable to Photoshop in power, Clip Studio Paint is often considered more intuitive and easier to learn. It's also more budget-friendly, with perpetual licenses available for around $50 for the Pro version and $220 for the EX version, which includes additional features for animation and manga. Furthermore, Clip Studio Paint is compatible with Android tablets and smartphones and can open Photoshop files, ensuring a smooth workflow.
Setting Up Clip Studio Paint for Pixel Art
Before diving into the creative process, proper setup is key to achieving crisp, pixel-accurate results. These steps apply to both Clip Studio Paint Pro and EX.
Canvas Size and Resolution
Begin by creating a new illustration. For a classic retro feel that still allows for detail, set the canvas size to 256 x 128 pixels with a resolution of 72 dpi. This provides a 2:1 aspect ratio, ideal for many environmental pieces. While pixel art resolutions can vary widely from 600 x 400 px down to much smaller dimensions, this size offers a good balance for this tutorial.
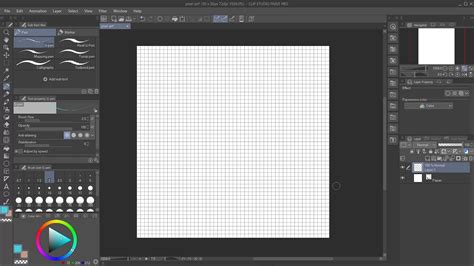
Grid Settings
A 1 x 1 pixel grid is invaluable for precise pixel placement, especially during the polishing phase. Navigate to View > Grid Settings. In the grid settings dialog, set both the Gap and Number of divisions to 1 pixel. You can toggle the grid on and off using View > Grid.
Customizing Brushes for Hard Edges
For pixel art, it’s crucial to have brushes with hard edges and no anti-aliasing to ensure each pixel is distinctly controlled.
- Fill-in Mono Pen: In the
Pen Sub Toolpanel, select theFill-in mono penunder theMarkerssection. - Disable Anti-aliasing: Ensure that
Anti-aliasingis turned off in the Sub Tool's settings.
While anti-aliasing is generally avoided for sharp pixel art, it's worth noting that color gradations and softer edges are not strictly forbidden and can be used depending on the desired artistic outcome.
Setting Up the Eraser
The default eraser may not offer the crisp pixel removal required for pixel art. Select the Hard eraser and ensure its Anti-aliasing is also turned off. This guarantees that erased pixels are removed cleanly, without any residual softening.

Creating a Custom Organic Textured Brush
To add organic textures for elements like foliage, rocks, or terrain, a custom brush is beneficial.
- Create Texture: Open a new document (approximately 200 x 200 pixels) and paint an organic texture shape or paste a pre-existing texture.
- Set Expression Mode: In the
Layer Propertiespanel, set theExpression modetoGray. This is vital for the custom brush to function correctly. - Register as Material: Go to
Edit > Register as material > Image. - Material Properties: In the
Material Propertiesdialog, checkUse for Brush Tip Shapeand clickOKto save the texture to your Material Library. - Duplicate Brush: Return to the
Pen Sub Toolpanel, right-click on yourFill-in mono pen, chooseDuplicate sub tool, and name it (e.g., "Organic Pixel Brush"). - Edit Brush Tip: On the new sub-tool, click the wrench icon to open the
Sub Tool Detailpanel. Navigate toBrush Tip, selectMaterialas theTip shape, and clickAdd brush tip shape. - Assign Material: Choose the texture material you just registered.
- Adjust Spray Properties: Within the
Sub Tool Detailpanel, fine-tune theSpray propertiesto achieve a slightly random and organic feel suitable for various environmental elements.
Test your new custom brush to ensure it produces the desired organic effect.
Preparing Selection Tools
Finally, ensure your selection tools are also set for pixel-accurate work. Set the Lasso, Polyline, and Pen selection tools to No anti-aliasing.

With these preparations complete, your Clip Studio Paint workspace is optimized for creating pixel art.
Choosing a Color Palette
A well-planned color palette is fundamental to successful pixel art, contributing to a balanced and cohesive feel. Historically, color limitations were imposed by video hardware like EGA (16 colors) and VGA (256 colors). A constrained palette not only evokes a retro aesthetic but also aids in unifying the artwork.
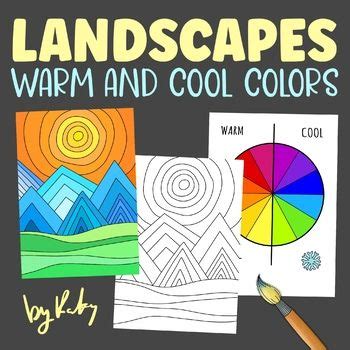
For this tutorial, we'll adopt a dual, warm-cool palette. Instead of using a continuous gradient, we'll select specific color swatches. Imagine creating four gradients in Clip Studio Paint: blue, red, orange, and yellow, each progressing from dark to light. From these, we’ll sample key tones - for instance, three red, orange, and yellow tones, and seven blue tones - to build an initial 16-color palette.

This palette serves as a guideline; as the artwork progresses, intermediate shades and subtle variations can be introduced to add depth and complexity.
The First Sketch: Laying the Foundation
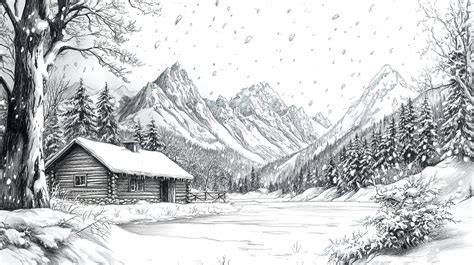
With the tools and palette ready, we can begin sketching. The initial sketch should focus on composition, light, and basic shapes, remaining largely monochromatic and limited to about three or four light values. For a snow-covered landscape, we’ll start with cool colors.
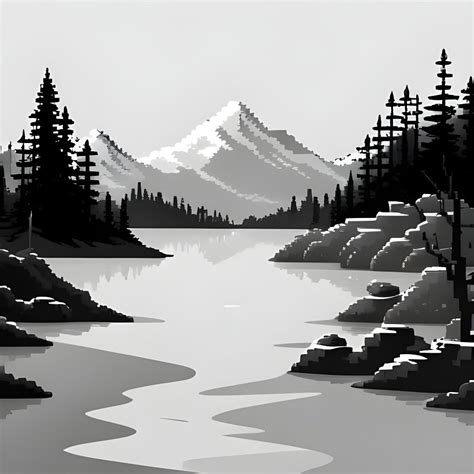
Using the Fill-in-mono pen with hard edges, create a simple, blocky structure. Gradually carve out details, maintaining simplicity.

Continue adding depth and detail to various areas.
Now, introduce rough, flat areas of warm color.
The primary focus points will be a house in the upper right and a traveler in the lower left. These areas will utilize warm colors to contrast with the predominantly cool environment, drawing the viewer's eye.
Refining Your Pixel Art Environment
Once the initial sketch is established, it's time to gradually polish and add detail, moving between different areas to avoid overworking any single section.
Begin by adding detail to the house and foreground elements.
Continue refining the house and the trees in the background.
Next, add details to the center-back and left trees. This is where the custom "organic textured" pixel brush can be employed to impart a more natural feel to these elements.

Apply the organic brush to foreground and midground bushes as well.
As the image evolves, you'll notice it approaching a finished state. Continue working around the canvas, adding foliage, organic ground shapes, and refining the sky.
At this stage, enhance the house with richer reds, oranges, and yellows. This is where you can deviate slightly from the strict limited palette, introducing intermediate shades to add depth, texture, and character to key elements.
Further detailed work on the house, snow, and sky will bring more polish.
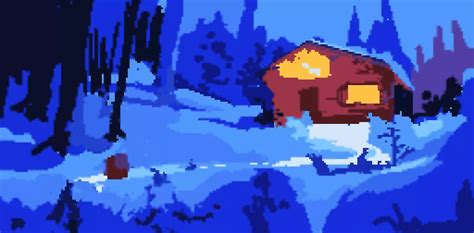
Finally, introduce the character carrying a candlelight in the foreground and perform final touches on the house and other areas. For the candlelight, layer blending modes like Screen can be used to achieve the transparency and glow of firelight.
Final Result
The culmination of this process is a detailed pixel art environment, crafted with precision and artistic intent.
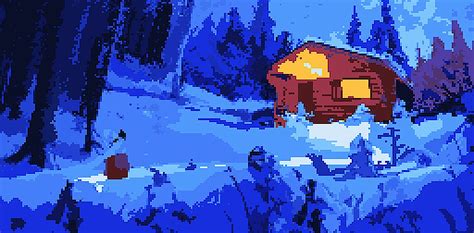
Throughout this creation, a progression from sharp, rough edges in the sketching phase to more subtle, softer edges and the use of layer blending modes as the composition advanced is evident. This transition from simple to complex is a core technique for building a compelling pixel art environment.
Fundamental Principles of Pixel Art Creation
The resurgence of retro visual styles in the era of high-resolution 3D graphics highlights the enduring appeal of pixel art. This technique can produce stunning visual effects that stand out in video games and as standalone art pieces. The methods discussed here are applicable to various pixel art forms, including isometric environments, top-down scenes, characters, and 2D backgrounds for games like Metroidvanias.
The core tenets remain consistent:
- Pixel-Accurate Brushes: Utilizing brushes that maintain hard edges and avoid anti-aliasing is paramount.
- Controlled Edges: Each pixel must be intentionally placed.
- Color Palette Constraints: Mimicking the limited color palettes of historical hardware (EGA, VGA) helps achieve the authentic retro look.

Creating low-resolution images involves embracing limitations, which can be a challenging yet highly rewarding learning experience. Understanding how these constraints influence artistic choices can lead to a deeper appreciation for the craft.
Pixel Art Explained SIMPLY In Clip Studio Paint!
The journey of pixel art is one of deliberate choices, where simplicity is amplified through meticulous pixel placement. By mastering these techniques, artists can unlock the potential to visualize new worlds and bring them to life, one pixel at a time.
Understanding Brush Dynamics and Settings in Clip Studio Paint
Beyond the fundamental setup for pixel art, a deeper understanding of Clip Studio Paint's brush engine can unlock further creative possibilities. While the core principles of pixel art often emphasize hard edges, exploring brush dynamics can inform more nuanced approaches, especially when creating custom brushes or working with different styles.
Brush Size Dynamics: This setting allows for variations in brush stroke thickness based on factors like pen pressure or tilt. For instance, setting the minimum brush stroke size to zero when applying light pressure creates a tapering effect, mimicking traditional drawing tools. Increasing the minimum value can effectively disable pen pressure sensitivity, ensuring consistent stroke width regardless of pressure.
Tilt Settings: Mimicking the behavior of traditional pencils, tilt sensitivity can alter brush appearance based on the angle of the stylus. Tilting a pencil causes more of its surface to contact the paper, resulting in a darker, broader stroke. Adjusting these values allows for the replication of this realistic effect.
Brush Velocity: This parameter influences how a brush stroke looks based on the speed at which you draw. Faster strokes might appear thinner or less opaque, while slower strokes could be bolder.
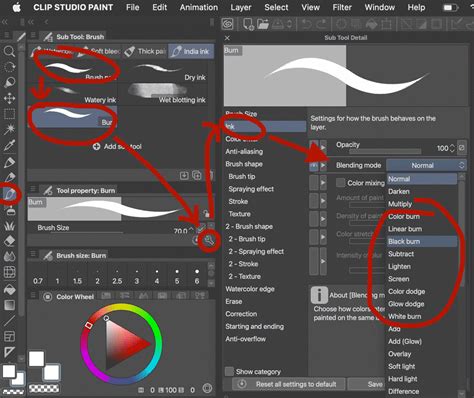
Blending Modes: The blending mode of a brush affects how it interacts with existing colors on the canvas. For example, reducing the "Amount of paint" can make a brush's color less noticeable initially, gradually becoming stronger with repeated strokes, similar to building up pigment.
Anti-aliasing: As previously discussed, a brush with strong anti-aliasing will have smooth, soft edges, whereas a brush with weak or no anti-aliasing will produce harder, more pixelated edges when zoomed in. This is critical for pixel art where sharp definition is often desired.
Brush Tip Settings: This is arguably one of the most crucial areas for brush customization. The Material setting allows you to use custom shapes or textures as your brush tip. This is key to creating unique brushes, including the organic textured brush discussed earlier. You can also control the angle at which brush tips rotate, though this is more noticeable with non-circular tips or when thickness varies significantly.
Brush Density: Similar to opacity, density controls the transparency of the brush stroke. However, density can build up gradually with repeated strokes in the same area, even without lifting the pen, creating a layered effect.
Particle Settings: For brushes designed to create effects like spray or texture, particle settings are vital. You can adjust the particle size, density, spray deviation, and direction to control the spread and randomness of the effect. The Gap setting determines the spacing between these particles (wide, normal, or narrow), and the Continuous spraying option allows paint to build up when the pen is held stationary. The Ribbon effect is a specialized option available when using material brush tips.
Texture Settings: This feature allows you to add texture to your brushes, influencing how they appear on the canvas. You can adjust Texture density to control the visibility of the texture.

Experimenting with these settings is the best way to understand their impact. Starting with basic settings like Ink, Brush tip, and Textures, and gradually exploring others, will build a comprehensive understanding.
Creating a Custom Pencil Brush for Sketching
A practical application of these settings is creating a custom pencil brush for sketching.
- Draw Brush Tip: Create a new project and draw the desired shape for your brush tip.
- Convert to Gray: Right-click on the layer and select
Convert layer, changing theExpression colortoGray. - Register Material: Hide the default paper and layer 1, then go to
Edit > Register material > Image material. - Add New Brush: Create a new brush by clicking the
Add from defaultoption next to the sub-tool panel, and select theG-penunder thePencategory. - Adjust Dynamics: In the brush settings, activate
Pen pressureandTiltforBrush sizeand adjust the values slightly. - Modify Gap: Increase the
Gapbetween brush tips by a small amount to achieve a more natural, slightly textured pencil stroke.
This custom pencil brush can then be used for the initial sketching phase of your pixel art projects.
Advanced Concepts: Jaggies, Doubles, and Sprite Sheets
When moving beyond environments to character creation or animation, specific concepts become crucial.
Jaggies and Doubles: In pixel art, "jaggies" refer to the stair-step effect that occurs on diagonal lines when pixels don't align perfectly. "Doubles" are a technique where two pixels of the same color are placed adjacent to each other, often used to create a sense of rigidity or sharpness. Understanding these concepts helps in creating clean and deliberate line art.
Line Art Refinement: After a well-defined sketch, the line art stage requires careful attention to these principles. For pixel art characters, the line work should be precise, avoiding unintended anti-aliasing and maintaining consistent pixel placement.
Coloring Techniques: When coloring, start by defining the basic silhouette of your character with flat colors. Use contrasting colors to separate shapes effectively. For shading, two different tones can be used for soft and intense shadows. Adding "bounce light" - light reflecting from surfaces back onto the object - can enhance realism, often achieved by picking the background color and tweaking it.
Sprite Sheets for Animation: For character animation in video games, sprites are arranged into "Sprite Sheets." These are single images containing all the frames of an animation, laid out in a grid. Setting up an animation canvas in Clip Studio Paint involves defining the sprite dimensions (e.g., 180px by 90px) and frame rate. Sprites are then imported onto separate layers and arranged chronologically on the timeline. Numbering sprites sequentially is essential for organization.
Breaking the Rules: While many pixel art techniques emphasize precision and limitations, some styles encourage a more freehand approach. As long as anti-aliasing and blending are avoided, even thick brushes with irregularities can be used effectively, especially before applying line art and color.
Scaling and Interpolation: When scaling pixel art, the Interpolation method in Clip Studio Paint can minimize pixel smoothing. However, if the original pixel art was created at a low resolution, scaling it up will inevitably result in blurriness if not handled carefully, as pixel art relies on clarity and intention.
Ultimately, pixel art is built on clarity, intention, and simplicity. This guide has introduced various methods and workflows, encouraging exploration into how different styles can communicate effectively within the constraints of limited space and resolution.