Photopea, a free and powerful online photo editor, offers a robust set of tools for both beginners and advanced users. Among its most crucial features are the selection and color manipulation tools, which are essential for any image editing task. This tutorial delves into the intricacies of Photopea's color picker and related selection tools, providing a step-by-step guide to effectively changing colors and creating harmonious palettes.
Understanding Photopea's Toolbar and Panels
Before diving into color selection, it's vital to familiarize yourself with Photopea's interface. The software is structured around a familiar layout, mirroring many aspects of desktop photo editing applications.
- Toolbar: Located on the left side of the screen, this is where you'll find all the primary editing tools. Many tools have sub-tools, indicated by a small gray arrow in the corner of the icon. Clicking and holding these icons reveals the hidden options.
- Panels: On the right side, you'll typically find panels like Layers, Adjustments, Color Channels, Color Picker, Color Swatches, and History. These panels provide crucial information and controls for your editing workflow. The Layers panel, in particular, is fundamental, as Photopea, like Photoshop, operates on a system of layers. Each new object, image, or text added creates a new layer, allowing for non-destructive editing.
- Menus: At the top, standard menus like File, Edit, Image, Layer, Select, Filter, and Window provide access to a wide array of commands and settings.
The toolbar is where a significant portion of your time will be spent when learning Photopea. Understanding the function of each tool and its associated sub-tools is a necessity for anyone serious about photo editing.
Navigating Selection Tools for Precise Color Targeting
Selecting specific areas of an image is often the first step before applying color changes or adjustments. Photopea offers a variety of selection tools, each suited for different scenarios.
The Magic Wand and Quick Selection Tools
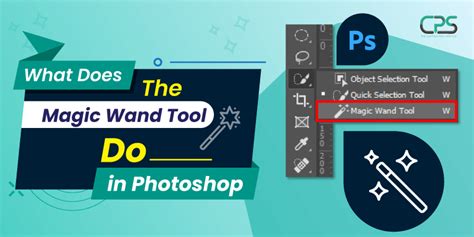
The Magic Wand tool is designed to select pixels with similar colors. Its effectiveness can be enhanced by understanding the Contiguous mode option. When Contiguous is enabled, the tool selects only connected pixels of similar color to the source pixel. This is particularly useful for isolating solid blocks of color.
The Quick Selection tool aims to improve upon the Magic Wand's speed and ease of use. It allows users to draw strokes over an area, and Photopea intelligently analyzes the image to deduce the selection. When in Subtract mode, these strokes are drawn using black, effectively removing areas from an existing selection. This tool can be incredibly time-saving for complex selections.
The Color Range Tool: Pinpointing Specific Hues
For directly targeting specific colors, the Color Range command is invaluable. Accessible via Select > Color Range, this feature opens a window that previews your selection. The brightness of pixels in the preview corresponds to the degree of their selection. This means lighter areas are more strongly selected, while darker areas are less so. This tool allows you to select a specific color from the image with remarkable precision.
Other Essential Selection Tools
- Rectangle and Ellipse Select Tools: These tools allow for straightforward rectangular and oval selections, respectively. They are fundamental for basic area selection.
- Lasso Tools: The standard Lasso tool enables freehand drawing of selections. The Polygonal Lasso tool creates selections with straight lines by clicking to create anchor points. The Magnetic Lasso tool attempts to automatically snap to the edges of objects by detecting color and contrast differences, which is incredibly useful when a precise moving device like a mouse is used. However, it can sometimes struggle with closely related colors, leading to selection wandering. In such cases, zooming in and using the subtract mode with a regular lasso tool can refine the selection.
- Object Selection Tool: This relatively newer tool aims to select entire objects within a layer with a single click or by drawing a simple bounding box around the desired object. It often incorporates a feathering option for smoother edges.
Modifying Shapes and Their Colors
Photopea isn't just for photo retouching; it's also a capable tool for graphic design, including creating and modifying shapes. The process of changing a shape's color is straightforward.
- Create a Shape: From the Toolbar, click and hold the shape tool icon (e.g., the Rectangle Shape tool) to reveal other options. Select the desired shape.
- Draw the Shape: Click and drag on the artboard to create your shape.
- Change Fill Color: With the shape layer selected, click on the Fill Color Box in the top options bar.
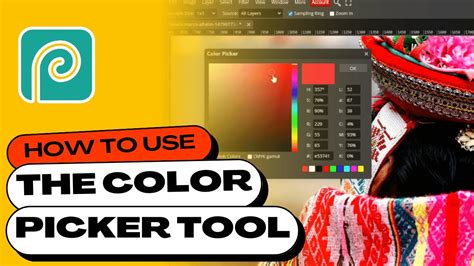
- Customize Color: The Fill Color window will open. Here, you can choose a fill type or directly click the Color Box for a more detailed selection.
- Color Picker: The Color Picker window then appears, allowing you to precisely customize your color using sliders, color fields, and input values. Press "OK" after selecting your desired color.
Photopea How To Change Color Of Shape
The Art and Science of Color Selection: Beyond Basic Picking
While the direct color picker is essential, understanding color theory and how to create harmonious color schemes can elevate your work significantly. Many resources focus heavily on abstract color theory, which can be overwhelming and impractical for immediate application. The true goal for most users is to simply "pick colors that look good together."
Photopea's interface, along with external tools and understanding color relationships, can facilitate this. The concept of a "key color" is central to building a balanced palette.
Building Harmonious Color Palettes
A well-designed color picker tool can guide you in selecting colors that naturally complement each other. Such a tool might work by:
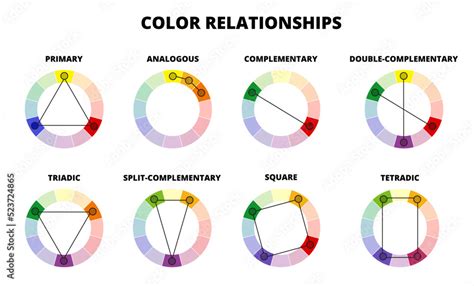
- Identifying a Key Color: You select a primary color, which acts as the "home" or "key" color for your scheme.
- Analogous Colors: Pointers can then indicate analogous colors - those that are adjacent to the key color on the color wheel. These colors share a similar hue and can be used to enhance or subtly modify the key color's appearance without drastically changing its identity. They offer a range of values and saturations.
- Split-Complementary Colors: Opposite the key color on the wheel, secondary pointers can suggest split-complementary colors. These are the colors on either side of the key color's direct complement. This combination offers strong visual contrast but is generally easier to manage than a true complementary pair, creating an "easy harmony." Colors suggested here might be limited to desaturated forms to maintain balance.
- Accent Colors (True Complementary): For added "pop," additional pointers can indicate a true complementary pair to the key color. However, to maintain harmony, these might also be presented in desaturated forms, adding subtle accents rather than overpowering the primary colors.
By using such a system, you can generate a palette of dozens of individual yet harmonious colors that work together effectively. It's important to remember that you don't need to use every suggested color; the goal is to have a rich selection from which to choose.
Essential Photopea Tools for Color Manipulation and Refinement
Beyond selection, Photopea offers a suite of tools for adjusting and refining colors.
Adjustment Tools
- Brightness and Contrast: Essential for correcting exposure issues or enhancing the mood of an image.
- Hue and Saturation: Allows you to alter the color tones and the intensity of colors within an image.
- Curves: A more advanced tool offering precise control over tonal range and color balance.
Retouching and Repair Tools
- Clone Stamp Tool: This tool is invaluable for duplicating areas of an image to cover blemishes, unwanted objects, or repair damage. It functions by sampling pixels from one area and painting them onto another.
- Eraser Tools: Photopea features three distinct eraser tools:
- Eraser Tool: Acts like a brush, removing pixels.
- Background Eraser Tool: Designed to remove colors similar to the selected background color, with a tolerance option to control the range of similar colors removed.
- Magic Eraser Tool: Offers a single-click removal of pixels of a similar color, with an option to keep the selection contiguous or apply it to the entire layer.
Brush and Gradient Tools
- Brush Tool: Extremely versatile, the brush tool can simulate various real-world brushes. Its options allow control over size, color, shape, opacity, flow, and smoothness, making it suitable for both building compositions from scratch and adding details to existing images. Photopea also supports importing custom brushes.
- Paint Bucket Tool: Fills a contiguous area or a selection with a solid color or pattern. The tolerance setting determines how many similar pixels are affected.
- Gradient Tool: Allows for the creation of smooth or abrupt color transitions between multiple colors. This is perfect for creating effects like sunsets or modifying the color of water in an image.
Other Useful Tools
- Crop Tool: Used for trimming the edges of an image or resizing the canvas. The Perspective Crop tool offers more advanced control, allowing for adjustments to corners and creating non-rectangular crops, though caution is advised as it can distort the image.
- Zoom Tool: Enables easy zooming in and out of an image for detailed inspection. Keyboard shortcuts (like CTRL + middle mouse button) and context menu options provide further zoom control.
Understanding Color Pickers in the Toolbar
The toolbar prominently features two color picker tools, often displayed as black and white squares. These represent the foreground and background colors.
- Foreground/Background Colors: These squares indicate the currently selected colors for painting, filling, and other color-related actions. Clicking on them opens the Color Picker window.
- Swapping Colors: The small arrow icon between the color squares allows you to quickly swap the foreground and background colors. This is useful for quickly switching between painting and erasing or applying different color effects.
- Default Colors: Clicking the small black and white squares resets the foreground color to black and the background color to white.
While these serve as primary color selectors, the true power of color selection lies in understanding how these colors interact within the broader editing context and how to use tools like Color Range and the various selection methods to isolate and modify specific hues. Photopea's comprehensive suite of tools empowers users to achieve precise color control, from simple shape fills to complex image manipulations.