Fonts are powerful tools for everyone - whether you’re a beginner, working on a one-off project, or a full-fledged graphic designer. They play a big part in design customization as well as creative projects. A font can boost the visibility of your product or design to your audience. Photoshop, a leading graphic design software, offers a robust environment for manipulating text and integrating fonts seamlessly into your creative workflow. Understanding how to effectively use and manage fonts within Photoshop is crucial for achieving professional and impactful designs.
There are preloaded fonts available in Photoshop, but you also have the flexibility to download and install new fonts to expand your creative palette. These can include fun and unique fonts, with some containing additional glyphs that offer further customization options. This tutorial will guide you through the process of using your installed fonts in Adobe Photoshop, from basic text entry to advanced adjustments.
Installing and Activating Fonts for Photoshop
Before you can use a new font in Photoshop, it must be installed on your operating system and activated for use. The process for adding a font on a Mac is as simple as downloading the file and clicking a few options. For Windows users, the process typically involves right-clicking the font file and selecting "Install." If you need some directions on how to do this, feel free to follow our tutorial on how to install fonts.
Once installed on your computer, Photoshop uses fonts that users have activated on their computers. For example, one user creates a document that uses the font Futura. They then share it with a friend whose computer does not have that font; the friend will not be able to see or use Futura correctly in their version of Photoshop.
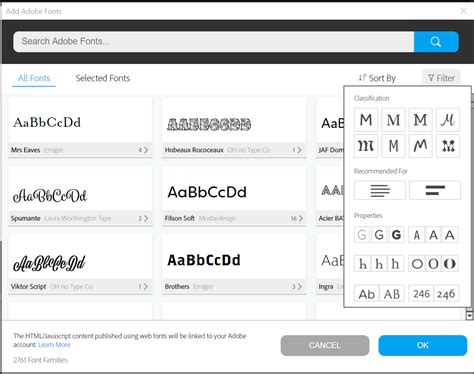
Adobe Fonts offers a vast library of thousands of fonts as part of the Creative Cloud subscription. These fonts are licensed for personal and commercial use, although some exclusions apply, such as when using fonts in mobile or desktop applications. It’s never been easier to add fonts to Photoshop. All fonts in active use are available in the My Adobe Fonts section of your user profile. Active fonts describe those activated through Creative Cloud. You can go to the Active Fonts tab to manage your current and previously installed fonts. You have a few options when deactivating fonts. You can use the Deactivate switch next to a font-family name to remove that entire family, or you can use the switch next to individual font styles to remove a single font. Note that we keep track of fonts already used under the Previously Active tab.
The most common Photoshop fonts are Arial, Calibri, Verdana, Times New Roman, and Georgia. They're all considered “web-safe” fonts because they're widely available on almost all computers and devices, ensuring consistency across different platforms. Other commonly used Photoshop fonts include Helvetica, Tahoma, and Trebuchet MS.
Creating and Editing Text in Photoshop
Step 1 - Add Text and Select Your Font
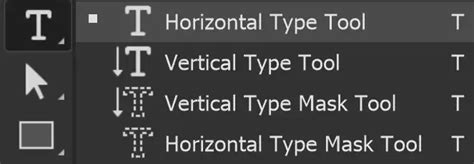
First, you need to make sure that the font you wish to use has been unzipped and installed on your computer. Open Photoshop and either create a new document or open an existing one. Select the Horizontal Type tool (T) from the toolbar, which looks like a capital 'T'. Click inside the canvas where you want your text to appear.
Next, type out your desired text. Once your text is entered, you can select it by clicking on the font drop-down menu from the top bar and choosing the font you want to use from the list of installed and activated fonts.
Step 2 - Adjust Your Text
Once you have typed out the text, you can make a variety of adjustments directly from the top menu bar. These include modifying the font family, size, style (e.g., bold, italic), orientation, anti-aliasing (which affects how text edges are rendered to reduce jaggedness), and color.
For more granular control over your text, you can open the Character panel. You can access this by going to Window > Character in the Photoshop menu, or by clicking on the small icon on the top menu bar that often looks like a small "A" with lines next to it.
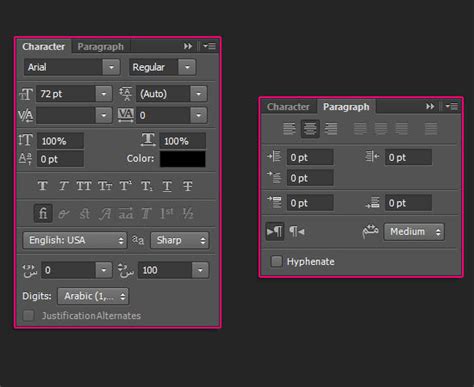
One of the key adjustments available in the Character panel is "Leading," which controls the amount of vertical space between lines of type. This is particularly useful when you have multiple lines of text and want to fine-tune their spacing for readability.
The "Tracking" option controls the amount of horizontal space between a range of letters or characters. Adjusting tracking can help improve the overall visual appeal and legibility of your text, especially for headlines or short phrases.
If your chosen font has extra glyphs or decorative swashes, you can explore these using the Glyphs panel (Window > Glyphs). We have a guide on using glyphs in Photoshop that can provide more in-depth instructions on how to access and implement these unique characters.
Using Photoshop's Glyph Palette to Access Special Characters
Exploring Advanced Text Effects in Photoshop
Beyond basic text manipulation, Photoshop excels at creating sophisticated and eye-catching text effects. These effects can transform simple typography into a design element that complements and enhances your overall project.
Classic and Elegant Text Effects
Classic, simple, and elegant text effects don’t go out of style. These often involve subtle use of layer styles such as drop shadows, inner shadows, bevels, and gradients. The Mia Charro Graphics Bundle by TheHungryJPEG.com, for example, includes 12 of Mia’s fantastic products, some of which may offer inspiration or pre-made elements for creating sophisticated text designs. Using textures with layer styles is a great way of achieving some cool effects, allowing you to apply intricate patterns or surfaces to your text.

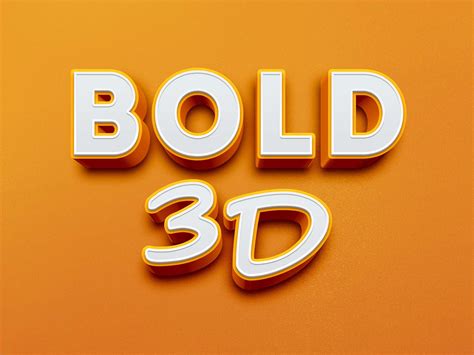
The Power of 3D Text
The use of 3D text is a great addition to almost any design project. Photoshop provides tools and techniques to create convincing 3D effects, adding depth and dimension to your typography. This can range from simple extrusions to more complex lighting and material simulations. If you liked this tutorial, make sure to check out our guides on how to create a hollow 3D text effect in Adobe Photoshop.
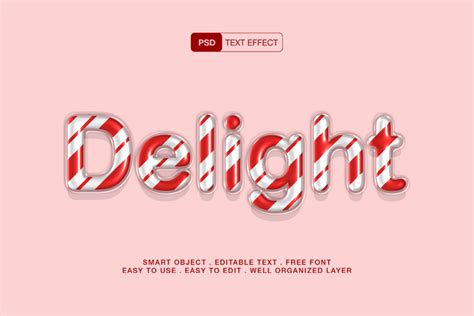
Seasonal and Thematic Text Effects
Photoshop is ideal for creating thematic text effects that align with specific seasons or events. For instance, it’s December, and it’s time for an awesome candy cane text effect! These effects often involve creative use of brushes, patterns, and layer blending modes to mimic real-world textures and appearances.
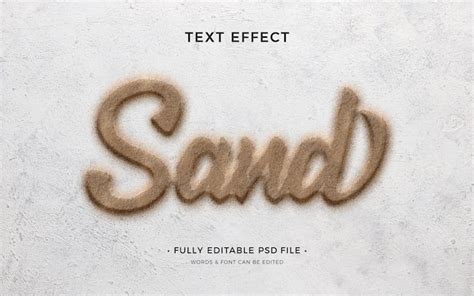
Summery and Natural Textures
You can also create more organic and natural-looking text effects. For example, you can create a summery sand writing text effect from scratch in Adobe Photoshop. This type of effect often involves manipulating textures and using brushes to simulate the look of sand, water, or other natural elements.
Font Styles and Design Applications
The choice of font significantly impacts the overall mood and message of a design. Light or thin fonts are commonly used in minimal and clean designs, conveying a sense of sophistication and simplicity. Their delicate appearance can make a design feel airy and uncluttered.

Conversely, bolder or more decorative fonts can be used to create a strong visual impact or to convey a specific personality. Understanding the different font classifications-such as serif, sans-serif, script, and display fonts-and their typical applications is essential for effective typographic design.
Digital paper and patterns are very versatile and can be integrated with text to create unique backgrounds or fill effects. When combined with sophisticated layer styles, these elements can lead to highly customized and visually engaging text treatments.
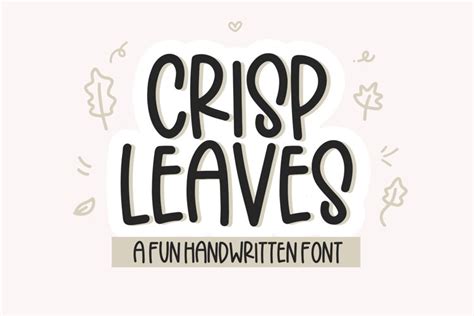
Font Duo Example: Crisp Leaves
For a practical demonstration, consider the Crisp Leaves font duo. It includes a sans-serif font and a dingbat font all in one! A sans-serif font is characterized by its lack of serifs (small decorative strokes at the end of a letter’s strokes) and is often favored for its modern and clean appearance. A dingbat font, on the other hand, is a decorative font that typically contains symbols, icons, or ornaments instead of standard letters and numbers. Using such a duo can add a layer of complexity and interest to your designs, allowing for creative combinations of standard text and unique glyphs.
Conclusion: The Enduring Importance of Typography in Digital Design
In conclusion, mastering the use of fonts in Photoshop is a fundamental skill for any digital artist or designer. From basic text entry and adjustment to the creation of intricate and thematic text effects, Photoshop offers a comprehensive suite of tools. The ability to install, manage, and creatively apply fonts, including specialized font pairs like the Crisp Leaves duo, allows for unparalleled design customization. Whether you're aiming for a minimalist aesthetic with light fonts or a bold statement with 3D typography, understanding the nuances of font selection and application will elevate your projects. Exploring resources like graphic bundles and tutorials on specific text effects further expands your creative potential, ensuring your designs effectively communicate and captivate your intended audience.