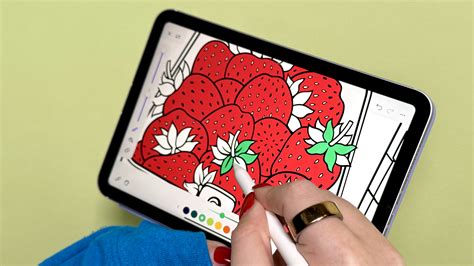
Procreate offers a unique and engaging way to experience the joy of coloring, transcending the limitations of traditional paper-based activities. This digital art application provides a dynamic platform where users can explore a wide array of techniques to enhance their coloring experience, making it both fun and efficient. Whether you are a complete beginner to digital art or looking to refine your existing skills, Procreate's intuitive interface and powerful features make it an ideal tool for bringing digital coloring pages to life. This tutorial delves into various methods and tips to help you achieve stunning results, from simple fills to intricate shading and textural effects.
Getting Started with Digital Coloring Pages in Procreate
Coloring in Procreate is presented as one of the easiest and most relaxing ways to begin creating digital art, even if you're brand new to the app. The process typically begins with acquiring a digital coloring page. These can be found from various sources, including free downloads offered by digital artists or as part of digital coloring books. For those looking to dive in immediately, many artists provide free coloring pages specifically designed for Procreate, often in .Procreate file format, which allows for direct import and use within the application. These files are typically set up with a distinct layer for line art and another designated for coloring, simplifying the workflow for beginners.
Importing Your Coloring Page
The initial step involves downloading the chosen .Procreate files to your iPad. Once downloaded, these files are usually located in your iPad's Files app, often within the Downloads folder. To import a file into Procreate, simply tap on it. This action will automatically open the file within Procreate, presenting you with a new canvas ready for coloring. It is crucial to open or import your coloring page into a new canvas to ensure your line art remains crisp and unaffected by your coloring endeavors. Before you commence coloring, taking a moment to examine the layer setup is a wise practice, as it can prevent extra cleanup work later in the process.
Understanding the Layers Panel
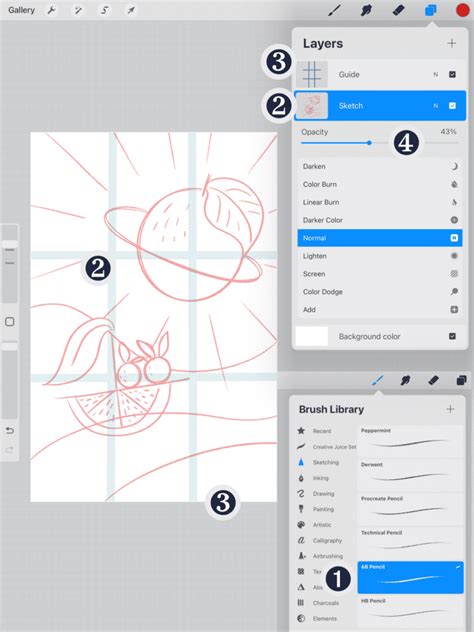
Upon opening a Procreate coloring page file, you will typically find a layer structure that aids in the coloring process. The Layers panel, accessed by tapping the icon resembling two squares in the upper right corner of the screen, reveals these layers. You will commonly see a layer dedicated to the black line art, which serves as your guide. Below this line art layer, there is usually another layer labeled something like "Color Here." This is the designated area where you will apply your colors, ensuring that your artwork remains clean and your line work stays intact.
Essential Coloring Methods in Procreate
Procreate offers several straightforward methods for filling in digital coloring pages, catering to different preferences and complexity levels. These techniques are designed to be user-friendly, allowing even novice digital artists to achieve polished results quickly.
Drag and Drop Color Fill (ColorDrop)
One of the most efficient methods for filling large, solid areas is using Procreate's ColorDrop feature. To utilize this, you first select your desired color from the color palette. Then, you tap and drag the color swatch from the palette into the specific area you wish to fill on your canvas. As you drag, a color fill will emanate from the swatch. Releasing your finger within the desired area will apply the color. A crucial aspect of ColorDrop is the threshold slider that appears immediately after you release the color. Adjusting this slider controls how tightly the fill adheres to your line art. A higher threshold means the color will spread further, while a lower threshold will keep it more contained. This is particularly useful for filling areas with varying line weights or slight imperfections.
Coloring with the Selection Tool
For more precise coloring, especially in detailed sections or areas with tiny gaps, the Selection tool offers a clean and controlled approach. This method involves first defining the area you want to color using one of the selection tools (like the automatic or lasso tool). Once the area is selected, you can then fill it with color. This ensures that the color stays strictly within the boundaries of your selection, preventing any accidental spills or overcoloring outside the intended lines. This technique is invaluable for intricate designs or when you want to maintain a very sharp edge on your colors.
Using Reference Layers for Coloring Underneath Line Art
A fundamental technique for maintaining crisp line art while coloring is to utilize reference layers. This involves placing your coloring layers beneath your line art layer in the Procreate layers panel. By doing so, the outlines of your coloring page will always remain visible and sharp, acting as a protective barrier. This setup provides significant flexibility, allowing you to edit, shade, and experiment with different colors and textures without ever affecting the integrity of the original line work. This method is highly recommended for achieving a professional and polished look.
How to use Reference Layers and Images in Procreate
Pro Tips and Tricks for Enhanced Coloring
Beyond the basic filling techniques, Procreate offers a suite of advanced features and "pro tips" that can dramatically enhance your coloring workflow, making it faster, more enjoyable, and opening up possibilities for creative effects.
Leveraging Layers, Clipping Masks, and Alpha Lock
Simple yet powerful features like reference layers, clipping masks, and alpha lock can significantly streamline your coloring process and elevate the quality of your work.
- Clipping Masks: A clipping mask allows you to confine the color or texture applied to a layer to the visible pixels of the layer directly beneath it. For example, if you have a solid color layer for a character's shirt and you want to add shading to that shirt, you would create a new layer above the solid color layer, clip it to the shirt layer, and then draw your shading on the clipped layer. The shading will only appear within the boundaries of the shirt.
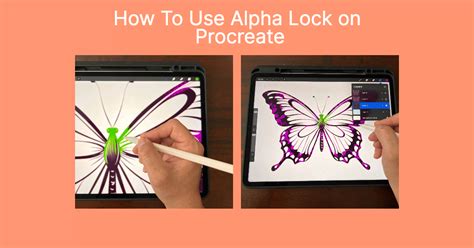
- Alpha Lock: Alpha Lock is another invaluable tool that locks the transparency of a layer. Once a layer is alpha-locked, you can only paint on the areas that already have color on that specific layer. This is incredibly useful for adding details, textures, or shading to an area that you have already filled, without the risk of coloring outside the existing shapes. For instance, if you've filled a shape with a base color, alpha-locking that layer allows you to add highlights or shadows directly onto the existing color without affecting the background or other elements.
These tools work in conjunction with your base coloring to add depth, dimension, and visual interest. They are essential for creating effects like shading, highlights, and adding intricate textures and variations that would be difficult or impossible to achieve on paper.
Adding Texture and Depth
To move beyond flat, uniform colors, Procreate's brush library and layering techniques are key.
- Using Different Brushes: The choice of brush can dramatically alter the appearance of your colors. For instance, using a crayon brush over a solid color fill can add a subtle texture, mimicking traditional art supplies. Marker brushes can provide a smooth, even color, while brushes like "Marker & Fine Point Marker + Crayon for texture" can be used to add a rougher, more organic feel. The "Colored Pencil" brush is excellent for adding fine details, highlights, or textures like scales on a fish.
- Blending Colors: Tools like the Smudge tool, particularly with brushes like "Wet Paint," can be used to blend different shades of gray or other colors together, creating smooth transitions and gradients. This is perfect for rendering objects with subtle variations in light and shadow, such as a rocket made of different shades of grey.
- Layering and Opacity: By using multiple layers and adjusting their opacity, you can build up colors and create richer, more complex tones. For example, a base layer of color can be overlaid with another layer at a reduced opacity using a textured brush to add depth without obscuring the base color.
Specific Brush Recommendations for Textures and Effects
The provided information highlights specific brush applications for different elements:
- For Planets: "Marker & Fine Point Marker + Crayon for texture" is suggested to give planets a textured appearance.
- For Shooting Stars: A "Fine Point Marker" is recommended for sharp, clear lines.
- For Fish: Both "Fine Point Marker" for the outline and "Colored Pencil" for adding scales are suggested, showcasing how different brushes can be used for different details on the same object.
- For the Sky: "Messy Paint" is ideal for adding and blending colors to create a dynamic sky.
- For the Rocket: "Wet Paint" is used to blend shades of grey, implying a smooth, metallic finish.
- For Extra Stars: "Colored Pencil" is suggested, likely for adding small, detailed star elements.
Common Beginner Mistakes and How to Avoid Them
Many common coloring issues encountered by beginners in Procreate stem from a few recurring problems, most of which are easily preventable with a little awareness and attention to detail.
Small Gaps in Line Art
One frequent frustration arises from tiny, often invisible, gaps in the line art of a coloring page. When using tools like ColorDrop, these gaps can cause the color to "spill" out and fill unintended areas of the canvas. To combat this:
- Inspect Your Line Art: Before coloring, zoom in closely on your line art and look for any breaks or disconnected lines, especially in corners or where lines meet.
- Close Gaps Manually: If you find gaps, you can often close them by using a fine-tipped brush on the line art layer itself to carefully connect the broken lines.
- Adjust ColorDrop Threshold: As mentioned earlier, the threshold slider in ColorDrop is your best friend here. Experiment with different threshold settings to see how it affects the fill. Sometimes, a slightly higher threshold can bridge small gaps without overfilling.
Working on the Wrong Layer
Another prevalent mistake is inadvertently coloring on the line art layer or another incorrect layer. This can lead to messy lines, difficulty in editing, and a generally unpolished look.
- Layer Discipline: Always ensure you are actively working on the designated "Color Here" layer, or a layer specifically created beneath your line art layer.
- Check Your Active Layer: Before applying any color, take a quick glance at the Procreate Layers panel to confirm that the correct layer is highlighted (indicating it's the active layer).
- Use Reference Layers Effectively: By consistently placing your coloring layers underneath your line art layer, you create a natural separation that makes it harder to accidentally color over your lines.
A quick check of your layers and a mindful adjustment of the ColorDrop threshold can prevent most common coloring frustrations, allowing you to focus on the creative aspect.
Practice Makes Perfect: Utilizing Ready-Made Pages
For those new to digital coloring or Procreate, using ready-made coloring pages offers a significant advantage. These pre-prepared files allow you to bypass the setup process and jump directly into practicing coloring techniques. This hands-on experience is invaluable for building confidence and familiarity with Procreate's tools and features.
Many artists offer free downloadable coloring pages, often provided as .Procreate files or even as printable PDF versions for those who prefer traditional coloring. Examples include themed sets like "Space Pets," "Foodie Land," "Dino Trip," and "Just Fanta-sea." These diverse themes provide ample opportunity to experiment with different color palettes and artistic styles.
Free Procreate Brushes for Kids and Adults
To further enhance the learning experience, many artists also provide free brush packs designed for Procreate, suitable for both children and adults. These brush sets, such as the "Kids Make Art!" brush pack, are curated to offer a variety of textures and effects that are fun and easy to use. Using these specialized brushes can make the coloring process more engaging and help users achieve unique artistic outcomes.
Exploring Creative Expression: Beyond Coloring Pages
While digital coloring pages are an excellent starting point, the techniques learned can be applied to creating original digital art from scratch. The principles of using layers, clipping masks, alpha lock, and various brush types are fundamental to digital illustration and painting. Many artists who create coloring pages also produce original artwork, and the skills honed through coloring are directly transferable.
The Benefits of Digital Coloring
The appeal of digital coloring in Procreate extends beyond mere aesthetics. It offers several intrinsic benefits:
- Beginner-Friendly Creative Practice: It provides a low-barrier entry point into digital art, making creative expression accessible to a wider audience.
- No Mess, Unlimited Undo, Endless Color Options: Unlike traditional art, digital coloring eliminates physical mess, offers an infinite "undo" function for mistakes, and provides an unlimited palette of colors.
- Great for Learning Layers and Selection Tools: It serves as a practical, enjoyable way to understand and master core Procreate features like layers and selection tools.
- Relaxing Way to Build Confidence with Procreate: The repetitive and forgiving nature of coloring helps users build confidence and familiarity with the app's interface and functionalities.
Finding Your Style
Ultimately, there is no single "correct" way to color digitally. The most effective approach is to experiment with each method and tool, discovering what best suits your personal style and creative goals. The more you practice and explore the vast capabilities of Procreate, the faster and more confident your digital coloring and art creation will become. The journey from coloring pages to original art is a natural progression, fueled by exploration and a willingness to try new things.