Adding text and titles to your video projects is an essential skill for any video editor, transforming raw footage into engaging narratives. DaVinci Resolve, a powerful and free video editing software from Blackmagic Design, offers a robust suite of tools to achieve this, from simple text overlays to dynamic animated titles and professional-grade motion graphics. Whether you're a beginner looking to add basic captions or an advanced user aiming for cinematic titles, this guide will walk you through the various methods available within DaVinci Resolve.
Accessing Text Tools in DaVinci Resolve
DaVinci Resolve provides access to its text functionalities across several of its integrated "Pages." The most common locations for adding text elements will be the Cut and Edit pages. While the core functionality is the same, the specific placement of these tools differs slightly between the two.
In the Cut Page
On the Cut page, which is designed for rapid editing, you'll find a dedicated Titles menu conveniently located in the top-left corner of the interface. This provides quick access to a variety of pre-designed text templates.
In the Edit Page
The Edit page, offering more granular control, requires an extra step. Here, you first need to click on Effects (also situated in the top-left area). Within the Toolbox sidebar that appears, you will then find the Titles category.
Once you've navigated to the Titles section in either page, you'll be presented with a diverse array of text templates. A significant advantage of DaVinci Resolve is that you don't need to import these titles into your project to preview them. Simply hover your mouse cursor over each title from left to right, and a preview of the effect will be displayed in the main Viewer window, allowing you to quickly assess their visual appeal and suitability for your project.
Adding and Modifying Basic Titles
After identifying a title that suits your needs, the process of adding it to your project is as simple as dragging and dropping it from the list onto your Timeline. You have considerable flexibility regarding placement:
- Overlay: Place the title directly on top of a video clip to superimpose text over moving imagery.
- Underneath: If you're working with multiple video layers, you can position the title below certain clips, allowing it to be visible beneath some but above others.
- Standalone: Position the title between clips to have it appear solely on its own, typically over a black background.
By default, a title clip on the timeline will have a duration of 5 seconds. However, this duration is easily adjustable. You can alter the length by moving your cursor to either edge of the title clip and dragging it inwards to shorten or outwards to extend. DaVinci Resolve features a helpful snapping capability, which is enabled by default. This means that as you adjust the edges, they will automatically snap to the playhead or existing edit points, ensuring precise alignment and timing.
For even more precise duration control, you can click on an edge of the title clip (it will turn green), then type + or - followed by a numerical value representing the desired change in seconds, and finally press Enter.
Editing Text Content and Formatting
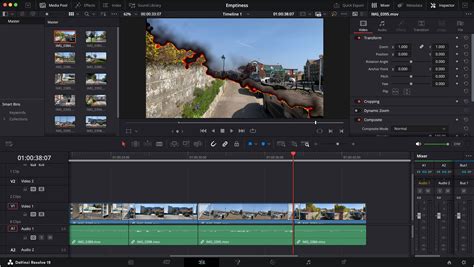
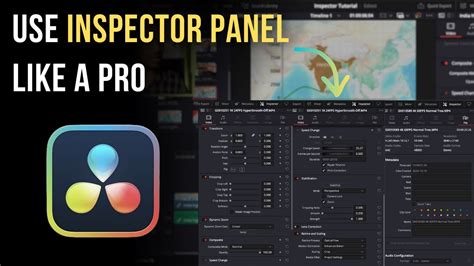
Having "Sample" as your default text is rarely ideal. To change this, ensure the title box is selected in the timeline. Its editable parameters will then appear in the Inspector panel, typically located in the top-right section of the interface. For immediate visual feedback, it's also beneficial to position the playhead over the text on the timeline, allowing you to see your changes as you make them in the main preview window.
The changeable parameters for a title are generally organized into two tabs within the Inspector: Title and Settings.
The Title tab is where you'll input your custom text. You can start typing directly into the provided text box. Below this, you'll find a comprehensive set of formatting options. These include:
- Font Selection: Choose from a wide array of installed fonts.
- Font Face: Select variations like Bold, Italic, or Light if available for the chosen font.
- Color: Define the text color using a color picker.
- Size: Adjust the font size.
- Alignment: Set text alignment to left, center, or right.
- Position: Control the horizontal and vertical placement of the text on screen.
- Stroke: Add an outline to your text, specifying its color and size.
- Drop Shadow: Apply a shadow effect for added depth, with options for color, offset, and blur.
- Background: Add a solid or gradient background behind the text.
The Settings tab, located next to the Title tab in the Inspector, houses more traditional manipulation values. It's crucial to confirm that you are working on the correct clip; it will be highlighted with a red border in the timeline. This ensures you're modifying the intended text element, especially if your playhead is not positioned over it.
While you can click into a field and type a value directly, DaVinci Resolve offers a more powerful and intuitive method for adjusting parameters. Hover your mouse cursor over a field. It will transform into a thick white line with arrowheads at either end. Clicking and dragging this line left or right will decrease or increase the corresponding value, respectively. The further you drag, the more significant the change. This method provides a tactile and precise way to fine-tune settings like position, rotation, zoom, and more.
Exploring Advanced Text Options: Text+ and Fusion Titles
DaVinci Resolve goes beyond basic text templates with more powerful tools for creating sophisticated titles.
Text+ Titles
Text+ is an advanced text generation tool within DaVinci Resolve that offers significantly more personalization than the basic text effects. It unlocks capabilities such as 3D rotation, advanced transform controls, and detailed shading options, allowing for highly customized titles.
To use Text+:
- Navigate to the Effects library in the Edit tab.
- Go to Toolbox > Titles.
- Locate and drag the Text+ effect onto your timeline, typically on a new video track above your main footage.
Once applied, click on the Text+ clip in the timeline to open its settings in the Inspector. You'll find a more extensive set of tabs and controls compared to basic titles. The core text input remains similar, but you gain access to richer parameters for transforming, shading, and animating your text.
Fusion Titles
For those seeking truly unique and dynamic text effects, DaVinci Resolve's Fusion page is the ultimate destination. Fusion Titles are pre-built templates created within DaVinci Resolve's powerful node-based compositing environment. They come with built-in animations and effects like fades, glitches, reveals, and more, offering a cinematic quality with less effort.
To add a Fusion Title:
- In the Effects library, browse the Fusion Titles category.
- DaVinci Resolve provides various Fusion Titles for callouts, lower thirds, and credits.
- Hover over each title to see a preview of its animation and style.
- Once you've found a suitable Fusion Title, drag it onto your Timeline.
Editing Fusion Titles is done through the Inspector. Depending on the specific Fusion Title, you might find additional settings for elements like upper and lower text, background boxes, and various motion graphic parameters. While these titles offer ready-made effects, you can still extensively modify their appearance and behavior within the Inspector.
Editing Fusion Templates Titles in DaVinci Resolve
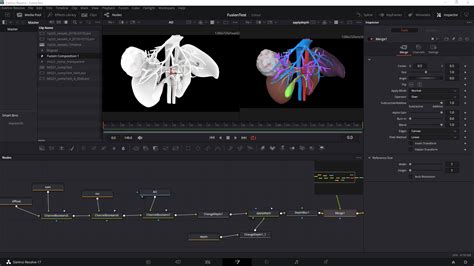
Understanding the Fusion Page
Even though Fusion Titles offer a streamlined approach, understanding the underlying Fusion page can unlock unparalleled creative freedom. You can access it by going to Workspace > Switch to Page > Fusion.
The Fusion page might appear intimidating at first due to its node-based workflow. Essentially, you connect different nodes â which represent operations or effects â between a MediaIn (input) and MediaOut (output) node. Each node acts like a customizable filter or effect applied to your clip. The beauty of Fusion is that any changes you make are instantly reflected back in the Edit page, allowing for a seamless workflow. While Fusion itself is a vast subject, this provides a glimpse into its immense potential for creating special effects.
Adding Subtitles in DaVinci Resolve
Accessibility is paramount in modern video production, and DaVinci Resolve makes creating subtitles straightforward. The Subtitle effect is specifically designed for this purpose, offering a more appropriate format for dialogue or informational text than standard titles.
Creating and Editing Subtitles
- Add a Subtitle Track: On the Edit page, you can add a new subtitle track by right-clicking in the track header area and selecting Add Subtitle Track. Alternatively, you can find the Subtitle effect in the Effects Library (Toolbox > Titles > Subtitles) and drag it above your last track to create a new subtitle track.
- Add a Subtitle Clip: Position the playhead on the timeline where you want the subtitle to begin. Right-click within the subtitle track area and select Add Subtitle. A subtitle clip will appear, starting from the playhead. You can adjust its position and duration on the timeline like any other clip.
- Edit Subtitle Text and Formatting: Select the subtitle clip and open the Inspector. Under the Caption section, you can type your subtitle text. You can also adjust its format, duration, and position. To customize individual subtitles, check the Customize Caption box. Here, you can navigate between subtitles using the "previous" and "next" buttons. The Track tab in the Inspector allows you to edit general settings for the entire subtitle track, such as its overall position.
Enhancing Text with Title Studio (Continuum Plugins)
For users seeking professional-grade titling solutions, the Title Studio plugin, part of the Boris Continuum Complete (BCC) suite, offers a powerful and versatile option. It can be used to add basic text, sophisticated 3D titles, and animated text directly within DaVinci Resolve.
Applying and Using Title Studio
- Apply BCC Title Studio: In the Effects Library, search for Open FX > BCC 3D Objects > BCC Title Studio. Drag this effect onto your video clip or an Adjustment Clip at the desired timestamp.
- Add Text in Title Studio: With the effect applied, open the Inspector. You can either use the FX Browser to access a vast library of presets or click Launch UI Window for full creative control.
Quick Text Using Presets
Title Studio's presets offer a rapid way to add professional-looking text.
- Click FX Browser in the Inspector to open the preset browser.
- Explore categories like banners, callouts, motion titles, and infographics.
- Select a preset, then change the text in the preview window below and click Insert Text.
- Click Apply to return to DaVinci Resolve. You can further refine composite settings like Apply Mode and opacity in the Inspector.
Advanced Text Creation in Title Studio
For complete control, launch the Title Studio UI Window from the Inspector.
- Within the UI, you can modify existing presets by editing layers in the bottom-left panel or build titles from scratch.
- Use the Toolbar in the middle to add new text or shape layers. These are added as tracks in the timeline area within Title Studio.
- Select layers and edit their properties in the Controls Window.
- Once satisfied, click Apply to send the title back to DaVinci Resolve.
Animating Text in DaVinci Resolve
Animated text breathes life into your titles, making them more dynamic and engaging. DaVinci Resolve offers several methods for achieving this.
Animating Text with Built-in Tools
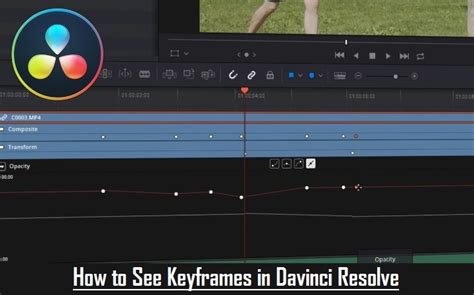
Keyframe Animation
This is the most powerful method for creating custom animations.
- Select your text clip in the timeline and open the Inspector.
- Navigate to a parameter you wish to animate (e.g., position, zoom, rotation, drop shadow).
- Click the diamond icon next to the parameter to enable keyframing. This records the current value at the playhead's position.
- Move the playhead to a different point in time.
- Adjust the parameter's value. DaVinci Resolve automatically creates a new keyframe.
- Repeat this process for all parameters you want to animate. You can view and adjust all created keyframes by clicking the diamond icon on the text clip in the timeline.
Video Transitions
A simpler way to animate how text appears and disappears is by using video transitions.
- In the Effects panel, go to Toolbox > Video Transitions.
- Drag a transition (e.g., a fade, wipe, or dissolve) to the beginning and/or end of your text clip on the timeline.
- Transitions primarily affect the entry and exit of the text. For animations within the text's duration, keyframing is the preferred method.
Animating Text with Title Studio
Title Studio also incorporates robust keyframing capabilities for text animation.
- Within the Title Studio UI, click the Toggle Animate/Static Mode key icon below the Composite Window.
- Select the track (text, shape, etc.) you want to animate.
- Position the playhead in the timeline.
- Make adjustments to parameters in the Controls Window.
- Move the playhead and make further adjustments to create motion over time.
- Click the key icon again to disable animation mode.
- Click Apply to return to DaVinci Resolve.
Mastering text and titles in DaVinci Resolve, whether through its built-in tools, the advanced Text+ and Fusion pages, or third-party plugins like Title Studio, opens up a world of creative possibilities. By combining static text with dynamic animations, you can significantly enhance viewer engagement, convey information effectively, and elevate the overall production value of your videos.