Photoshop, renowned for its raster image editing capabilities, also harbors powerful tools for creating and manipulating vector shapes. This tutorial delves into the process of converting various elements within Photoshop into editable vector shapes, offering a flexible and scalable solution for designers. Whether you aim to create unique icons, modify existing text into scalable graphics, or extract specific elements from an image as vector assets, Photoshop provides an accessible workflow.
Understanding Photoshop Vector Shapes
At its core, Photoshop's vector capabilities revolve around paths. A path is essentially a series of points, much like an outline, that can be used to define the boundaries of a shape. These paths are inherently scalable without any loss of quality, making them ideal for elements that might need to be resized across different mediums. Shape layers in Photoshop are a sophisticated implementation of these paths, allowing them to hold fills and outlines.

The advantage of working with vector shapes in Photoshop is multifaceted. Firstly, it eliminates the need for external vector editing software for many tasks. Secondly, it allows for non-destructive editing, meaning you can transform, recolor, and apply effects to your shapes without degrading the underlying image data. This is particularly useful when you need to make a particular shape to place on your design, but aren't finding readily available options. Instead of drawing, then tracing, and importing the shape you need, Photoshop offers a much easier way.
Creating Custom Shapes from Selections
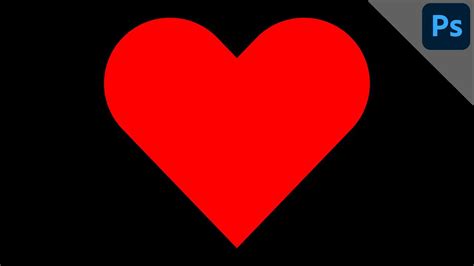
One of the most versatile methods to create vector shapes in Photoshop is by converting selections into custom shapes. This technique is particularly effective when dealing with images that have a good contrast between your subject and your background.
The process begins by opening your desired image in Photoshop. Once the image is loaded, you'll need to make a selection of the subject you wish to convert into a shape. Photoshop offers a variety of selection tools, from the Quick Selection Tool and Magic Wand to the more precise Pen Tool. The choice of tool will depend on the complexity of the image and the desired accuracy of your selection.
After making your selection, it's often beneficial to refine it. Go to Select > Modify > Smooth. This option helps to soften any jagged edges in your selection, resulting in a cleaner vector path. The degree of smoothing can be adjusted to suit your needs.
With your selection active and smoothed, the next crucial step is to convert it into a usable shape. Navigate to Edit > Define Custom Shape. This command will prompt you to name your new custom shape. Once named and saved, this shape will be available for future use.
To access and utilize your newly created custom shape, select the Custom Shape Tool (U) from the Photoshop toolbar. In the Options bar at the top of the screen, you'll find a dropdown menu displaying your available custom shapes. Your recently defined shape will be listed here. Simply select it, and you can then draw it onto your canvas as a vector shape layer.
Now that you know how easily you can make your own custom shapes in Photoshop, you can make any kind of modifications you want to it like you normally do with any other vector shape. This includes resizing, recoloring, and applying layer styles.
Utilizing the Pen Tool for Precise Shapes
Among many powerful tools in Adobe Photoshop is the king of kings: the Pen Tool. While creating paths with the Pen Tool can be difficult at first, the process becomes easier with practice and is well worth the effort for the designer seeking ultimate control. Paths created with the Pen Tool are vector-based and offer unparalleled precision.
The fundamental process involves clicking to create anchor points and dragging to create bezier curves, thereby constructing a path. You might draw a crazy random shape, or you might take the time to design a simple icon. The key is to actually complete the path to create a shape. This means bringing the path all the way around back to where you started and clicking back onto the first anchor point to close the path.
Once a path is completed, it will appear in the Paths panel. With the working path selected in this panel, you can then convert it into a shape layer. Move up to the menu bar and click Layer > New Fill Layer. Three new options will appear in a menu which determine how your shape turns out: Solid Color, Gradient, or Pattern.
Even with a solid fill color, you can still achieve a gradient or pattern background using layer effects.
Once you click any of these choices (for instance, Solid Color), a New Layer window appears. You might give this shape layer a name, adjust its opacity, or set a blend mode. However, all of these settings can be changed later, so you can simply hit OK. Following this, you can choose your desired fill color. If you want to change the shape layer's fill color at a later point, just double-click on the layer icon in the Layers palette.
Manipulating Shape Layers
Once you have a shape layer, it's easy to manipulate. You can choose from any layer effects to create details like drop shadows, textures, gradients, or similar options. These non-destructive effects allow for extensive customization without altering the original vector data.
Since the shape layer is a vector, you can hit CTRL+T (or CMD+T on Mac) to transform the graphic to any size without quality loss. This is a fundamental advantage of vector graphics over raster images.
Converting Shapes to Smart Objects
Sometimes, you may want to further encapsulate your shape for advanced editing or to maintain its scalability within a more complex workflow. If you right-click on the shape layer and choose “Convert to Smart Object,” the shape itself is now editable within a .PSB file. Sometimes, you'll find PSBs as separate files, but in this case, the PSB would be saved within the PSD. Basically, a Smart Object is like a compartmentalized image stored within the main document. No data is lost between the shape layer to Smart object conversion, and there are quite a few benefits to using the Smart Object. For instance, you can apply filters non-destructively to the Smart Object. Also, remember that your path should still be available in the Paths panel, offering a fallback for direct path manipulation if needed.
Smart Objects in Photoshop: Learn The Basics
Converting Text to Shape Layers
A practical application of Photoshop's vector capabilities is converting text into shape layers. This process offers several compelling advantages, making it a valuable technique for designers.
Top Reasons to Convert Text to Vector-Based Shapes
Out-of-Consideration (Font Independence): The primary benefit is ensuring that anyone opening your file will not encounter a "Missing Font" warning. While Photoshop's missing font warnings are generally less disruptive than in some other applications, avoiding them altogether presents a cleaner and more professional file. This ensures your design looks exactly as intended, regardless of the fonts installed on the viewer's system.
Security: Converting text to a shape layer prevents individuals who open your file from easily editing the content of your text. While not an impenetrable security measure, it adds a layer of protection against accidental or intentional text modifications.
Better Strokes: Vector shapes allow for the application of strokes with sharp, mitered corners, regardless of how the stroke is aligned. This provides more control over the appearance of outlines compared to rasterized text, where stroke behavior can sometimes be less predictable.
Flexibility in Shape Manipulation: Once text is converted to a shape layer, you gain the ability to edit the shape of individual letters using tools like the White Arrow tool (Direct Selection Tool). This allows for creative modifications, such as altering the curves of a letter or creating unique ligatures and stylistic variations, as one might do to create a custom "M" in the background.
The process of converting text to a shape layer is straightforward. First, type out your desired text using the Type Tool. Then, with the text layer selected, right-click on the layer in the Layers panel and choose "Convert to Shape." Alternatively, you can go to Type > Convert to Shape. Once converted, the text layer transforms into a vector shape layer, behaving just like any other shape layer with all its associated benefits.
Advantages of Vector Shapes in Design Workflows
The ability to create and manipulate vector shapes within Photoshop significantly enhances a designer's workflow. The scalability of vector graphics means that logos, icons, and other graphical elements can be resized from a business card to a billboard without any degradation in quality. This is a crucial advantage for branding and print design.
Furthermore, the precise control offered by paths and shape layers allows for the creation of intricate and clean designs. The non-destructive nature of shape layers and Smart Objects ensures that edits can be made at any stage of the design process without compromising the original artwork.
By mastering these Photoshop techniques for converting selections, paths, and text into vector shapes, designers can unlock a new level of flexibility and control in their creative endeavors, ensuring their designs are not only visually appealing but also technically robust and adaptable to various applications.