Procreate, a leading digital art application for iPad, offers a robust set of tools that empower artists to create complex and dynamic artwork. Among its most powerful features are its vector capabilities, particularly when it comes to understanding and utilizing vector layers. While Procreate is primarily known for its raster-based painting and drawing, its handling of text and imported vector elements, combined with its sophisticated layer system, provides unique workflows for artists. This article delves into the intricacies of vector layers in Procreate, exploring how to import, manipulate, and leverage them for a wide range of creative projects.
Importing Vector and Image Files into Procreate
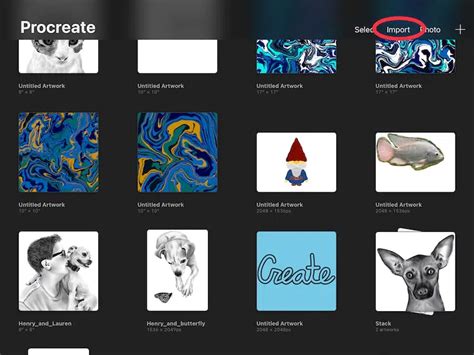
Procreate offers several methods for bringing external files into your artwork, each with specific implications for how the imported content interacts with your canvas. Understanding these import options is crucial for maintaining the integrity and editability of your work.
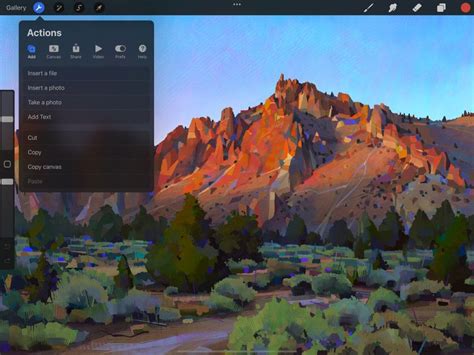
To insert a compatible image file, such as a JPEG, PNG, or PSD, from your Files app into your artwork, you will tap "Actions" (the wrench icon) → "Add" → "Insert a file." This action opens the Files app, displaying your recent images. It is important to note that if you import a PSD file through this method, it will be placed in your artwork as a flattened image, meaning its layers will be merged into a single layer upon import.
Alternatively, to bring a JPEG, PNG, or PSD image from your Photos app into your canvas, you will tap "Actions" → "Add" → "Insert a photo." Your Photos app will then pop up, allowing you to select the desired image. Similar to importing from the Files app, if you import a PSD this way, it will also be placed in your artwork as a flattened image.
Leveraging Private Layers for Efficient Workflow
Private layers offer a sophisticated way to manage reference images or other content that is not intended to be part of your final artwork, without the need to delete or toggle off these layers. This feature is particularly useful for maintaining a clean and organized workspace.
To insert a compatible image file as a Private Layer, you tap "Actions" > "Add" and then slide the "Insert a file" tab to the left. Using the navigation bar at the bottom, you can also browse all your connected folders. You can import PNG, JPEG, and PSD files. As with regular imports, if you import a PSD as a private layer, it will be placed in your artwork as a flattened image. Once you've selected an image from the Files app, it will appear on your Canvas as a private layer.
Similarly, to bring a JPEG, PNG, or PSD image from your Photos app into your Canvas as a private layer, you tap "Actions" > "Add" and then slide the "Insert a Photo" tab to the left until it reveals a grey "Insert a private photo" button. Again, importing a PSD file this way will result in a flattened image. Once you select a photo, it will appear on your Canvas as a private layer.
Procreate also allows you to take a photo directly and insert it as a private layer. Tap "Actions" > "Add" and then slide the "Take a Photo" tab to the left until it reveals a grey "Take a private photo" button. Once you have taken a photo, it will appear on your Canvas as a private layer.
Understanding Procreate's Typography Tools
Procreate's typography tools provide a powerful avenue for incorporating crisp, editable text into your digital creations. These tools offer professional-quality text editing features, allowing you to create and manipulate text with ease.
When you select the text tool, a text box will be added to your canvas. You can then drag this text box to reposition it or begin typing immediately. The text created in Procreate is vector-based, meaning it can be scaled and manipulated without loss of quality. However, for certain operations, such as applying raster-based filters or brushes directly to the text, you may need to convert it to pixels. To do this, tap the thumbnail of your Text layer and then tap "Rasterize." This action converts your vector text into a pixel-based layer.
Advanced Layer Management and Manipulation
Procreate layers are fundamental to any digital art workflow, serving as a powerful tool for separating, organizing, preserving, and expanding your work. The application offers a myriad of ways to utilize them, starting with the core functionalities.
By default, in a new document, you will typically see two layers: "Layer 1" and "Background Color." This basic structure allows for immediate separation of elements. For instance, you could draw something on one layer and then create a new one for additional artwork, ensuring that changes to one element do not affect the other.
The Layers panel provides a comprehensive set of controls for managing your layers. You can Lock a layer to protect its contents from accidental alteration; its contents won't be modifiable until you unlock it. The Delete option, as its name suggests, removes the selected layer. Furthermore, you can rearrange your Procreate layers by simply tapping and holding a layer and then dragging it to your desired position within the stack.
Groups are another essential organizational tool. You can group layers together by swiping right on the layers you wish to include in a group. The selected layers will be highlighted in blue, indicating they are ready to be grouped. Once grouped, the layers are contained within a folder, which can be expanded or collapsed to reveal or hide its contents. You can also rearrange layers within these groups.
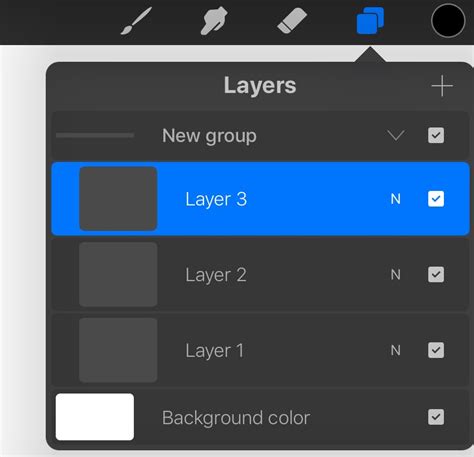
Layer visibility can be toggled on and off via the checkboxes located on the right-hand side of each layer in the Layers panel. This allows you to selectively hide or show elements of your artwork.
Tapping on a layer thumbnail reveals a more extensive set of options. Rename allows you to give your layers descriptive names, which is crucial for maintaining organization in complex projects. Copy duplicates the contents of the layer, which can then be pasted elsewhere. Invert flips the colors of the layer, creating a negative effect. Merge Down combines the selected layer with the layer directly beneath it. It's important to note that the visibility of these options can depend on the number of layers and their order. For example, if you only have one layer, you won't see "Merge Down" or "Combine Down" as there is no layer beneath it to merge with.
Advanced Layer Techniques: Clipping Masks, Reference Layers, and Masks
Procreate offers sophisticated techniques for controlling how layers interact with each other, enabling precise editing and creative effects.
Clipping Masks are invaluable for restricting drawing or painting to the boundaries of a shape on a layer below. For example, if you have a layer with a purple circle, you can create a new layer on top of it and then tap the layer preview and select "Clipping Mask." Now, any artwork you create on this new layer will only be visible within the area occupied by the purple circle on the layer below. This allows you to draw within specific boundaries without worrying about going outside your intended area.
Reference Layers provide a similar but distinct functionality, particularly useful for line art. You can designate a layer as a Reference Layer by tapping on its thumbnail and selecting "Reference." The layer directly above the Reference Layer will then rely on said reference. This makes it incredibly easy to add fills or colors to your line art while keeping the lines themselves independent on their own layer. For instance, if you have line art on a layer called "Line Layer," and you create a new layer above it named "Color Layer," setting the "Line Layer" as a reference will ensure that any coloring on the "Color Layer" adheres to the lines.
Masks, though not explicitly detailed in the provided text as a separate tool like Clipping Masks, are implicitly utilized through the visual feedback of black and white areas in layer previews when using certain features. For example, when a layer has a "Fill Color," and you examine its "Mask Preview," the black space indicates hidden areas, and the white space indicates visible areas. This concept is fundamental to understanding how certain layer effects and selections can hide or reveal parts of a layer.
How to use Layer Masks, Clipping Masks and Alpha Lock in Procreate - A Beginners Guide
Modifying Layer Opacity and Blending Modes
Procreate allows for extensive control over how layers interact visually through opacity adjustments and blending modes.
Right under a layer's preview in the Layers panel, you'll find the Opacity Slider. This slider controls the transparency of the layer. At 100%, the layer is fully opaque, while at 0%, it would be completely invisible. Adjusting opacity is a fundamental way to subtly integrate layers or create depth in your artwork.
Blending Modes dictate how a layer's pixels interact with the pixels of the layers beneath it. This can create a wide range of visual effects, from subtle color shifts to dramatic textural overlays. Procreate offers numerous blending modes, and understanding their effects is key to unlocking advanced artistic possibilities. For example, with some line art on one layer and a solid color on a layer above it, changing the blending mode of the color layer can dramatically alter its appearance. If the color layer is set to "Normal," it will simply cover the line art. However, if set to "Lighten," it might only show up where the color is brighter than the underlying lines, or if set to "Multiply," it could darken the lines by interacting with their color. Experimenting directly with these modes is often the most effective way to grasp their impact.
Expanding Your Procreate Toolkit with Brushes
While this article focuses on vector layers and core layer functionalities, it's worth noting that Procreate's versatility is further enhanced by its vast brush library. Artists can find and import a wide array of brushes to add texture, detail, and unique artistic styles to their work. Collections exist for various purposes, such as adding texture, mimicking real media, or providing decorative elements like snowflakes. These brushes, when used in conjunction with Procreate's layer system, allow for incredibly rich and nuanced digital paintings.
Copy and Paste Functionality
Procreate offers straightforward copy and paste functions that can be applied to selections, entire layers, or even the whole canvas. You can cut selected artwork from your canvas and store it in the iPadOS clipboard. It's important to remember that the "Copy" and "Cut" commands typically affect only a single layer at a time. Once you’ve cut or copied your image data, you can paste it elsewhere within your current canvas or into an entirely different Procreate project.
Procreate also provides alternative ways to access Copy Paste without navigating through the Actions menu. Furthermore, the "Paste private" button, accessible through the "Add" menu when inserting files or photos as private layers, allows for the seamless integration of copied content into your private layer workflow.
By mastering these layer management techniques, from basic organization to advanced blending modes and clipping masks, artists can significantly enhance their creative workflow and achieve more sophisticated results within Procreate.