In an ever-growing world of digital uploads, it’s hard to protect your digital art from misuse. But making a logo in Photoshop for your photography helps your work. It can create a protective shield from those individuals who intend to infringe intellectual content. This article will guide you through various methods of adding a copyright logo or watermark to your images using Adobe Photoshop, ensuring your work remains identifiable and protected.
From Van Gogh to Damien Hirst, most artists have some type of logo, watermark, or signature on their work to protect it from copyright breaches and also to add authenticity, so you know who the creator was. Logos on artwork may have started off as a simple signature years ago. This is when paintings were the main medium of visual art, but as popularity grows, individuals have transformed themselves. They’ve changed into brands and bigger networks, so the simple signature has been modernized into logos. To create a logo in Photoshop is actually simpler than you may think. There are a few different ways to do this depending upon what you want your logo to look like.
Method 1: Creating a Signature Brush from a Hand-Drawn Logo
If you want a signature-style logo, a good way to start is by doodling some signatures on paper first. Try scribbling down a few different ideas on plain paper, but use a good pen, because if you draw one you like, then you could transform that exact signature to be your final logo in Photoshop.
- Scan or Photograph Your Signature: Start off by scanning the paper and uploading it to your computer. If you don’t have a scanner, then just take a picture of it, but make sure your shot is sharp, otherwise your logo will be blurry!
- Open and Select in Photoshop: Now open the file in Photoshop and use the marquee tool (CTRL+M / CMD+M) to select the signature you want.
- Refine the Signature: Check that all parts of your signature look just how you want it. You can use the eraser tool to remove any smudges.
- Define Brush Preset: Make sure your marquee line is still around the edge of the signature and then select EDIT > DEFINE BRUSH PRESET.
- Name Your Brush: Photoshop will then ask you to name your signature, so you can find it again in the brush panel.
- Close the Original File: Now you can close the file with all your scribbles on without saving (unless you want to).
- Apply Your Signature Brush: To test out your new signature logo, then open up a piece of work that you’d like to brand and then go to your brush tool on the left-hand side vertical tool bar.
- Adjust Brush Settings: Make sure the hardness is set to 100%.
- Brand Your Artwork: Click once on your artwork exactly where you want the logo to appear, and now your work is forever branded! It’s truly that easy to convert a scribble on a page to a fully functioning logo in Photoshop that can be reused infinitely, making your work consistent and identifiable.
Method 2: Creating a Text-Based Logo from Scratch
Not all of us are that talented with a pen and paper, and that’s fine because there are other ways to create text signatures and logos from scratch in Photoshop. You can easily get carried away when creating a logo for your artwork, but at the end of the day, it should be simple and recognizable. It’s not going to be big, so heavily detailed designs are pointless; a logo should reflect something about you as an artist. Bold fonts suggest a strong masculine feeling, italicized typefaces describe creative individuals (but they are often overused and can look boring), whereas slim fonts can be modern and appealing.
- Open Your Image: Start by opening the picture you want to watermark in Photoshop.
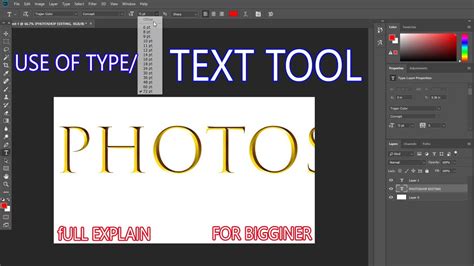
- Select the Text Tool: Choose the Text tool from the Tools Palette or by pressing T on your keyboard.
- Type Your Copyright Notice: Click inside the image and type the text as you’d like it to appear.
- Format Your Text: Format the text as you’ve tested it - font, size, bold, italic, color, opacity, etc. You can add any special characters, such as the copyright symbol (©), using the Windows Character Map (Start > Programs > Accessories > System Tools > Character Map) or Mac OS X's Character Palette (Edit > Special Characters).
- Add Color (Optional): If you want to add a bit of color, then you can do that using the color box on the top toolbar when the text is selected. Plain, neutral colors often look best, so choosing either pure white or black, depending on what stands out more, can be effective.
- Position Your Watermark: Decide where you think the watermark should be positioned in the frame. While the middle of the image can be a good deterrent against easy removal, positioning it in the lower right corner is also common. To place it in the lower right, select Layer > Align > Right Edges, followed by Layer > Align > Bottom Edges. Your watermark should snap to the lower right-hand edge. You can always move it and change things once it appears on a photo.
- Adjust Opacity and Effects: The watermark is okay as it stands, but it's not particularly subtle and really draws the eye. You might want to adjust the opacity. This screen shot shows the Opacity can be adjusted in the Layers window and was set at 27%. You might want to jazz the text up a bit by adding some effects to it. The Bevel and Emboss effect can look good and is useful for separating the watermark from the background on some images.
Method 3: Creating a Patterned Watermark
This method involves creating a repeatable pattern of your copyright information that can be applied to any image. This can be particularly useful for batch processing.
- Create a New Document: Go up to the File menu at the top of the screen and select New… to bring up the New Document dialog box. Enter dimensions suitable for a watermark tile, for example, 6 inches for the width, 4 inches for the height, and 300 pixels/inch for the resolution.
- Add Your Copyright Text: Grab your Type tool and click inside the new document. Type your copyright notice.
- Rotate and Format Text: The copyright watermark tends to look better with the text rotated a bit. Once you've entered your text, press Ctrl+T (Win) / Command+T (Mac) to bring up the Free Transform handles around your text, then place your mouse cursor just outside one of the corner handles and drag left or right with your mouse to rotate the text. Format the text as desired.
- Trim the Document: Go up to the Image menu next and select Trim. This brings up the Trim dialog box. Ensure "Transparent Pixels" and "Top left corner" are selected, and click OK.
- Define the Pattern: Go up to the Edit menu at the top of the screen and select Define Pattern. Give your pattern a descriptive name.
- Apply the Pattern to Your Image: Back in your original image document, you should have one layer, the Background layer, which contains your image. Create a new layer (Layer > New > Layer). With your new layer selected in the Layers palette, go up to the Edit menu and select Fill, which brings up the Fill dialog box.
- Select Your Pattern: With "Pattern" selected in the Contents dropdown, click on the little thumbnail image beside the words Custom Pattern and then choose your copyright pattern from the list that appears.
- Adjust Blend Mode and Opacity: The only problem now is that the text can be too prominent, blocking much of the image from view. To fix that, with the new layer selected, go up to the layer blend mode options in the top left of the Layers palette, click on the down-pointing arrow beside the word "Normal" and select Overlay from the list. Then move over to the Opacity option beside it and reduce the opacity as needed until the watermark is subtle yet visible.
How To Create Seamless Patterns In Photoshop (With Graphics Or Images!)
Method 4: Using a Logo Image as a Watermark
If you're a professional photographer, blogger, or enthusiast with your own logo, you can use that as a watermark rather than plain text. It's a little bit more involved but can be really effective.
- Prepare Your Logo: In order for your logo to make an effective watermark, you first need to remove all color from it if it's a color logo and you want it to be monochrome.
- Open and Copy Logo: Open your logo image in Photoshop. Copy it across to the photo you want to watermark.
- Adjust Blending Mode: Select the logo's layer and change the blending mode to "Darken." This will make the white background disappear, leaving only the black and grey areas.
- Invert and Link (Optional for White Watermark): If you think this watermark would look better in white than black, this is easy to do. First, add an "Invert" adjustment layer (Layer > New Adjustment Layer > Invert). In the Layers panel, position the Invert layer directly above the logo layer. Highlight the Invert layer, then hold Alt/Option and click on the line between the two layers. This will clip the Invert layer to the logo layer, ensuring that only the logo is inverted rather than the entire image.
- Change Blend Mode to Lighten: Finally, select the logo layer and change its blend mode to "Lighten." You can also apply this technique to color logos, although these can clash with the photo's colors and be difficult to read.
- Adjust Opacity and Position: Use the Move tool for positioning the logo and the Free Transform tool (Ctrl+T in Windows, Cmd+T on Mac) for resizing the logo as per your needs. Double-click the logo layer again and select Blending Options. Adjust the opacity from the Blending Options to make the watermark subtle yet visible.
Batch Processing Watermarks
If the watermark is to be applied to a large selection of images, it can be added using a batch process in either Photoshop or Bridge.
- In Photoshop: Use File > Scripts > Image Processor.
- In Bridge: Use Tools > Photoshop > Image Processor.
These tools allow you to apply a saved action or preset to multiple files automatically, saving significant time and ensuring consistency across your portfolio.
Actions for Reusable Watermarks
For frequently used watermarks, creating a Photoshop Action is highly recommended.
- Open the Actions Panel: Open the “Actions” panel if not already visible (Window > Actions).
- Create a New Action: Click the "Create new action" button. When the New Action window opens, give it a name - "Watermark" or "Copyright" would be the best choice. Click "Record."
- Perform Watermark Steps: Now, perform all the steps necessary to add your watermark to an open image (e.g., adding text, adjusting opacity, positioning).
- Stop Recording: Once you have applied the watermark to your satisfaction, click the square "Stop recording" button below your current Action.
- Run the Action: You should now be left with an Action that you can use over and over. To use it, open a new image, select the Action you created from the Actions panel, and hit the “Play” button. The recorded steps will be applied automatically.
Applying a watermark in Photoshop is a crucial step in protecting your intellectual property in the digital age. By utilizing these methods, you can effectively brand your images, making them uniquely yours and deterring unauthorized use. Remember, while no method is foolproof, a well-placed and consistent watermark significantly increases the difficulty for those who might seek to misuse your work.