Removing the background from an image in Photoshop is a fundamental skill that unlocks a world of creative possibilities. Whether you're a seasoned professional or just starting your Photoshop journey, understanding how to isolate subjects and manipulate backgrounds is crucial for achieving polished and versatile results. This tutorial will delve into various techniques, from simple automated tools to more intricate manual methods, ensuring you can tackle any background removal challenge with confidence.
Why Remove Backgrounds in Photoshop? The Power of Flexibility
The primary benefit of removing an image's background lies in the immense flexibility it provides. When you detach a subject from its original setting, you gain the ability to repurpose that image for a multitude of applications without the need for reshooting. This is particularly invaluable for product photography, where a single product shot can be adapted to various marketing materials, website banners, or social media campaigns. By removing the background, you can effortlessly change the background color to match branding guidelines or swap in entirely new scenes to create different moods and contexts. This not only saves time and resources but also allows for a more dynamic and responsive creative workflow.
Essential Tools for Background Removal
Photoshop offers a diverse toolkit for tackling background removal. While some methods are automated and quick, others require a more hands-on approach for intricate details. Understanding when to use each tool is key to achieving professional-looking results.
The Magic Wand Tool: Quick Selections for Uniform Backgrounds
For images with a relatively uniform background color and texture, the Magic Wand Tool is an excellent starting point. This tool selects areas of similar color with a single click.
To utilize the Magic Wand Tool:
- Open your image in Photoshop.
- Select the Magic Wand Tool from the toolbar (keyboard shortcut: W).
- Adjust the Tolerance setting: This crucial setting determines how similar in color pixels must be to be selected. A lower tolerance (e.g., 20) prevents the tool from selecting parts of your subject, while a higher tolerance will select a broader range of colors.
- Click on the background area you wish to remove. The Magic Wand will create a selection around similarly colored pixels.
- Refine the selection: Often, the Magic Wand won't capture all of the background in a single click, especially in areas with subtle color variations or gradients. To add to your existing selection, hold down the Shift key while clicking on the missed areas. This allows you to progressively build a more complete selection of the background.
- Address problematic areas: If certain areas are significantly different in color or texture from the majority of the background (like a watermark in the provided example), the Magic Wand might struggle. In such cases, you might need to use other selection tools to isolate these specific regions.
The Marquee Tool: Rectangular and Elliptical Selections
While primarily used for basic geometric selections, the Marquee Tool can also be employed in conjunction with other tools to refine background removal. For instance, if you have remaining background areas that are difficult to select with the Magic Wand, you can use the Marquee Tool to quickly select larger sections.
To incorporate the Marquee Tool for refinement:
- Ensure the Marquee Tool is selected.
- Hold down the Shift key to add to your existing selection.
- Draw a rectangle or ellipse around any remaining background areas that need to be selected.
Expanding and Inverting Selections: Precision and Control
Once you have a substantial portion of the background selected, you'll often need to refine the selection further. Expanding your selection slightly can help ensure you capture any stray background pixels that might be clinging to the edges of your subject.
To expand your selection:
- With your background selected, go to the menu bar and navigate to Select > Modify > Expand.
- Enter a value (e.g., 3 pixels) to expand the selection outwards. This small expansion can help capture subtle background remnants.
After expanding, you'll likely have a selection of the background. However, to isolate your subject, you need to invert this selection so that only your desired element is selected.
To invert your selection:
- Go to Select > Inverse. Now, your subject will be selected, and the background will be deselected.
Feathering: Softening Edges for Natural Transitions
A common pitfall in background removal is creating harsh, unnatural edges around your subject. Feathering softens these edges, creating a more seamless blend between the subject and any new background you might introduce.
To apply feathering:
- With your subject selected, go to Select > Modify > Feather.
- Enter a small value, typically 1 to 2 pixels, for a subtle softening. This blurs the selection boundary slightly, making the transition appear more natural and convincing.
The Lasso Tool: Freehand Selections for Irregular Shapes
The Lasso Tool offers greater freedom for selecting irregularly shaped areas. It's particularly useful for manually cleaning up remaining background bits or for selecting complex edges that automated tools might miss.
To use the Lasso Tool:
- Select the Lasso Tool from the toolbar (keyboard shortcut: L).
- Draw a freehand selection around any remaining background areas you want to remove.
- Hold down the Shift key to add to your selection if you need to make multiple lasso selections.
- After making your lasso selections, you can apply feathering again (Select > Modify > Feather) to ensure consistency with previous adjustments.
Advanced Techniques for Precise Background Removal
While the tools mentioned above are fundamental, Photoshop offers more sophisticated methods for achieving truly professional results, especially when dealing with challenging subjects like hair or fur.
The Quick Selection Tool and "Select Subject"
Photoshop's Quick Selection Tool is designed to quickly "paint" a selection based on color and texture. It's more intuitive than the Magic Wand for complex areas. Even more powerful is the "Select Subject" feature.
To use "Select Subject":
- Ensure you have your image open.
- Locate the "Select Subject" button within the Quick Actions panel.
- Clicking this button prompts Photoshop to automatically analyze your image and identify the main subject, creating a selection for you. This feature often works remarkably well, especially on images with good contrast between the subject and background.
Important Note: The "Select Subject" feature, and some other automated selection tools, often require an internet connection to function as they utilize cloud-based processing.
The Select and Mask Workspace: The Professional's Choice
For intricate details like hair, fur, or transparent elements, the Select and Mask Workspace is indispensable. It provides a focused environment for refining selections and masks without the distractions of the main Photoshop interface.
To access and use Select and Mask:
- After making an initial selection (using any of the tools discussed), go to Select > Select and Mask.
- Within this workspace, you'll find various tools and sliders to refine your selection.
- Refine Edge Brush Tool: This is your go-to for hair and fur. Paint over these areas, and Photoshop will intelligently analyze the edges to create a more accurate mask.
- Global Adjustments: You can apply global adjustments like Feathering or Smoothness to the entire selection.
- Decontaminate Colors: This option is crucial for removing color casts that may appear around the edges of your subject due to reflections from the original background.
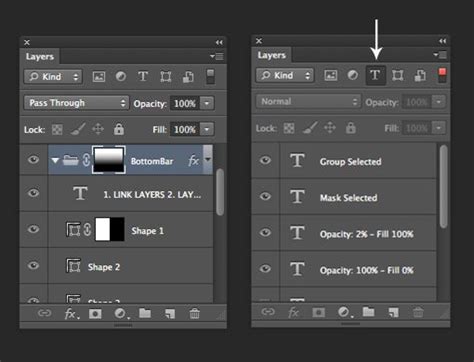
Working with Masks: Non-Destructive Editing
Instead of directly deleting pixels, it's best practice to use layer masks for background removal. A mask allows you to non-destructively hide or reveal parts of a layer.
To create and refine a mask:
- Once you have a good selection of your subject, click the "Add layer mask" icon at the bottom of the Layers panel. This will create a mask that hides everything outside your selection.
- Painting on the mask: If you notice leftover background bits or areas where the mask has accidentally hidden parts of your subject, you can correct this by painting directly on the mask.
- Paint with black on the mask to hide areas (revealing the background).
- Paint with white on the mask to reveal areas (bringing back parts of your subject).
- Paint with gray to create semi-transparent areas.
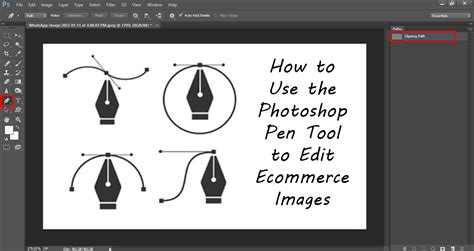
The Pen Tool: Ultimate Precision for Complex Shapes
For ultimate control and precision, especially with sharp, defined edges or when creating silhouettes, the Pen Tool is the industry standard. While it has a steeper learning curve, it offers unparalleled accuracy.
To use the Pen Tool for background removal:
- Select the Pen Tool from the toolbar. Ensure it is set to the "Path" option in the options bar.
- Zoom in closely on your image.
- Click to place anchor points around the edge of your subject. For straight lines, simply click from point to point.
- To create curves: Click and drag your cursor to create bezier handles that control the curve of the line.
- To return to a straight line from a curve: Hold down the Alt (Windows) or Option (macOS) key and click on the last anchor point, then drag a new straight line from that point.
- Close the path by clicking back on your very first anchor point.
- Once your path is complete, you can create a selection from the path by right-clicking on the path in the Paths panel and choosing "Make Selection."
- With the selection active, you can then add a layer mask to remove the background.
Handling Specific Backgrounds and Edge Cases
Different types of backgrounds and subjects present unique challenges. Understanding how to adapt your approach is key.
Removing White Backgrounds
Making a white background transparent is a common task. The Magic Wand Tool is often effective here, especially if the white is consistent. However, if there are subtle shadows or variations, you might need to combine it with the Quick Selection Tool or manual masking. The goal is to isolate your subject so you can use it in a variety of ways.
Dealing with Color Casts
When removing a colored background, especially a vibrant one, some of that color might reflect onto the edges of your subject, creating an undesirable color cast. This is where the "Decontaminate Colors" option in the Select and Mask workspace, or manual color correction on the mask, becomes crucial. You can use the Brush Tool with the Alt/Option key to activate the Eyedropper Tool and sample colors from your subject to paint over these casts on the mask.
Intricate Edges: Fur and Hair
Animal fur and human hair are notoriously difficult to mask perfectly. The Refine Edge Brush Tool within the Select and Mask workspace is your best ally here. Gently paint over these areas to allow Photoshop to analyze and separate the fine strands from the background. Sometimes, a global feather or blur might not work well; you may need to apply localized adjustments or even paint on the mask with varying opacities. A secret among professionals is that if an area is too challenging to select precisely, it's often easier to mask it away with careful brushwork on the layer mask.
Easy Complex Hair Masking in Photoshop - Quick Tutorial
Post-Removal Refinements and Creative Applications
Once the background is removed, it's essential to perform a final check and consider how you'll use the isolated subject.
Double-Checking Your Selection
After removing the background, take a moment to double-check the edges of your subject. Zoom in closely, especially around areas like animal fur, human hair, or translucent objects. Look for any stray pixels from the original background or any parts of your subject that may have been inadvertently masked out.
Replacing the Background
With your subject isolated, you can now place it onto a new background. This is as simple as:
- Opening your desired background image in Photoshop.
- Dragging and dropping your isolated subject onto the background image's canvas.
- Using the Transform tool (Ctrl+T or Cmd+T) to resize and position your subject as needed.
- Ensuring your subject layer is above the background layer in the Layers panel.
Conclusion: Mastering the Art of Background Removal
The ability to effectively remove backgrounds in Photoshop is a cornerstone skill for digital artists and designers. By understanding and practicing with tools like the Magic Wand, Lasso Tool, Quick Selection, and the powerful Pen Tool, and by leveraging advanced features like the Select and Mask workspace and layer masks, you can achieve professional-grade results. Remember that practice is key, and experimenting with different techniques on various images will build your confidence and proficiency. The flexibility gained from mastering background removal opens up a vast array of creative possibilities, allowing you to transform your images and bring your artistic visions to life.
For those seeking to deepen their expertise, specialized courses like the "Selections and Masking Mastery Course" offer comprehensive, step-by-step guidance, downloadable practice files, and custom Photoshop brushes, taught by industry professionals. Such resources can accelerate your learning and help you unlock the full potential of Photoshop's selection and masking capabilities.