Black and white photography possesses a timeless allure, continuing to mesmerize viewers even in our contemporary era saturated with vibrant color imagery. The transformation of a color photograph into a monochromatic masterpiece is a creative endeavor that unlocks new dimensions of visual storytelling. Photoshop offers a powerful suite of tools to achieve this, ranging from rapid, one-click solutions to more nuanced, adjustable methods. This article delves into various techniques for converting color images to black and white within Photoshop, emphasizing efficiency, control, and the preservation of creative flexibility.
The Desaturate Command: A Quick, Yet Permanent, Solution
One of the most immediate ways to remove color from an image in Photoshop is by employing the Desaturate command. This method is exceptionally fast and straightforward, making it an attractive option for users seeking a quick conversion. For an even faster way to select the Desaturate command, simply press the keyboard shortcut Shift+Ctrl+U (on Windows) or Shift+Command+U (on Mac).
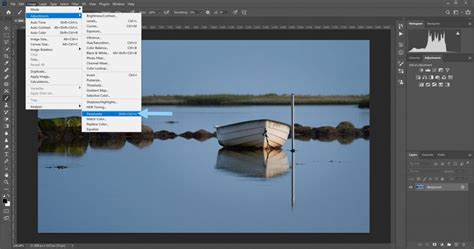
Using the Desaturate command was certainly quick and painless, but the problem is, it's also permanent. Since we've made changes directly to the original image, if we save our document and close out of it at this point, the color in the photo will be gone for good. Even if we save the document as a Photoshop .PSD file, there will be no way to bring the original color back. This inherent lack of reversibility is a significant drawback for photographers who may wish to revisit the original color version or fine-tune the black and white conversion later.
Of course, one way we could have avoided this problem would have been by first duplicating the Background layer to create a copy of the image, then applying the Desaturate command to the copy. This simple step ensures that the original color information remains intact on a separate layer, allowing for non-destructive editing.
To bring back the photo's original color if you've used the Desaturate command on the background layer, you can undo the action by going up to the Edit menu at the top of the screen and choosing Undo Desaturate.
The Hue/Saturation Adjustment Layer: Non-Destructive Control
A more professional and flexible approach to black and white conversion involves using adjustment layers, specifically the Hue/Saturation adjustment layer. This method offers a significant advantage over the Desaturate command: it is non-destructive. This means that the original image data remains untouched, allowing for unlimited edits and the ability to revert changes at any time.
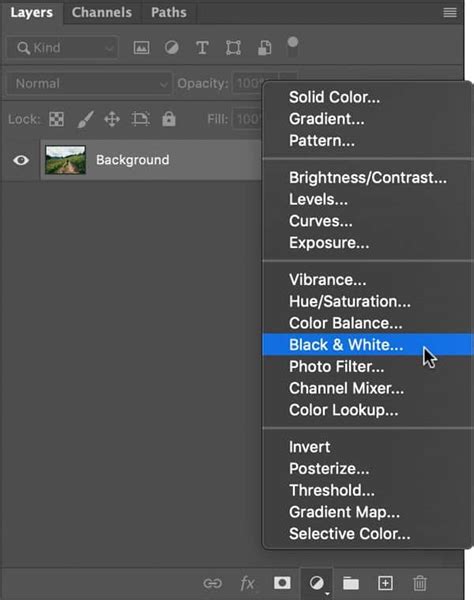
To apply a Hue/Saturation adjustment layer, navigate to the Layers panel, click on the Create new fill or adjustment layer icon (a half-filled circle), and select Hue/Saturation.

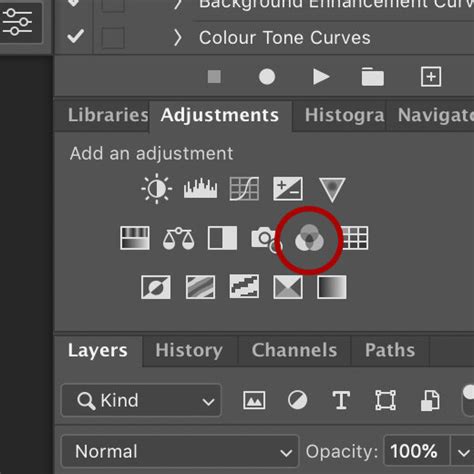
Once the Hue/Saturation adjustment layer is created, a properties panel will appear. If you're using Photoshop CS4 or later, the controls and options for the Hue/Saturation adjustment layer will typically appear in the Adjustments Panel, which was a new feature introduced in CS4.
To convert the image to black and white using this layer, simply drag the Saturation slider all the way to the left, towards -100. This effectively removes all color information from the image, yielding a black and white result. This gives us the exact same result that we saw with the Desaturate command.
So what's the difference between using the Desaturate command and dragging the Saturation slider? Well, let's say we decide that we don't want a completely black and white image. We'd like to bring back a subtle amount of the photo's original color. With the Desaturate command, unless we duplicated the Background layer first and applied the command to a copy of the image, we'd be out of luck. Since we're using an adjustment layer, nothing we're doing to our image is permanent. We're free to make as many changes as we like without causing any harm to the original photo.
To restore some of the original color, simply drag the Saturation slider back a little towards the right. Keep an eye on your photo in the document window to judge the results as you drag the slider. The further you drag it towards the right, the more color you'll restore. This level of control allows for subtle desaturation or the creation of duotone effects, which are impossible with the permanent Desaturate command.
PHOTOSHOP ((Quick Tip)) Fine Tune COLOR IMAGES with the BLACK & WHITE Adjustment Layer
Exploring Other Photoshop Black and White Conversion Methods
While Desaturate and Hue/Saturation offer quick entry points, Photoshop provides a richer palette of tools for creating nuanced black and white images. These methods offer varying degrees of control over tonal range, contrast, and color channel influence.
The Black & White Adjustment Layer
A dedicated Black & White adjustment layer is another powerful non-destructive tool for converting images to monochrome. This method offers more control over how individual color ranges are converted to grayscale tones, allowing for creative manipulation of luminance values.
To use this:
- Select the Black & White adjustment layer from the Create new fill or adjustment layer menu.
- Photoshop will present a dialog box with sliders for Red, Yellow, Green, Cyan, Blue, and Magenta.
- Adjusting these sliders affects how the corresponding colors in the original image are translated into shades of gray. For instance, dragging the "Red" slider to the right will make red tones in the image lighter in the black and white version, while dragging it left will make them darker.
- The "Auto" button can provide a good starting point, and you can further refine the look using the presets available in the Properties panel.
This method is particularly useful for enhancing textures and details by selectively darkening or lightening specific color components.
Grayscale Mode Conversion
For a straightforward, permanent conversion to black and white, Photoshop's Grayscale mode is an option. This mode discards all color information and converts the image to 256 shades of gray.
To convert to Grayscale mode:
- Go to Image > Mode > Grayscale.
- Photoshop will prompt you with a dialog box asking if you want to discard the color information. Click Discard.
While quick, this method is permanent and offers no control over the conversion process. It's best suited for situations where color information is not needed and a simple grayscale representation is sufficient.
Channel Mixer for Monochrome Control
The Channel Mixer offers a sophisticated way to control the conversion to black and white by allowing you to blend the red, green, and blue channels of the original image. This method provides granular control over the luminance values of the final grayscale image.
To use the Channel Mixer for black and white:
- Go to Layer > New Adjustment Layer > Channel Mixer.
- In the Channel Mixer dialog box that appears, click the Monochrome checkbox at the bottom.
- You can then adjust the sliders for Red, Green, and Blue. The total percentage of these sliders should ideally add up to 100% to maintain the overall brightness of the image.
- By manipulating these channel contributions, you can significantly alter the tonal relationships and contrast of the resulting black and white image. For instance, emphasizing the red channel can often lead to smoother skin tones in portraits.
This technique is favored by many professionals for its ability to sculpt the final image's appearance by understanding how color channels contribute to luminance.
Gradient Map Adjustment Layer
The Gradient Map adjustment layer can also be used to create black and white images, albeit in a more artistic way. Instead of a direct conversion, it maps the luminance values of the image to colors in a gradient. By choosing a gradient that consists only of shades of gray, you can achieve a black and white effect.
To use a Gradient Map for black and white:
- Select the Gradient Map adjustment layer.
- In the Properties panel, click on the gradient preview to open the Gradient Editor.
- Select a preset grayscale gradient, or create your own by setting both color stops to black and white.
- The gradient will then remap the image's tones, from the darkest shadows to the brightest highlights.
While this method can produce interesting results, it's often more about creative color grading than a standard black and white conversion.
Enhancing the Black and White Workflow
The act of converting a photo to black and white in Photoshop is straightforward, but achieving truly compelling results often requires more than just a single click. The journey to a stunning black and white image can involve multiple adjustments to contrast, tone, and detail. This is where tools that streamline the editing process become invaluable.
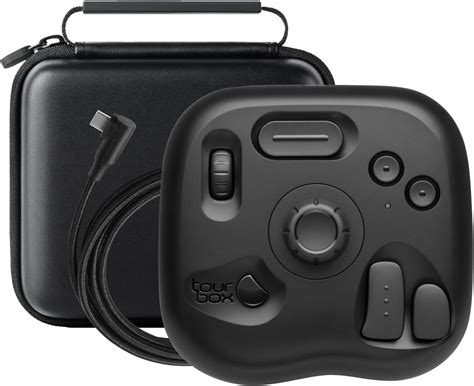
For instance, the use of a dedicated hardware controller like TourBox can significantly enhance efficiency and maintain a fluid creative workflow. With TourBox, you can efficiently adjust your photos, navigate through your workspace, and execute commands without breaking your creative flow. Assigning shortcuts for specific adjustments, brush sizes, or layer selections can dramatically speed up repetitive tasks, allowing you more time to focus on the artistic aspects of editing.
The Enduring Power of Black and White
By shedding the layers of color, we are challenged to find beauty in simplicity, to find meaning in the mundane, and to find stories in silence. Black and white photography strips away the distraction of color, forcing the viewer to engage with the subject on a deeper level, focusing on form, texture, light, and shadow. It emphasizes the fundamental elements of composition and emotional resonance.
With this in mind, we encourage you to embrace the simplicity and depth of black and white photography. Experiment with the various methods Photoshop offers, from the rapid Desaturate command for quick edits to the nuanced control of adjustment layers like Black & White and Channel Mixer for truly artistic transformations. Play with it, and see where it takes you. Each technique offers a unique pathway to unlocking the dramatic potential and timeless appeal of monochrome imagery.