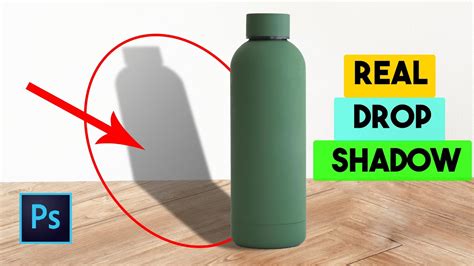
Realistic shadows are the unsung heroes of professional product photography. They lend an air of authenticity and polish, making objects appear grounded and believable. While ideal shooting conditions and perfect lighting can achieve this organically, they are not always feasible. Fortunately, Adobe Photoshop offers powerful tools to imbue your product images with natural-looking drop shadows, transforming them from flat images into compelling visual narratives. This tutorial delves into the nuanced process of creating these shadows, moving beyond the simplistic application of the "Drop Shadow" layer style to construct shadows that mimic real-world physics and lighting.
How to Make most REALISTIC SHADOWS in Photoshop, 3 simple steps
Understanding the Science of Shadows
Before embarking on the technical steps, it's crucial to grasp the fundamental principles of how light and shadow interact. Objects cast two primary types of shadows:
- Cast Shadows: These are the shadows projected by an object onto a surface, such as the floor or another object. Their appearance is dictated by the light source's direction, distance, and intensity, as well as the object's form. Cast shadows typically become lighter and more diffused as they move further away from the object casting them.
- Form Shadows: These are the shadows that occur naturally on the object itself, revealing its three-dimensional form. By understanding how form shadows fall on an object, you can gain valuable insights into how a realistic cast shadow might behave.
The distinction between a simple "drop shadow" effect and a "cast shadow" is significant. A basic drop shadow, as applied through Photoshop's layer styles, often maintains a uniform size and shape relative to the object. In reality, shadows rarely conform to such rigid parameters. Achieving a natural look requires simulating the way light behaves, which means adjusting the shadow's blur, opacity, and distortion based on its distance from the object and the inferred light source.
The Step-by-Step Process for Crafting Natural Shadows
This comprehensive tutorial will guide you through creating a realistic drop shadow in Photoshop, employing a combination of layer styles, transform tools, gradient manipulation, blur effects, layer masks, and alpha channels.
1. Isolate Your Product from the Background
The first foundational step is to meticulously separate your product from its original background.
- Open the photograph you intend to modify in Photoshop.
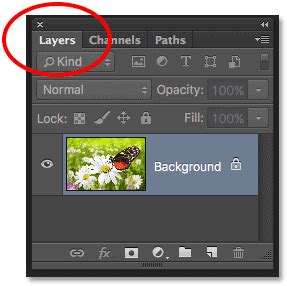
- Navigate to Window > Layers to ensure your Layers panel is visible.
- Use your preferred selection tool (such as the Quick Selection Tool, Pen Tool, or Object Selection Tool) to accurately select your product.
- Copy your selection (Ctrl+C or Cmd+C) and paste it into a new layer (Ctrl+V or Cmd+V). This crucial step ensures that your original image remains untouched, allowing for non-destructive editing.
- Rename this new layer to something descriptive, like "Isolated Object," to prevent confusion as you build your shadow layers.
- Click the eye icon next to the original Background layer to make it invisible. This will present your isolated object against a transparent canvas, ideal for shadow creation.
2. Establish a New Background
With your object isolated, it's time to create a clean backdrop against which your shadow will be rendered.
- In the Layers panel, select your hidden background layer (or simply click on the transparent canvas area if no background layer is present).
- Go to Layer > New Fill Layer > Solid Color….
- A dialog box will appear prompting you to name the new layer. A suitable name would be "Solid White." Click OK.
- The Color Picker window will launch. To create a pure white background, navigate to the upper-left corner of the color field or, more precisely, type
ffffffinto the hexadecimal color value field. Click OK. - You should now see a solid white layer covering your entire canvas.
- In the Layers panel, click and drag this new white fill layer so that it sits directly beneath your "Isolated Object" layer.
3. Determine Your Cast Shadow Color
Shadows are not merely black voids; they possess color influenced by the ambient light and the object itself.
- Examine your isolated object for any natural form shadows. These internal shadows can provide valuable clues about the color your cast shadow should adopt.
- Select the Eyedropper Tool from the Toolbar.
- Click on a prominent form shadow within your object. The color you sampled will now appear as your foreground color in the Toolbar.
- Double-click on this foreground color swatch to reopen the Color Picker.
- To achieve a more realistic shadow color, slightly darken and desaturate the sampled color by moving the selection downwards and to the left within the color field. Click OK. This adjusted color will serve as your primary shadow color.
4. Create an Initial Drop Shadow
Now, let's apply a basic drop shadow that will serve as the foundation for our more complex shadow.
- Ensure your "Isolated Object" layer is selected in the Layers panel.
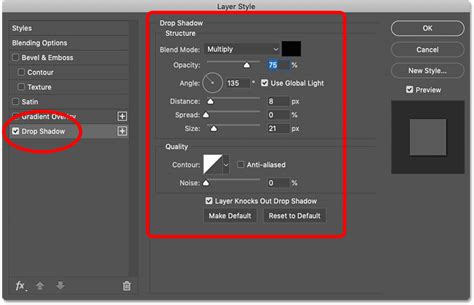
- Click the fx icon at the bottom of the Layers panel and choose Drop Shadow.
- The Drop Shadow dialog box will appear. Set the Color of the shadow to the foreground color you previously sampled and adjusted.
- For now, don't be overly concerned with the precise values for Opacity, Distance, Spread, and Size. You can use the values shown in reference screenshots as a starting point. The key is to get a shadow visible. Click OK once you have a basic shadow.
5. Separate the Drop Shadow onto its Own Layer
To gain independent control over the shadow, it needs to be detached from the layer styles.
- With your "Isolated Object" layer still selected, go to Layer > Layer Style > Create Layer.
- A warning dialog box may appear, informing you that the layer style will be converted into a new layer. Click OK to proceed.
- Your drop shadow is now on its own dedicated layer, positioned directly below your object. This separation is critical for further manipulation.
6. Distort the Drop Shadow for Realism
Real-world shadows are rarely perfectly rectangular or aligned. They stretch and distort based on the light source's angle and the surface they fall upon.
- In the Layers panel, select the newly created drop shadow layer.
- Go to Edit > Transform > Distort.
- You will see bounding box handles around your shadow. Click and drag these handles to pull the shadow downwards and outwards, simulating it falling onto a surface.
- Consider the form shadows on your object to infer the direction of the light source. This will guide you in determining the natural direction of the cast shadow. Also, think about the vanishing point of your image to inform how far and in what direction you should distort the shadow. This step requires a degree of artistic judgment and observation of real-world shadows.
How to Make most REALISTIC SHADOWS in Photoshop, 3 simple steps
7. Create an Alpha Channel for Gradient Control
The further a shadow is from its source object, the lighter and blurrier it becomes. An alpha channel is an effective way to precisely control these gradations.
- Navigate to Window > Channels to open the Channels panel.
- Click on the Channels panel menu (the icon with four horizontal lines in the top-right corner of the panel) and select New Channel….
- In the New Channel dialog box, you can keep the default name "Alpha 1." Crucially, under Color Indicates, ensure the Selected Areas radio button is chosen. Click OK.
- You will now see "Alpha 1" listed in your Channels panel. Make sure the visibility (the eye icon) is toggled on for all channels (RGB/CMYK and Alpha 1) so you can see the interaction.
8. Apply a Gradient within the Alpha Channel
This step defines the fall-off of your shadow, making it fade into the background.
- In the Channels panel, click on your "Alpha 1" channel to select it, just as you would select a layer in the Layers panel.
- Select the Gradient Tool from the Toolbar.
- In the Options Bar at the top of your application window, ensure that the gradient is set to Black to White and the Gradient Type is Linear. Also, ensure your foreground color is black and your background color is white.
- Position your cursor at the point furthest from your object (or even beyond the canvas edge) and drag the gradient tool towards the part of the shadow closest to your object. A red overlay will appear, indicating the gradient's influence. This red overlay represents the areas that will be affected by the gradient.
9. Blur the Selection Based on the Alpha Channel
Now, we'll use the gradient created in the alpha channel to selectively blur the shadow layer.
- In the Channels panel, you can toggle off the visibility of the red gradient overlay by clicking the eye icon next to Alpha 1 if it becomes distracting.
- Click on the top channel in your Channels panel (e.g., RGB or CMYK, depending on your image's color mode) to re-select your color channels and deselect the alpha channel.
- Return to your Layers panel and ensure your drop shadow layer is still selected.
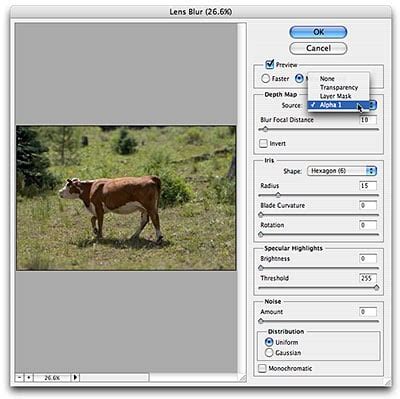
- Go to Filter > Blur > Lens Blur….
- In the Lens Blur dialog box, ensure the Preview box is checked.
- Under the Depth Map section, choose Alpha 1 from the Source dropdown menu.
- Set Blur Focal Distance to
0and check the box next to Invert. - Adjust the Radius slider to a high value (e.g., 72 or more). This value determines the extent of the blur. Leave other settings at their defaults for now. Click OK.
10. Create a Layer Mask for Refined Fading
A layer mask will allow us to precisely control the visibility of the blurred shadow, ensuring it fades naturally.
- Go to Select > Load Selection….
- In the Load Selection dialog box, choose Alpha 1 from the Channel dropdown menu. Ensure New Selection is checked. Click OK.
- You will now see a selection marquee that approximates the darkest areas of the gradient you created in your alpha channel.
- Invert this selection by going to Select > Inverse or using the shortcut Shift+Ctrl+I (or Shift+Cmd+I on a Mac).
- With the inverted selection active, go to your Layers panel and click the Add Layer Mask icon at the bottom of the panel.
- The shadow should now appear to "fade" as it recedes from the object. The thumbnail for the layer mask should visually resemble the gradient you created in Alpha 1. If the shadow appears too strong or too subtle, you can adjust the opacity of the Drop Shadow layer itself.
11. Refine Shadow Placement and Clean Up Edges
The final stage involves ensuring the shadow behaves realistically according to the inferred light source and tidying up any imperfections.
- Carefully examine your shadow. Ensure no part of it appears to fall on the "front" of your object if the light source is positioned behind it. For instance, if the light is coming from the right, the cast shadow should primarily fall to the left.
- Select the Eraser Tool.
- Using a soft-edged brush, carefully erase any portions of the shadow that do not logically align with the direction of your inferred light source. This meticulous cleanup is key to achieving a believable effect.
When to Employ Natural Shadows in E-commerce
The strategic application of natural shadows can significantly enhance product imagery, particularly in e-commerce.
- Product Pop: When showcasing products on a clean white background, a natural shadow helps the item stand out, creating a more dynamic and professional presentation.
- Adding Dimension and Depth: For items like furniture, where complex lighting during a photoshoot might be impractical, the natural drop shadow technique can effectively convey depth and dimensionality without the need for specialized studio setups. Retailers like The Mood Store and Famous Footwear consistently utilize this technique to imbue their product listings with a polished and inviting aesthetic.
Adding natural shadows to your product photos is a vital step in optimizing them for sales. While it is a detailed and time-consuming process, the return on investment in terms of visual appeal and perceived professionalism is substantial.
Frequently Asked Questions About Photoshop Shadows
How do I add a shadow to an image in Photoshop?The process involves isolating your object, creating a new background, determining shadow color, applying a basic drop shadow, converting it to a layer, distorting it, and then using alpha channels and layer masks to refine its appearance, considering the light source throughout.
What is the easiest way to add a shadow in Photoshop?The most straightforward method is to apply the built-in "Drop Shadow" layer style to your isolated object. However, this often results in an unrealistic shadow that requires further manipulation for a natural look.
How do you add a subtle shadow in Photoshop?For a subtle effect, you can create a small, feathered ellipse of color beneath your object using the Ellipse Tool. Set it to be short and wide, feather the selection, fill it with 50% gray, and then significantly reduce its opacity.
What is a drop shadow in Photoshop?A drop shadow is a layer effect that simulates a shadow cast by a layer onto the layers beneath it. It's accessed via Layer > Layer Style > Drop Shadow… and allows adjustments to blend mode, color, opacity, angle, distance, spread, and size, creating the illusion of depth.
What are the different types of shadows in Photoshop?Photoshop can create three main types of shadows:
- Drop Shadow: A basic shadow effect applied directly to a layer.
- Natural Shadow (or Cast Shadow): A more realistic shadow that mimics how light behaves, often created through manual techniques involving distortion, gradients, and blurs.
- Reflective Shadow: Simulates a reflection, often seen with glossy surfaces or water.
Can you remove drop shadows from layers in Photoshop?Yes, you can hide a drop shadow by clicking the eye icon next to it in the Layers panel, or permanently remove it by unchecking the "Drop Shadow" option in the Layer Style dialog box. You can also right-click the effect and choose "Create Layer," then delete that layer.
What is the purpose of a drop shadow?Drop shadows are used to create visual separation between an object and its background, making the object appear to float and adding a sense of depth and dimension to an image. They help guide the viewer's eye and improve the overall visual hierarchy.
Can you add a drop shadow to text in Photoshop?Absolutely. Select your text layer, double-click it to open the Layer Style dialog box, and then check the "Drop Shadow" option. You can then customize its appearance.
When would you use a reflective shadow for jewelry photos?Reflective shadows are particularly effective for jewelry photography as they can enhance the sparkle and shine of gemstones and precious metals, mimicking the way they would appear on a highly polished surface or in water.
How do you add a drop shadow to all layers in Photoshop?While you can apply the drop shadow effect individually to each layer, a more efficient method for consistent shadows across multiple layers is to apply it to one layer, then use Edit > Copy with Property Links (if available in your version) or to group layers and apply the style to the group.
What if my drop shadow isn't working in Photoshop?If the drop shadow effect is not behaving as expected, try resetting your Photoshop preferences or checking for conflicts with other layer effects. Ensure you are applying it to a layer that can accept layer styles and that the settings are not inadvertently canceling each other out. Sometimes, clearing the cache or restarting Photoshop can resolve such issues.