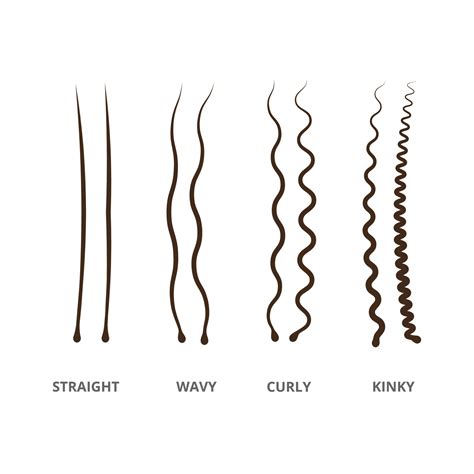
Drawing realistic and dynamic curly hair in digital art can be a daunting task for many artists. However, with the right techniques and tools, it becomes an achievable and rewarding process. This tutorial will guide you through two distinct methods for illustrating curly hair in Procreate: the "Wavy Road Method" and the "Staircase Method." These approaches break down the complexity of curly hair into manageable steps, allowing you to create natural-looking strands with depth and dimension. We will explore the foundational line work, shading techniques, and detailing that bring these illustrations to life.
The Wavy Road Method: Crafting Fluid Curls
The Wavy Road Method offers a fluid and organic approach to drawing hair, emphasizing the natural flow and variation within a single strand. This technique is excellent for creating softer, more undulating curls.
Step 1: Laying the Foundation with a Wavy Line
Drawing hair may seem hard, but you’ll see it’s pretty easy to do. For the wavy road method, let’s start by drawing a wavy line. This initial line serves as the central axis or the flow of your hair strand. It's the backbone upon which the rest of the detail will be built.
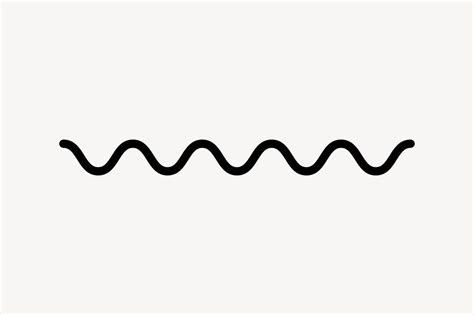
Step 2: Transforming the Line into a Wavy Road
Now, let’s draw another wavy line next to the first one we drew to create your wavy road. Try to ensure that this second line is not exactly following the waves of the first one. This variation is crucial for creating a sense of volume and realism. So make sure that you have thicker and thinner areas between the two lines. These variations in spacing will dictate where shadows and highlights will later be placed. And there you have the base of your wavy hair strand. To maintain organization, I’ll call this layer “Wavy Road” to keep everything organised. This layer acts as your guide, defining the overall shape and thickness of the hair strand.
Step 3: Building Depth with Shadow Areas
Create a new layer and let’s start filling this wavy and hairy road! Start with the darkest areas, you can find them where the two lines are closer to each other. Using a “c” like movement, start creating short, sketchy lines in the darkest areas. This "c" like movement mimics the natural curve of hair strands and helps to build up form. It doesn’t need to be perfect from the start. Now create longer lines that join the lines you created before. This layering of strokes adds to the texture and volume. Now let’s blend that a little bit to make it softer. Blending is key to creating smooth transitions and a more realistic appearance. And continue to layer on. It is recommended to create a new layer every time after you blend one area. This non-destructive workflow allows for easier adjustments and corrections. When you’re happy with how it’s looking, merge all the layers except the one we called "Wavy Road", where you have the sketch. To do this, just pinch your fingers on top of all the layers you want to merge. Now let’s duplicate this layer and turn the view off. This way we can always return to this stage if we make a mistake, providing a safety net for your creative process.
Step 4: Introducing Light and Highlights
On the layer that is on, let’s create more light. For this, let’s use the eraser. Start softly and delicately erasing using the same “c” like movement where the two original lines are farther apart from each other. This is where the light catches the hair, creating highlights and defining its form. Keep doing this and blending when you think necessary until you’re happy with how it’s looking. The interplay of light and shadow is what gives the hair strand its three-dimensional quality.
Step 5: Adding Finishing Touches for Realism
Once you’re happy, let’s add some final details and call it a hair! Go back to the “Wavy Road” layer and turn it off. Create a new layer and start adding extra hairs on the sides so the illustration looks more natural and real. These individual strands, often called "flyaways" or "chit-chat hairs," add a crucial element of realism that prevents the hair from looking too uniform or artificial. Once I do that, I like to merge my layers and delicately create some extra hairs that go through the whole thing both with the eraser and the pencil for the same reason as before - to add subtle variations and break up any harsh lines. And there you have the Wavy Road Method!
Procreate Simple Hair Brush tutorial
The Staircase Method: Building Structured Curls
The Staircase Method is ideal for rendering tighter, more structured curls, such as those found in coily or kinky hair types. This technique relies on geometric principles to build the curl's form.
Step 1: Establishing the Strand's Outline
For this method, let’s create two vertical lines that are slightly going inward. Keep in mind that these two lines will determine how thick the hair strand is. These lines define the overall width and tapering of the hair segment you are drawing.
Step 2: Creating the "Staircase" Structure
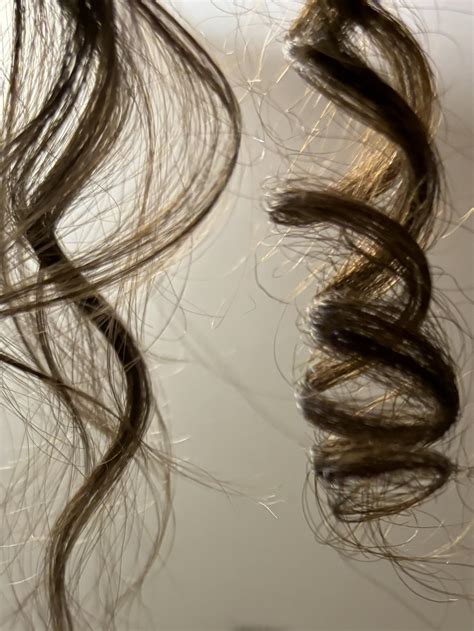
Once you have that, let’s create two diagonal lines. The angle on these lines will determine how curly the hair will be. So, if you want to draw a loose curl, create the lines in an angle that’s more pointing down. But if you want to create more coily hair, then make these lines more pointing to the side. Keep doing lines with the angle you choose until you reach the end of the vertical lines. After this, create a second pair of lines that touch the ends of the first two you drew. So, the top line with the top line and bottom line with the bottom. Keep doing this until you reach the end of the vertical lines. This creates a segmented, staircase-like structure that forms the basis of the curl's shape.
Step 3: Defining Front and Back Sections
Now, let’s determine which of these sections will be at the front and which in the background. Here you can choose what you prefer. What you have to do is choose one of the sections and erase the excess lines to have a more clear overview of which side of the hair will be closer to us. This step is crucial for establishing depth and ensuring that the curls overlap realistically. Once you’ve done that, you have finished the basic sketch that will become your hair strand. I’m going to name this layer “Sketch”.
Step 4: Adding Texture and Volume
Let’s start drawing some hairs now! Make a new layer. Start creating short, sketchy lines on the outer sides of the sections that are closer to you, following the angles of the sketch. These lines shouldn’t touch in the middle because that’s where the light will go, creating a subtle highlight. Keep doing this until you’ve done all the sections that are in the front. After you’re done with the sections that are closer, start with the ones that are further from you. The side that is closer to you will be the side with more light and the other one will be in the shadows. So make the hairs in the sections that are further, darker. This contrast between light and shadow is fundamental to creating volume and form. Extra Tip: After you’re done with all the areas that are in the shadows, take a soft brush and create a light shadow where the front and the back sections meet. This subtle shadow helps to further define the separation between curl segments.
Step 5: Softening Edges with Smudging
Pick the smudging tool with a low opacity and start softly smoothing out the areas that are closer to the center of each section. Repeat this in all the sections. Smudging helps to blend the individual strokes, creating a softer, more cohesive texture that mimics the appearance of actual hair.
Step 6: Refining with Light and Shadow
Now with the eraser, create clean lines that go from the center towards the edges of each section. Be sure to use short lines that don’t go from side to side to help your illustration seem more realistic. These erased lines represent the highlights where light hits the hair most directly. Now with the pencil, let’s softly create more lines and shadows. Continue doing this until you’re happy with how it’s looking. This iterative process of adding and refining, using both the eraser and the pencil, builds up the complexity and realism of the curl.
Step 7: Final Details for a Polished Look
To finish up, go to the sketch layer and turn it off. Go again with the pencil tool and deepen the shadows a bit. Create some extra hairs on the sides to add some finishing touches. To add loose hairs, use a fine detail brush. These final touches, like stray hairs and subtle shadow adjustments, elevate the illustration from a basic rendering to a more convincing and lifelike depiction of curly hair. And there you have your curly hair!
By mastering these two distinct methods, artists can confidently tackle the challenge of drawing curly hair in Procreate, creating dynamic and believable illustrations that capture the unique beauty of different curl types. The key lies in understanding the underlying structure of hair and utilizing Procreate's tools to mimic those natural forms and textures.