DaVinci Resolve, a powerhouse in post-production, offers a dynamic and adaptable interface that can be tailored to suit a myriad of tasks. While the core functionality remains consistent, the way users interact with its various panels can significantly impact efficiency and creative flow. This is where the concept of "layout presets" becomes invaluable, allowing users to swiftly switch between optimized workspaces for different stages of their video production workflow. Whether you're pulling selects, refining an edit, or performing intricate color grading, having pre-configured layouts at your fingertips can save considerable time and mental energy.
The Evolution of DaVinci Resolve's Interface
Originally renowned for its unparalleled color correction capabilities, DaVinci Resolve has evolved into a comprehensive post-production suite. This expansion has led to the integration of distinct "Pages," each dedicated to a specific aspect of the workflow: Media, Cut, Edit, Fusion, Color, Fairlight, and Deliver. Each of these Pages presents a unique arrangement of panels and tools designed for optimal performance within its designated domain. However, within each Page, the arrangement and visibility of individual panels can be further customized, leading to the concept of personalized layout presets.
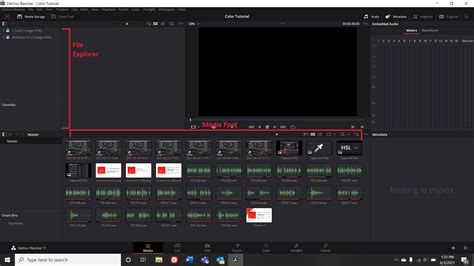
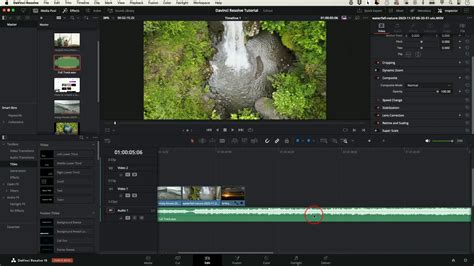
For instance, during the initial import and organization phase, the Media Page is paramount. Here, the Media Pool, which serves as the central hub for managing all project assets, is of primary importance. Users might want to maximize the viewing area for media previews and ensure easy access to the file browser. Conversely, during the editing phase on the Edit Page, the timeline becomes the focal point. The Inspector window, crucial for clip-level adjustments, and the Effects Library, for applying transitions and effects, also demand prominent placement. A first grading pass might prioritize the node editor and viewer in the Color Page, while a final pass might require a different configuration to focus on specific color adjustments or the comparison of graded versions.
Navigating the DaVinci Resolve Workspace
DaVinci Resolve is structured into seven major working areas, known as Pages. These are:
- Media: For importing, organizing, and managing all media assets.
- Cut: A streamlined page for quick edits and rough cuts.
- Edit: The primary page for detailed timeline editing, transitions, and effects.
- Fusion: For advanced visual effects and motion graphics.
- Color: The dedicated page for color correction and grading.
- Fairlight: For professional audio post-production.
- Deliver: For exporting the final project.
Within each of these Pages, users can customize the layout by toggling the visibility of different panels, resizing them, and even assigning custom shortcuts. This flexibility is key to creating personalized workspace presets.
The Media Pool: Your Project's Digital Library
The Media Pool on the Media Page is the central hub for importing, organizing, and managing all media assets for a project, including video, audio, and graphics files. It's the area below the Media Storage and Viewer. For efficient project management, the ability to add frequently accessed volumes or folders to your favorites is a significant time-saver. Right-clicking on a desired folder and selecting "Add Folder to Favorites" ensures quick access, streamlining the import and organization process.
Building Your Timeline: From Concept to Completion
DaVinci Resolve doesn't create a timeline by default. To begin constructing your project, you need to create a new timeline. This can be achieved by right-clicking in the empty area of your Media Pool and choosing "Create New Timeline…". Alternatively, you can navigate to File > New Timeline… or use the keyboard shortcut Command-N. Once created, the timeline will appear in the Media Pool alongside your other media assets, ready for editing.
The Inspector and Effects Library: Tools for Refinement
On the Edit Page, the Inspector window, located in the top right corner of the interface, provides access to clip-level adjustments. This panel is essential for fine-tuning properties such as transform, cropping, and retiming. Simultaneously, the Effects Library, typically found in the top left corner, offers a comprehensive collection of transitions, video effects, and audio effects that can be applied to your clips. Being able to quickly show or hide these panels, or arrange them in a preferred configuration, is a fundamental aspect of efficient editing.
The Color Page: A Node-Based Approach to Grading
The Color Page is where the magic of color correction and grading happens. Unlike layer-based systems, DaVinci Resolve employs a node-based workflow. Each clip on the timeline is represented by a thumbnail in the viewer, and adjustments are made by adding and connecting nodes. This node structure allows for a highly organized and non-destructive approach to color grading.
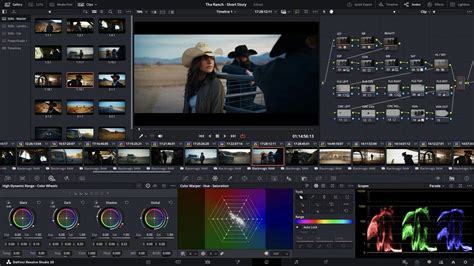
The Color Page viewer offers various viewing options to compare your color-graded versions with the original footage, different versions of the grade, or selected clips. This comparison capability is vital for making informed grading decisions. Furthermore, the Gallery feature allows you to capture stills of your graded clips by right-clicking on the viewer and selecting "Grab Still." These stills serve as crucial reference images and also store the associated node structures, enabling easy recall and application of specific looks.
The node tree structure within the Color Page can be customized extensively. A common approach, as outlined by Gedaly, involves a series of nodes for specific purposes:
- EXP / CON: For exposure and compensation adjustments.
- WB / SAT: For white balance and saturation control.
- HSL: For targeted adjustments to individual colors.
- Local: For localized adjustments using power windows.
- Grade: The primary color grade application.
- Clean Up: For fixing any technical issues or final touch-ups.
- VFX: For adding effects like film grain or halation.
- LUT: To convert footage from LOG to REC709 or other target color spaces.
This structured approach allows for a systematic and repeatable grading process, which can be saved and applied as a preset for future projects or different clips within the same project.
Exporting and Backup Strategies
The Deliver Page is where you render your final project. DaVinci Resolve offers significant flexibility in export options. You can choose to output your entire timeline as a single, mastered clip, or export individual source clips for roundtrip workflows or to deliver dailies. When adding an output to the Render Queue, it appears in a window, typically on the top right of the interface. This allows you to queue multiple render jobs, creating a batch render that can be processed sequentially, saving time and ensuring consistency.
For instance, a common export strategy involves rendering two versions: a high-quality master file for archival purposes and a compressed version (e.g., 4K H264) optimized for uploading to social media platforms. Once a project is deemed complete and unlikely to be revisited, it's good practice to delete it from the DaVinci Resolve project list and archive only the necessary raw footage or assets.
Workflow Optimization on the iPad Pro
The information provided highlights a specific workflow for video creation on an iPad Pro using DaVinci Resolve Studio 19. This approach emphasizes simplicity and efficiency, particularly for YouTube videos and social media content.
Folder Structure and Project Organization
A critical first step involves establishing a robust folder structure within the iPad's Files app. This structure serves as the central repository for all original media and project backups. Recommended subfolders include:
- A Roll
- B Roll
- Photos
- Music
- Sound Effects
- Voiceover
- Assets
- Project Backups
It's advisable to duplicate this folder structure and save it as a template for future projects, ensuring consistency. Renaming "A Roll" and "B Roll" to specific location or camera names can further enhance organization depending on the project's nature.
DaVinci Resolve for iPad Beginners Guide – Edit Like a Pro on iPad 🎬🔥
DaVinci Project Structure on iPad
Unlike the desktop version where folders can be directly dragged into DaVinci Resolve to automatically create bins, the iPad app requires manual bin creation. Within DaVinci Resolve, users must first create a new project, then navigate to the Media tab (accessed via the gear icon at the bottom right). Here, new bins are created under "Master" to mirror the folder structure established in the Files app. Subsequently, all video clips are imported and placed into their respective bins.
Enabling the Edit Page
To unlock the full editing potential on the iPad version of DaVinci Resolve, it's necessary to enable the Edit Page. While not fully ported, it functions as intended. This is achieved by going to the Workspace tab, selecting "Show Page," and assigning a custom button to the Edit Page. Saving this configuration ensures easy access to the editing tools.
Video Editing and Grading Workflow
The editing process involves placing the main "A Roll" clip, trimming it, and layering "B Roll" on top. Photos and graphics are placed above the video layers, while audio elements are positioned underneath. Consistent saving (CMD+S) is emphasized throughout the process. Periodically, or upon reaching significant milestones, exporting the project with stills and LUTs to the Files app provides a crucial backup.
Once the rough timeline is established, the workflow moves to the Color Grading tab. Here, a node tree is built for each clip, following a structured approach for adjustments like exposure, white balance, saturation, HSL, local adjustments, and final color grading. This node tree can be copied across clips as a base edit, and performance issues can be mitigated by switching to a lower resolution on the Cut Page if necessary.
The Power of Presets and Customization
The ability to save and recall custom panel arrangements and tool configurations is the essence of layout presets. DaVinci Resolve allows users to save their workspace layouts, which can then be quickly loaded when needed. This feature is particularly powerful when working on projects that involve multiple distinct phases. For example, a user might create and save:
- A "Logging" preset: With the Media Pool maximized and the Inspector hidden.
- An "Editing" preset: With the timeline prominent, the Inspector and Effects Library easily accessible.
- A "Color Grading" preset: With the node editor and viewer taking center stage.
- A "VFX" preset: With the Fusion page's node editor and viewer prioritized.
This deliberate customization of the workspace, combined with the inherent power of DaVinci Resolve's tools, empowers creators to work more efficiently, reduce friction, and allow their creativity to flow naturally without being hindered by tedious technicalities. The continuous development of DaVinci Resolve ensures that these tools are constantly improving, offering an ever-more seamless experience for bringing ideas to the screen.