In the ever-evolving landscape of digital content, video creation has become paramount, driven largely by the explosive growth of social media. This surge in video production has, in turn, fueled a significant demand for polished motion graphics and precise subtitles. DaVinci Resolve, a powerful and versatile editing suite available for both Mac and Windows, offers a robust set of tools for creating compelling text and captivating animations. This guide delves into the intricacies of adding and animating text within DaVinci Resolve, from basic titles to sophisticated "write-on" effects, empowering creators to enhance their visual storytelling.
The Foundation: Adding Basic Text in DaVinci Resolve
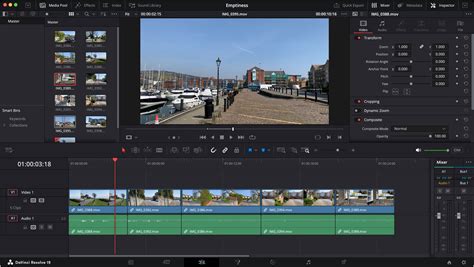
Before diving into complex animations, understanding the fundamental process of adding text is crucial. DaVinci Resolve provides several avenues for text integration, primarily accessible through the Edit page.
Accessing the Effects Library
The journey begins on the Edit page, the central hub for most editing tasks. In the top left corner of the screen, you'll find the Effects library. Clicking this opens a panel containing a variety of tools, including transitions, presets, and titles.
Creating a Basic Text Layer
Within the Effects library, navigate to the "Titles" category. Here, you'll find a basic "Text" effect. Dragging and dropping this icon onto your timeline will generate a new video track with a default text layer. This text can then be overlaid onto your existing footage. Alternatively, if you wish for the text to appear between clips rather than as an overlay, you can place it on the same video track as your footage.
Customizing Text Properties
Once the text layer is in place, the Inspector window, typically located in the top right corner of the Edit tab, becomes your command center. Here, you can transform the default text into your desired message. The Inspector offers a rich array of options:
- Rich Text Box: This is where you input your actual text content.
- Font Selection: Choose from a wide variety of fonts to match the tone and style of your video.
- Font Face: Select different weights or styles of a chosen font (e.g., bold, italic).
- Color: Define the color of your text to ensure readability and aesthetic appeal.
- Size: Adjust the scale of your text to fit the composition.
- Alignment: Control the horizontal and vertical alignment of your text block.
- Position: Precisely place your text on the screen.
- Stroke: Add an outline to your text for emphasis or stylistic effect, controlling its color and size.
- Drop Shadow: Create depth and separation by adding a shadow behind the text.
- Background: Apply a background color or element behind the text for better visibility or design.
Beyond these core attributes, the Inspector also allows for more dynamic adjustments. You can animate the motion of the text by utilizing keyframes. By clicking the diamond icon next to parameters like "Position," "Rotation," or "Zoom," you can set starting and ending points for these transformations, thereby creating movement. To view and fine-tune these keyframes, navigate to the timeline and click the diamond icon associated with your text clip. Right-clicking on these keyframes offers further control, allowing you to set them to "Linear" or "Ease-in" for smoother animation.
Leveraging Text+ for Enhanced Control and Animation
For users seeking more sophisticated text manipulation and animation capabilities without immediately diving into the node-based environment of Fusion, DaVinci Resolve offers the "Text+" effect. This feature bridges the gap, providing advanced options within the familiar Edit page interface.
Integrating Text+
Similar to the basic text effect, Text+ can be accessed through the Effects library. Navigate to "Toolbox" > "Titles" and locate "Text+." Dragging this onto your timeline will create a new video track, providing a more powerful text generation tool.
Advanced Customization with Text+
The Inspector for Text+ reveals a broader spectrum of controls compared to the basic text tool. In addition to the standard text editing options, Text+ introduces parameters for:
- 3D Rotation: Manipulate text in three-dimensional space.
- Transform: Gain finer control over position, scale, and rotation.
- Shading: Apply advanced shading and lighting effects to your text.
- Line Spacing and Tracking: Precisely adjust the vertical and horizontal spacing between characters and lines, which is particularly useful for preventing letters from overlapping in certain effects.
These enhanced controls allow for more intricate text designs and animations directly within the Edit page.
The "Write-On" Effect: A Detailed Fusion Tutorial
The "write-on" effect, where text appears to be drawn or written onto the screen character by character, is a popular and engaging animation technique. DaVinci Resolve's Fusion page provides the most powerful and flexible environment for achieving this. While Fusion's node-based system might appear intimidating at first, it offers unparalleled control. This section will break down the process of creating a compelling write-on effect.
Setting the Stage with an Adjustment Clip
To facilitate the creation of effects within Fusion while still seeing your underlying footage, it's recommended to use an Adjustment Clip.
- Add an Adjustment Clip: Go to the Effects library, search for "Adjustment Clip," and drag it onto a video track (e.g., V2) above your background footage.
- Lock Lower Tracks: To prevent accidental modifications to your background, consider locking the lower video tracks (e.g., V1).
- Navigate to Fusion: With the playhead positioned over the Adjustment Clip, switch to the Fusion page. The Adjustment Clip ensures that your background footage is visible within the Fusion composition, allowing you to preview your text effect in context.
- Full-Screen Viewer: For a clearer workspace, click the viewer button to expand the view to full screen.
Introducing Text+ in Fusion
The Fusion page utilizes a node-based workflow. Nodes represent individual operations, and they are connected by lines to form a processing chain.
- Add Text+ Node: Click on the "T" icon, representing the Text+ effect, at the bottom of the Fusion screen. This will automatically add a Text+ node to your node graph and connect it to a Merge1 node.
- Organize Nodes: For better organization, drag the Text1 node and position it above the Merge1 node. You can also rearrange other nodes like MediaIn and MediaOut to straighten up the flow.
- Select and Inspect: Click on the Text1 node to select it. This will bring up the Inspector, where you can input your text and adjust its properties.
Crafting the Text for Animation
- Input Text: In the Inspector, type your desired word in the text box. For this tutorial, let's use "TRAVEL" in all capital letters.
- Font Choice: Select a font that appears more handwritten. "Masiku," often available from sites like dafont.com, is a good example.
- Adjust Tracking: You might notice that the letters are too close together, potentially overlapping. To fix this, find the "Tracking" slider in the Inspector and move it to the right. This increases the space between individual letters, crucial for a clean write-on effect.
- Resize Text: Use the "Size" slider to increase the overall dimensions of your text to a suitable scale.
Implementing the Mask Paint for the Write-On Effect
The core of the write-on effect is achieved using a mask, specifically the "Mask Paint" tool.
- Add Mask Paint: With the Text1 node selected, press "Shift + Spacebar" on your keyboard. This opens the Select Tool window. Search for "Mask Paint" and click "Add." This adds a Mask Paint node to your workflow, typically placed after the Text1 node.
- Invert the Mask: By default, the Mask Paint node will cause your text to disappear. In the Inspector, under the "Mask" tab, select "Invert." This prepares the mask to reveal the text.
- Select Stroke Brush: Up on the left side of the Fusion interface, you'll see brush icons. Click the "Stroke" brush icon. This changes the mask's behavior to paint strokes rather than just areas. You'll now see a green circle, your brush.
- Adjust Brush Size and Softness: The brush needs to be slightly larger than the thickest part of your letters. Go back to the Inspector, select "Controls," and under the "Brush Controls" drop-down, increase the "Size" slider. For a sharp, defined write-on, drag the "Softness" slider all the way to the left, minimizing any feathered edges.
- Enable Stroke Animation: Within the Inspector, under "Stroke Controls," find the "Stroke Animation" option and set it to "Write On." This tells the mask to animate in a drawing fashion.
Painting the Write-On Path
This is the most meticulous part of the process.
- Paint the Path: Using the green circle (your brush), carefully paint over each letter of your word. It's vital to do this in the natural order and direction you would handwrite the word.
- Maintain Cursor Pressure: Do not release your mouse cursor until you have completed the entire stroke for the word. Releasing the cursor prematurely or making a mistake will require you to start the entire painting process over.
- Undo Mistakes: If you make an error, use "Command + Z" (Mac) or "Control + Z" (PC) to undo. Be aware that undoing will reset the animation.
- Speeding Up: The process of painting can be time-consuming. For the sake of demonstration in a tutorial, this section of the video might be sped up. However, when performing this yourself, take your time to ensure accuracy and avoid accidental strokes over unintended areas.
Finalizing the Animation and Adjusting Timing
Once you've painted the path over all your letters:
- Unhide Text: Go back to the Inspector under the "Mask" tab and uncheck "Invert." Your word should now reappear, with the animation ready to play.
- Access Keyframes: Open the Keyframes tab. Click the double-arrow icon to zoom to fit all your keyframes.
- Time Stretch Animation: Under the "MaskPaint1" and "Stroke1" drop-down menus, you'll see the "End" parameter, representing the points you painted. Select all these points by dragging your cursor over them. Then, click "Time Stretch." This tool allows you to alter the duration of the animation.
- Adjust Duration: Hover your mouse over the end of the time-stretched animation in the keyframe editor. You'll see double arrows appear. Click and drag inwards significantly to shorten the duration of the write-on effect, making it appear snappier and more dynamic.
With these steps completed, you've successfully created a "write-on" text animation in DaVinci Resolve Fusion.
Fusion Nodes Made Easy in DaVinci Resolve
Beyond Basic Text: Fusion Titles and Advanced Effects
DaVinci Resolve's Fusion page extends its capabilities beyond simple text creation, offering a vast array of "Fusion Titles" â pre-built templates with integrated animations and effects.
Exploring Fusion Titles
Within the Effects library, under the "Fusion Titles" category, you'll find a diverse collection of animated text presets. These range from dynamic reveals and glitches to sophisticated motion graphics. Each title can be previewed by hovering over it. Once you find one that suits your needs, drag it onto your timeline.
Customizing Fusion Titles
While these titles come with pre-defined animations, they are fully customizable. Clicking on a Fusion Title clip in the timeline and opening the Inspector will reveal specific parameters unique to that title. These can include options for adjusting text content, colors, animation speeds, and even underlying graphic elements. This allows for a high degree of personalization while leveraging the power of pre-built Fusion compositions.
The Role of Text in Modern Video Production
The strategic use of text in video production has evolved significantly, driven by the demands of online platforms and the need to convey information efficiently and engagingly.
Text for Information and Engagement
Text serves multiple critical roles in video content:
- Emphasis: In tutorials or educational videos, text can highlight key points, definitions, or instructions, reinforcing the spoken word.
- Attention Grabbing: A well-designed title sequence or animated text can immediately capture a viewer's attention at the beginning of a video.
- Information Delivery: Text can present supplementary data, statistics, names, locations, or calls to action, enriching the viewer's understanding.
- Accessibility: Subtitles and closed captions are indispensable for viewers who are hard of hearing, watching in noisy environments, or prefer to consume content without audio. This is particularly crucial for social media platforms where silent viewing is common.
Text Styles for Different Genres
The application and style of text vary greatly depending on the video's genre and purpose:
- Filmmaking: In traditional cinema, text is often used sparingly, primarily for opening titles, end credits, and occasional on-screen graphics (like UI elements in sci-fi films). The focus is usually on subtle integration.
- Commercials and Social Media: These mediums frequently employ more dynamic and eye-catching text. Lower thirds (text identifying individuals on screen), bold headlines, and animated call-outs are common to convey marketing messages and drive engagement. The style tends to be more vibrant and attention-grabbing.
Enhancing Workflow with Third-Party Tools
While DaVinci Resolve offers powerful built-in text and animation tools, specialized third-party software can further streamline workflows, especially for tasks like transcription and captioning.
Simon Says: Streamlining Subtitles and Captions
The advent of platforms like Simon Says highlights the growing importance of efficient subtitle and caption creation. Tools like Simon Says integrate directly with DaVinci Resolve, allowing users to:
- Generate Transcripts: Automatically transcribe audio from video clips in numerous languages.
- Create Subtitles Natively: Add subtitles directly within DaVinci Resolve, significantly reducing the time spent on manual captioning.
- Translate Content: Translate generated transcripts into various languages.
This level of integration can transform the laborious process of subtitling from hours into mere minutes, dramatically improving editing efficiency and expanding the reach of content to a global audience.
Conclusion: Mastering Text Animation in DaVinci Resolve
DaVinci Resolve offers a comprehensive suite of tools for incorporating and animating text, catering to a wide range of user skill levels and project requirements. From the straightforward text tool on the Edit page to the sophisticated node-based environment of Fusion, creators have the power to craft everything from simple titles to complex, dynamic text animations like the "write-on" effect. By understanding the fundamental principles of text manipulation, leveraging advanced features like Text+, and exploring the possibilities within Fusion, users can significantly elevate the visual appeal and informational clarity of their video productions. Furthermore, integrating specialized tools can further optimize workflows, ensuring that text elements are not only visually compelling but also efficiently implemented.