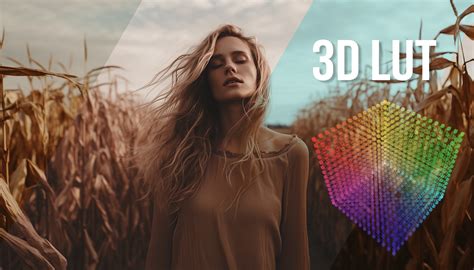
Look-Up Tables, or LUTs, are powerful tools that can instantly transform your footage from its raw state into a specific aesthetic. They act as color profiles, allowing for rapid application of desired looks and tones. In the realm of video editing, particularly within the robust environment of DaVinci Resolve, understanding and utilizing LUTs is a key skill for achieving professional-grade color grading and correction. This guide will delve into the intricacies of what LUTs are, how they function, and provide a detailed walkthrough of their installation and application within DaVinci Resolve, ensuring that editors of all levels can harness their potential.
Understanding the Essence of LUTs
At its core, a LUT is a mathematical algorithm that maps input color values from your video footage to different output values. Think of it as a lookup table containing all the colors in your footage, which then dictates how those colors should be transformed to achieve a particular look. This transformation can be for technical correction or creative styling.
LUTs are not limited to DaVinci Resolve; they are a widely adopted standard in most video editing software, including Adobe Premiere Pro and Final Cut Pro. Their primary benefit lies in their ability to streamline the color grading and correction process, saving significant time and effort compared to manually adjusting color wheels and curve parameters. Furthermore, LUTs enable color consistency across different projects or even across various clips within a single project, and they allow for the use of the same color grades across multiple software applications or displays.
Types and Categories of LUTs
LUTs generally fall into two primary categories based on their intended purpose:
Technical LUTs: These are designed to address the technical aspects of your footage. Their main functions include changing the color space, converting Log footage (which captures a wide dynamic range with flat contrast and muted colors, offering more flexibility in post-production), editing raw formats, and calibrating displays to ensure accurate image representation. You might hear terms like "calibration LUTs" or "camera LUTs," which are typically considered part of the Technical LUT category. A common example is a Log to Rec.709 LUT, which transforms footage shot in a Log color space to the standard Rec.709 color space for proper display on typical monitors.
Creative LUTs: These are primarily used for color grading, imbuing footage with a specific artistic style or mood. They are what most users think of when they desire a "cinematic look," a "vintage feel," or a specific color palette for their video.
Within these broad categories, there are also two main types of LUTs based on their technical implementation:
1D LUTs: These can only alter a single input value to an output value. For instance, they might adjust brightness, contrast, luminance, blacks, whites, or individual colors. They are predominantly used for color correction tasks. In DaVinci Resolve, you'll encounter these as 1D input LUTs and 1D output LUTs.
3D LUTs: These operate on red, green, and blue color values simultaneously. They possess the capability to transform any mapped color into a different one, influencing hue, saturation, and brightness. This provides video editors and colorists with a greater degree of control over both color correction and creative grading.
DaVinci Resolve also supports a powerful scripting language called DaVinci CTL (DCTL), which stands for DaVinci Color Transform Language. DCTL allows users to employ scripting to process images and colors, manipulating color data with custom code for precise adjustments that often exceed the capabilities of built-in tools.
LUT File Formats
Regardless of their intended application, two primary LUT file formats are commonly used in DaVinci Resolve: .cube and .3DL. While some video editing programs might use proprietary formats (like Adobe Premiere Pro's .look files for Lumetri presets), the .cube format is the industry standard and is compatible with most video editing software.
Installing LUTs in DaVinci Resolve: A Step-by-Step Guide
Before you can leverage the power of LUTs, they need to be installed within DaVinci Resolve. There are two primary methods for achieving this: a straightforward copy-and-paste approach into the software's designated folder, or a more integrated method through the project settings.
Method 1: Using Project Settings (Recommended)
This method is generally more user-friendly and ensures DaVinci Resolve correctly registers your new LUTs.
- Open DaVinci Resolve and Your Project: Launch DaVinci Resolve and open an existing project or create a new one.
- Access Project Settings: Click on the settings icon, usually located in the bottom right corner of the screen. Alternatively, you can navigate to
File > Project Settingsor use the keyboard shortcutShift + 9. - Navigate to Color Management: In the Project Settings window, locate and click on the "Color Management" tab on the left-hand side.
- Locate the LUT Folder: Scroll down within the Color Management options until you find the "Lookup Tables" section. Click on the "Open LUT Folder" button. This will open a new window displaying the directory where DaVinci Resolve stores its LUTs.
- Organize and Copy LUTs: Find the LUT pack you wish to install. If it's compressed (e.g., a .zip file), unzip it first. Create a new folder within the opened LUT directory with a descriptive name (e.g., "Motion Array," "Horror Film Grades"). Copy and paste the downloaded .cube files into this newly created folder.
- Update Lists: Close the LUT Folder window and return to the "Color Management" tab in DaVinci Resolve's Project Settings. Click the "Update Lists" button. This action prompts DaVinci Resolve to scan the LUT folder and integrate your newly added LUT files into its system.
- Save Settings: Click "Save" to apply the changes to your project settings.
Method 2: Manual Installation (For Advanced Users)
This method involves directly placing the LUT files into the DaVinci Resolve LUT directory.
Locate the DaVinci Resolve LUT Folder: The path to this folder varies depending on your operating system:
- Mac:
/Library/Application Support/Blackmagic Design/DaVinci Resolve/LUT/ - Windows:
C:\ProgramData\Blackmagic Design\DaVinci Resolve\Support\LUT - Linux:
/opt/resolve/LUT
Note: The
ProgramDatafolder on Windows is often hidden. You may need to enable "Show hidden files, folders, and drives" in your Folder Options.- Mac:
Copy and Paste LUTs: Navigate to this directory and create a new folder for your LUT pack, similar to Method 1. Then, copy and paste your .cube files into this folder.
Restart DaVinci Resolve (if open): If DaVinci Resolve was already running when you manually added the files, it's best to close and reopen the software to ensure the changes are recognized.
Update Lists (if necessary): If the LUTs don't appear automatically, you may need to go back to
File > Project Settings > Color Managementand click "Update Lists."
Important Guideline Before Using LUTs:
- White Balance: Always ensure your white balance is correctly set in-camera or during initial adjustments. Incorrect white balance can drastically alter the intended look of a LUT.
- Exposure: Proper exposure is crucial. Use your camera's histogram or DaVinci Resolve's scopes to ensure your footage is correctly exposed before applying a LUT.
- Adjustments: Recognize that LUTs are often a starting point. You may need to make additional adjustments to exposure, saturation, contrast, or other parameters to achieve optimal results tailored to your specific footage and preferences.
- Shooting Conditions: Lighting, weather, and location can significantly impact how a LUT looks. Experiment with different LUTs to find those that work best for your particular shooting scenarios and artistic style.
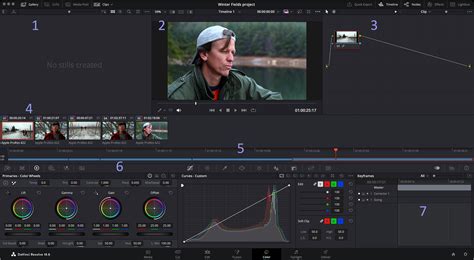
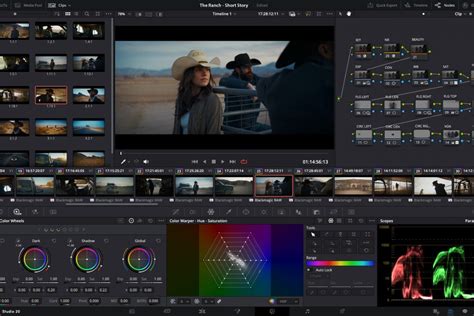
Applying LUTs in DaVinci Resolve
Once your LUTs are installed, applying them to your footage is a straightforward process.
- Navigate to the Color Page: Click on the "Color" tab at the bottom of the DaVinci Resolve interface to switch to the color grading workspace.
- Select Your Clip: In the timeline, select the clip you wish to apply a LUT to.
- Add a Node (Optional but Recommended): While you can apply LUTs directly, it's best practice to use nodes for greater control and flexibility. In the Node panel (usually on the right side of the Color page), right-click on a node (or create a new serial node by going to
Color > Nodes > Add Serial Node) and selectAdd Node > Corrector. This creates a dedicated node for your LUT. - Access the LUT Browser: In the top-left corner of the Color page, you'll find the LUTs browser panel. Click on it to open.
- Apply the LUT:
- Drag and Drop: Locate the desired LUT within the browser. You can preview LUTs by hovering your mouse over them. Once you find one you like, click and drag it directly onto the node you created in the Node panel.
- Right-Click Method: Alternatively, right-click on the node itself in the Node panel. From the dropdown menu, select
3D LUTand then choose your desired LUT from the presented list.
Fine-Tuning and Blending LUTs
Applying a LUT is rarely the final step. DaVinci Resolve provides numerous tools to fine-tune the applied look.
Adjusting Intensity: Sometimes, a LUT's effect can be too strong. To adjust its intensity, select the node containing the LUT. Open the "Key" tab from the tools bar (usually located at the bottom of the Color page). The "Key Output" slider functions like an opacity control. A value of 1.000 is the baseline; moving closer to 0 will make the node (and thus the LUT's effect) more transparent.
Blending Multiple LUTs: You might want to combine the effects of two or more LUTs.
- Apply your first LUT to a node (e.g., Node 02).
- To temporarily disable this node while you work on the next, click the small label on the node itself (e.g., "02").
- Re-open the LUT browser and select a second LUT you wish to blend.
- In the Node panel, select the node where you want to add the second LUT. To blend it with the previous one, you'll typically add a parallel node. This allows both nodes to feed into the next stage of your grading process, effectively combining their effects.
Split Screen Mode for Previewing: DaVinci Resolve 17 and later versions feature an enhanced Split Screen mode for previewing multiple LUTs simultaneously.
- Open the LUT browser.
- Select multiple LUTs you want to compare by drag-selecting with your mouse or holding down
Shiftto select a range. - Activate "Split Screen" mode, which is typically found in the top-left corner of the timeline viewer, near options like "Image Wipe" and "Highlight." This allows you to see the real-time preview of several LUTs applied to your footage at once, making it easier to choose the best option.
Mastering Advanced Film Look Techniques | DaVinci Resolve Guide
Understanding Log Footage and its Role with LUTs
A significant reason for the prevalence of LUTs is their utility in working with Log footage. Many modern mirrorless cameras and cinema cameras offer the capability to shoot in a Log profile. Log footage is designed to capture the maximum amount of dynamic range and color information, resulting in a flat, desaturated image. This "flatness" is intentional, as it provides extensive latitude for color correction and grading in post-production.
Why shoot Log instead of regular footage? By preserving more data from the outset, you gain the ability to recover more detail in highlights and shadows, and you have greater flexibility in manipulating the image without introducing artifacts. However, Log footage is not directly viewable on standard displays; it requires a conversion to a display-ready color space like Rec.709. This is where Technical LUTs, specifically Log to Rec.709 LUTs, become indispensable. They translate the captured Log data into a viewable and workable format, serving as a crucial first step in the grading process.
It's important to distinguish Log footage from RAW data. RAW is essentially unprocessed sensor data that needs to be debayered and processed before an image can be formed. Log, on the other hand, is a video format that has already been processed to some extent, but with a logarithmic gamma curve applied to preserve dynamic range. While Log footage is viewable (albeit flat), RAW data requires a significant processing step.
Exporting Your Own LUTs
DaVinci Resolve also allows you to create and export your own custom LUTs, which is incredibly useful for saving unique looks you've developed or for sharing your grading styles with collaborators.
- Grade Your Clip: Apply your desired color grading to a clip in the Color page.
- Generate LUT: Right-click on the clip's thumbnail in the Color tab. From the dropdown menu, select "Generate LUT."
- Choose Format and Location: A menu will pop up allowing you to select your desired LUT format (e.g., .cube) and choose where you want to save the exported LUT file.
- Finalize Export: Once you've made your selections, the export process will begin, typically taking only a few moments. The generated LUT will be saved to your chosen location, and you can then import it into DaVinci Resolve or other compatible software.
DaVinci Resolve: A Powerful Platform for Color Grading
DaVinci Resolve, developed by Blackmagic Design, has rapidly become one of the most powerful and widely used editing suites available, especially considering its robust free version. It's renowned for its speed, efficiency, and, most notably, its industry-leading color grading tools. Many Hollywood films and high-end productions rely on DaVinci Resolve for their post-production, particularly for color work.
Beyond LUTs, DaVinci Resolve offers a comprehensive suite of features for video professionals:
- Masking & Tracking: Isolate and enhance specific areas of your video with powerful tracking tools, perfect for blurring faces, creating spotlight effects, or altering the color of particular objects.
- 3D Titles and Text Animation: Design and animate professional 3D titles to elevate your video's visual appeal.
- Fusion Effects: Integrated within Resolve, Fusion is a powerful compositing engine for creating advanced visual effects, particle systems, green screen keying, and more.
- Speed Ramp & Slow Motion: Create smooth transitions between different playback speeds to emphasize key moments.
- Audio Mixing & Mastering (Fairlight): DaVinci Resolve includes Fairlight, a full-featured audio editor for professional sound mixing, noise reduction, and mastering.
- Stabilization: Correct shaky footage for a smooth, professional look.
- Multi-Cam Editing: Sync and edit footage from multiple cameras simultaneously, streamlining the editing of interviews, concerts, and other multi-camera setups.
- Sky Replacement: Utilize compositing tools to replace the sky in your shots for dramatic effect or to enhance dull scenes.
- Transitions and Effects: Access a wide array of built-in transitions and effects, with the ability to create custom ones.
- HDR Grading: Create stunning visuals optimized for HDR screens, precisely controlling brightness in specific image areas.
- Frame.io Integration: Seamlessly collaborate with teams, share, review, and approve projects directly within the Resolve timeline.
- Neural Engine Features: Leverage AI and machine learning for tasks like automatic color matching, creating high-quality slow-motion, shot classification, and upscaling footage.
By mastering LUTs and understanding the full capabilities of DaVinci Resolve, editors can significantly enhance their workflow, achieve professional color grades, and elevate the visual storytelling of their projects. Whether you're aiming for a subtle technical correction or a bold creative statement, LUTs in DaVinci Resolve offer a powerful and efficient path to achieving your vision.