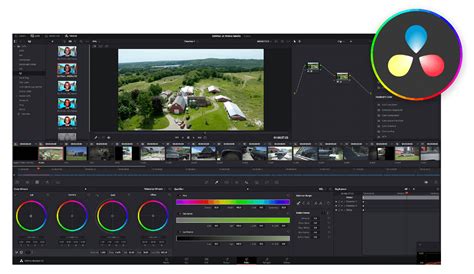
DaVinci Resolve, a powerhouse in professional video editing, color correction, visual effects, and audio post-production, is a creation of Blackmagic Design. Its widespread adoption in the film and television industry underscores its capabilities. However, like any complex software, DaVinci Resolve can sometimes present frustrating startup issues, leaving users wondering why the program simply refuses to open. This guide aims to provide a thorough walkthrough of potential causes and effective solutions for DaVinci Resolve not opening, drawing from user experiences and technical insights.
Understanding the Root Causes of DaVinci Resolve Startup Failures
Before delving into specific troubleshooting steps, it's crucial to understand the common underlying reasons why DaVinci Resolve might fail to launch. These issues can range from simple configuration errors to more complex system-level conflicts.
Insufficient System Requirements
DaVinci Resolve is a resource-intensive application, demanding significant processing power, RAM, and a capable graphics card. If your system falls short of the minimum requirements, the software may struggle to initialize or fail to open altogether. The minimum system requirements typically include at least 16GB of RAM, a discrete GPU with at least 2GB of VRAM, and a multi-core processor. While it’s possible to run DaVinci Resolve on systems that just meet these criteria, it performs best with more robust hardware.
Outdated or Incompatible Drivers
Drivers are essential for allowing hardware components, particularly the graphics card, to communicate effectively with the motherboard and the operating system (OS). Without up-to-date and compatible drivers, the graphics card may not function correctly, leading to DaVinci Resolve launching problems. Graphics card drivers, especially, play a crucial role in the smooth operation of GPU-accelerated software like Resolve.
Corrupt Installation Files
During installation, if the DaVinci Resolve installation files become corrupted, the software may not be able to install or launch properly. This corruption can occur due to various reasons, including interrupted downloads, disk errors, or conflicts with other software.
Incorrect Configuration Settings
Sometimes, incorrect settings or preferences within DaVinci Resolve itself can cause it to fail to open. These settings are stored in a "Preferences" folder, and if this folder becomes corrupted or contains erroneous data, Resolve may be unable to access the necessary information to start.
Operating System Issues
Your operating system (OS) might have underlying issues that prevent DaVinci Resolve from running. These could include corrupted system files, pending updates, or conflicts with other system-level software.
Software Updates and Patches
Occasionally, issues with DaVinci Resolve not opening can arise after a software update, either for Resolve itself or for other system components like graphics drivers or the operating system. These updates can sometimes introduce incompatibilities or bugs that affect the software's startup process.
Plugin Conflicts
If you have installed third-party plugins for DaVinci Resolve, these can sometimes cause conflicts that prevent the software from launching. The way Resolve is coded, it scans the entire PC when it tries to boot to see if there are any panels or devices that it can possibly use for different functions, such as a Speed Editor or Colour Grading Panels. Sometimes it’ll get hung up on this and refuse to open.
Ten Effective Solutions for DaVinci Resolve Startup Issues
When DaVinci Resolve fails to open, it can be a significant roadblock for video professionals. Fortunately, there are several effective methods to troubleshoot and resolve these startup issues.
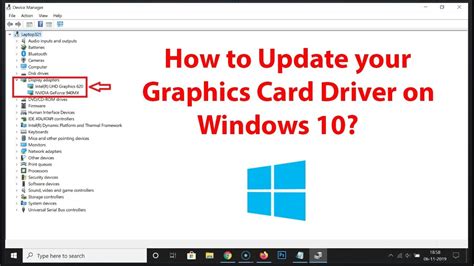
1. Update Your Graphics Card Drivers
Outdated or incompatible graphics card drivers are a very common culprit for DaVinci Resolve not opening. Drivers are essential for allowing components, like the graphics card, to communicate with the motherboard and the operating system (OS). Without drivers, the graphics card won’t work.
- Step 1: Access the Device Manager on your Windows system. You can do this by searching for "Device Manager" in the Windows search bar.
- Step 2: Expand the “Display adapters” section.
- Step 3: Right-click on each graphics card listed (you might have integrated graphics and a dedicated GPU) and select "Update driver." Choose the option to "Search automatically for drivers." If Windows finds an update, follow the on-screen instructions.
For NVIDIA users, it's advisable to visit the NVIDIA website or use the GeForce Experience application to download and install the latest Studio Drivers, which are optimized for creative applications. For AMD users, the AMD Driver Auto-Detect Tool can simplify the process of finding and installing the correct drivers. If you’re on the latest drivers and it still won’t work, try using the Studio Drivers.
2. Ensure DaVinci Resolve Recognizes Your Discrete GPU
DaVinci Resolve needs a discrete GPU as one of its minimum system requirements. Sometimes, Resolve might have trouble recognizing your discrete GPU, especially if you have both integrated graphics and a dedicated graphics card.
- Step 1: Open DaVinci Resolve's settings. This might require finding the application's executable file.
- Step 2: Look for an option related to GPU selection or configuration.
- Step 3: Ensure that your discrete GPU is selected as the primary graphics processor for DaVinci Resolve. If you are unsure how to do this, consult the DaVinci Resolve documentation or online forums for specific instructions related to your hardware configuration.
3. Verify DaVinci Resolve Installation Options
You might forget to uncheck the “DaVinci Control Panels” option during the DaVinci Resolve installation, which can sometimes lead to startup issues if you don't own or use such hardware.
- Step 1: Click on the Windows Start button.
- Step 2: Navigate to "Apps & features" or "Add or Remove Programs."
- Step 3: Find DaVinci Resolve in the list, click on it, and select "Modify" or "Change." During the modification process, pay close attention to the installation options and ensure that any options related to control panels are deselected if you are not using them.
4. Utilize Video Repair Software (Wondershare Repairit)
If you are experiencing issues with DaVinci Resolve not opening, one of the quickest solutions might involve using a dedicated video repair tool like Wondershare Repairit. This tool is perfect to fix various video-related problems, including those that might be preventing DaVinci Resolve from launching. It's important to note that while Repairit is designed for video files, some users have reported success using it to address software launch issues by repairing potentially corrupted application components. You can have this video repair tool on Windows and Mac devices.
- Step 1: Download Wondershare Repairit from its official website.
- Step 2: Add your corrupted DaVinci Resolve video files. Repairit offers batch processing, thus you can add multiple at once. (Note: This step is typically for repairing video files. If using this for software issues, you might need to identify and add the specific corrupted program files that Repairit can handle).
- Step 3: Click the "Preview" button to view the repaired DaVinci Resolve video file. (Again, this is for video files. For software repair, the process might differ, and you would proceed to the repair function).
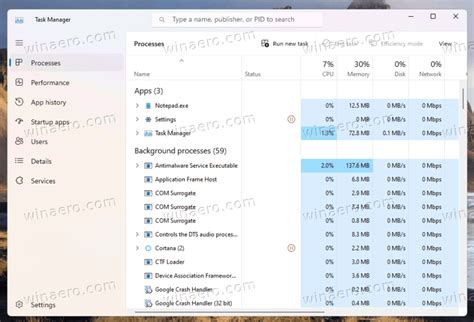
5. End DaVinci Resolve Processes in Task Manager
Sometimes, even after closing DaVinci Resolve, a background process might remain active, preventing a fresh launch. This can happen if the program crashes or is not closed properly.
- Step 1: Press
Ctrl + Shift + Escto open the Task Manager. - Step 2: Navigate to the “Processes” tab.
- Step 3: Look for any processes related to "DaVinci Resolve" or "Resolve."
- Step 4: Select each of these processes and click "End task." After ensuring no Resolve processes are running, try launching DaVinci Resolve again.
6. Reset DaVinci Resolve Preferences
A corrupted “Preferences” folder can sometimes stop DaVinci Resolve from opening. This folder stores important settings and configurations for the software. Resolve can't access the necessary information to start properly when it becomes corrupted.
- Step 1: Close DaVinci Resolve completely.
- Step 2: Navigate to the DaVinci Resolve configuration folder. On Windows, this is typically located at
C:\Users\[YourUsername]\AppData\Roaming\Blackmagic Design\DaVinci Resolve\Preferences. You may need to enable "Show hidden files" in your File Explorer options to see the AppData folder. - Step 3: Locate the “Preferences” folder within this directory.
- Step 4: Rename the “Preferences” folder to “Preferences.orig” or “Preferences.bad.” This action effectively resets Resolve to its default settings without deleting the original folder, allowing for easy recovery if needed.
- Step 5: Now, launch DaVinci Resolve. The software will create a new, default Preferences folder.
Note: Remember, renaming the “Preferences” folder will remove your saved settings, including custom layouts, workspace configurations, and other user-defined preferences.
7. Check Internet Connection and Firewall Settings
DaVinci Resolve isn't opening; your internet connection or firewall settings might be causing the problem. Some software, including DaVinci Resolve, may require an active internet connection for certain features or for license verification. Additionally, aggressive firewall settings can sometimes block the software from launching.
- Step 1: Temporarily disable your firewall. The exact steps vary depending on your operating system and any third-party security software you have installed.
- Step 2: Ensure you have a stable internet connection.
- Step 3: Try to launch DaVinci Resolve. If it opens, you will need to configure your firewall to allow DaVinci Resolve to connect to the internet.
Note: Be careful when changing these settings, as disabling your firewall can leave your system vulnerable. Re-enable it once you have tested DaVinci Resolve.
8. Run DaVinci Resolve in Compatibility Mode
Sometimes, Resolve might have compatibility issues with Windows. Running the application in compatibility mode can help resolve these conflicts.
- Step 1: Locate the DaVinci Resolve installation directory.
- Step 2: Find "Resolve.exe" and right-click on it (make sure it's the original .exe, not a shortcut).
- Step 3: Select "Properties" from the context menu.
- Step 4: Go to the "Compatibility" tab.
- Step 5: Check the box that says "Run this program in compatibility mode for:" and select an older version of Windows from the dropdown menu (e.g., Windows 8 or Windows 7).
- Step 6: You may also want to try checking the box for "Run this program as an administrator."
- Step 7: Click "Apply" and then "OK."
- Step 8: Try launching DaVinci Resolve. If this doesn't resolve the issue, you can return to this menu and try different compatibility settings or uncheck them altogether. The "Troubleshooting has completed" window will appear if you use the compatibility troubleshooter.
9. Clean Reinstallation of DaVinci Resolve
Uninstalling and reinstalling software can sometimes be necessary to resolve persistent issues. If you're having trouble with DaVinci Resolve on your Windows or Mac system, a clean reinstallation might be the solution. This involves not just uninstalling but also ensuring all residual files and registry entries are removed.
- Step 1: Uninstall DaVinci Resolve through your system's "Apps & features" or "Add or Remove Programs" control panel.
- Step 2: Manually delete any remaining DaVinci Resolve folders from your Program Files and AppData directories. This should completely remove Resolve from your Windows system.
- Step 3: Restart your computer.
- Step 4: Download the latest version of DaVinci Resolve from the official Blackmagic Design website.
- Step 5: Click Install and follow the instructions to complete the installation.
- Step 6: If the application shows a “Welcome Tour” upon launching, Resolve has been cleanly installed.
Clean Installation of DaVinci Resolve
10. Remove Third-Party OFX Plugins
If you’ve installed any plugins, this could be preventing a launch. DaVinci Resolve uses the OFx plugin standard for certain effects. If an OFX plugin is corrupted or incompatible, it can prevent Resolve from starting.
- Step 1: Navigate to the OFX plugin directory. On Windows, this is often located at
C:/Program Files/Common Files/OFX/Plugins. - Step 2: Temporarily move any third-party OFX plugins out of this folder (e.g., to your Desktop).
- Step 3: Try launching DaVinci Resolve. If it opens, one of the plugins you moved was the cause. You can then reintroduce them one by one to identify the problematic plugin. You can reinstall it afterward, but we need to make sure that it is actually the root cause.
By systematically working through these troubleshooting steps, users can effectively address the common issues that prevent DaVinci Resolve from opening and get back to their video editing workflow.