For many seasoned professionals within the DaVinci Resolve ecosystem, the concept of Power Bins might already be a familiar ally. However, the sheer utility of this feature warrants consistent emphasis, especially as it remains somewhat obscured within Resolve's default user interface. Recent updates have, in fact, made its discovery a more deliberate endeavor, a fact that can easily lead even experienced users to overlook its significant advantages.
Understanding the Essence of Power Bins
At its core, a Power Bin in DaVinci Resolve functions as a dedicated repository for media assets that are intended for use across an array of different projects. While the term "Power Bins" might evoke a sense of grandiosity, their practical application is far more grounded and immensely beneficial for efficient workflow management. They are, in essence, shared bins that persist across all projects within a single DaVinci Resolve database. This means that once an asset is placed in a Power Bin, it is readily accessible from any project you open within that same database, eliminating the repetitive task of importing the same files into each new endeavor.

The fundamental principle behind Power Bins is to provide a centralized location for frequently used assets. This can include anything from graphic elements, such as opening sequences or lower thirds, to specific audio clips, color grading presets, or even particular camera footage that you know you'll need to access repeatedly. The alternative-constantly importing these elements into every new project and then meticulously reorganizing them-is not only time-consuming but also prone to errors and inconsistencies. Power Bins offer a elegant solution to this common workflow challenge.
Navigating to and Enabling Power Bins
The method for enabling and locating Power Bins has evolved with DaVinci Resolve's development. In earlier versions of the software, the process was quite straightforward: a simple click on "View" followed by "Show Power Bins" would reveal this invaluable feature. However, with the advent of versions 18 and subsequent updates, this direct menu option has been retired.
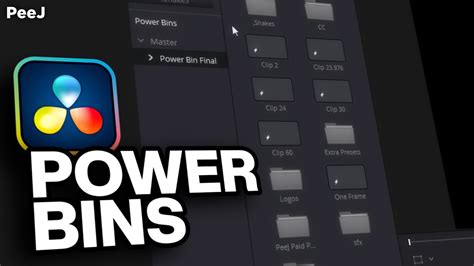
The current method for accessing Power Bins involves a slightly more nuanced approach. You will now find this crucial setting nestled within an ellipsis menu (often represented by three dots) located at the top of the Media Pool panel. By clicking on this ellipsis, a dropdown menu will appear, and within this menu, you can select the option to "Show Power Bins." This change, while seemingly minor, has contributed to the feature being less immediately apparent to users who are not actively seeking it out.
It is important to note that Power Bins are intrinsically linked to the DaVinci Resolve database you are currently working with. They are not global across all databases on your system, but rather specific to the one you have active. This means that if you create a new database, you will need to set up your Power Bins within that new database as well.
Integrating Assets into Your Power Bins
Adding media assets to your Power Bins is designed to be an intuitive process, mirroring the familiar methods used for organizing files within regular bins. You can employ the straightforward drag-and-drop functionality, or utilize the "Import Media" option to bring files into your designated shared bins.
The flexibility of Power Bins extends to their internal organization. You are empowered to create an unlimited number of sub-bins within your Power Bin structure. This allows for meticulous organization, enabling you to tailor the setup to your specific workflow and the types of assets you most frequently reuse. For instance, you might create separate sub-bins for "Graphics," "Sound Effects," "Music," or "LUTs."
It's crucial to understand a nuance when transferring assets directly from your timeline to a Power Bin. While you can drag and drop multiple assets from the timeline, this action typically does not preserve any adjustments or modifications made during your editing process. This includes applied color grades, audio settings, or even specific in and out points that you may have defined.
To ensure that these crucial adjustments are carried over, it is a prerequisite to render the specific version of the clip or sequence before you add it to the Power Bin. This rendering process essentially "bakes in" all your edits, grades, and settings, creating a new, self-contained media file that can then be placed into the Power Bin with its modifications intact. This step is vital for maintaining the integrity of your creative work when reusing assets across projects.
Maximizing the Utility of Power Bins
Once your media files have been incorporated into your Power Bins, they become universally accessible across any DaVinci Resolve project that you open within the same database. This seamless integration is the cornerstone of their utility, allowing for the creation of a robust library of reusable assets that can be accessed with unparalleled ease and speed.
The implications for workflow efficiency are profound. Consider the scenario of a recurring client or a specific type of project that demands a consistent set of graphical elements or intro sequences. Instead of re-importing and re-organizing these assets for each new project, a quick trip to your Power Bins provides immediate access. This not only saves significant time but also ensures a consistent visual identity across all your work.
For freelance professionals or studios working on multiple concurrent projects, Power Bins can be a game-changer. They act as a personal or team-wide asset management system, ensuring that essential elements are never misplaced or forgotten. This is particularly valuable when collaborating, as a shared database with well-organized Power Bins can provide a common ground for all team members.
Transferring Power Bins Between Databases
A common operational need arises when setting up a new DaVinci Resolve database or migrating to a new system: how do you transfer your existing Power Bins without the tedious process of re-importing and re-establishing their structure? Fortunately, DaVinci Resolve offers an elegant solution for this.
The process involves creating a temporary, new project within the database that currently houses your desired Power Bins. Within this new project, you would then select your master Power Bin folder and copy its contents. These copied assets are then pasted into regular bins located at the top of the Media Pool within this temporary project. This essentially creates a "transfer project" that contains all the assets from your Power Bins, albeit in regular bins.
How to Save or Backup POWER BINS in DaVinci Resolve 19 | Quick Tip Tuesday!
Next, you would navigate to "File" and select "Export Project." This action will export the structure and contents of your temporary project, including the copied Power Bin assets, into a project file.
Once this project file is exported, you can then hop over to the other DaVinci Resolve database (the one that needs to receive the Power Bins). Within this target database, you would right-click in the project list area and choose to "Import" the transfer project file you just created.
After the project is imported, all the regular bins containing your former Power Bin assets will appear. The final step is to drag these regular bins down to the "Power Bin" section within the Media Pool of your target database. This action effectively recreates your Power Bin structure in the new database, preserving all your organization and ensuring all your reusable assets are readily available.
Limitations and Considerations
While Power Bins offer immense advantages, it's important to be aware of their limitations. A key constraint is that you cannot directly drag and drop certain complex clip types into a Power Bin. This includes full timelines, multi-cam clips, or compound clips. These types of assets require a different approach if they need to be shared or reused across projects.
Furthermore, the files themselves are not embedded directly into the DaVinci Resolve database when using Power Bins. Instead, the Power Bins act as pointers to the actual media files residing on your hard drive. This has a significant implication: it is strongly recommended that the files designated for Power Bins reside on a permanently attached disk. Storing them on an external drive that might be disconnected or moved can lead to broken links and inaccessible media within your projects. Many users opt to place these essential assets on their internal drive or a dedicated, always-connected storage solution to avoid such issues.
Power Bins vs. Other Bin Types
Understanding Power Bins is also enhanced by differentiating them from other bin management tools within DaVinci Resolve, such as regular bins and Smart Bins.
Regular Bins: These are the standard organizational units within a DaVinci Resolve project. They are specific to that project and do not carry over to other projects unless explicitly copied or imported. They are excellent for organizing footage within a single project but lack the cross-project accessibility of Power Bins.
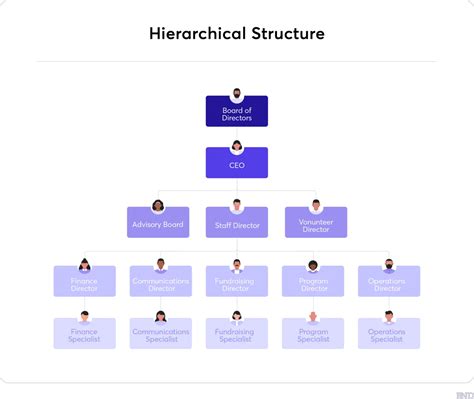
Smart Bins: Smart Bins offer a dynamic and automated approach to media organization. They are created based on specific metadata criteria. This metadata can be information embedded in the camera footage itself (like date, camera type, or scene number) or metadata that you add or modify within DaVinci Resolve's metadata editor. For example, you could create a Smart Bin that automatically collects all footage shot on a particular camera, or all clips tagged with a specific keyword. This automates the process of file sorting, which can be incredibly useful for large projects with vast amounts of footage.

Power Bins: As discussed extensively, Power Bins are designed for persistent, cross-project access to frequently used assets within a single database. They are manually populated and maintained, offering a stable and reliable way to access common elements.
The choice between these bin types depends on your specific needs. For project-specific organization, regular bins are sufficient. For automated sorting based on file attributes, Smart Bins excel. And for universally accessible, reusable assets across all your projects within a database, Power Bins are the indispensable tool. By mastering the use of all these bin types, users can ensure they do not get lost searching for footage in their larger projects and can maintain a highly organized and efficient workflow.
The strategic use of Power Bins, in conjunction with regular and smart bins, empowers editors and colorists to build a robust and efficient asset management system. This not only saves valuable time but also enhances consistency and reduces the potential for errors, ultimately contributing to a more streamlined and professional post-production process.