Recording a voice-over for your video can be a tricky endeavor. If you make a mistake, you might find yourself needing to repeat the scene, potentially losing some of the valuable footage you've just captured. However, modern audio production techniques allow us to record audio and visuals independently and then expertly mix them in post-production. This capability opens up a world of possibilities, enabling you to record voice-overs for your videos to provide extra information about what's happening in the scene, for YouTube tutorials, or even for film productions where characters speak off-camera. You don't necessarily need a dedicated audio editor, a Digital Audio Workstation (DAW), or to be an expert on audio recording and editing to achieve professional-sounding voice-overs. This comprehensive guide will demonstrate how to record audio directly within DaVinci Resolve, a powerhouse video editing tool widely recognized as one of the best on the market today.
Understanding how to record audio professionally is as crucial as knowing how to remove background noise in DaVinci Resolve. This is precisely why this powerful software is so beloved by professional video makers worldwide; it offers an all-encompassing suite of tools necessary to deliver high-quality video and audio content. This step-by-step tutorial will meticulously guide you through the process of recording voice-overs for your projects. In the concluding sections, we will delve into how you can effectively edit your newly recorded audio track within your current project and explore the techniques for making multiple takes using the same program. If you've been searching for a definitive guide on how to commence recording professional voice-over content in DaVinci Resolve, you have arrived at the right destination. Let's embark on this journey!
Step 1: Initial Setup and Recommendations for DaVinci Resolve
Before you even begin the process of recording your voice-over in DaVinci Resolve, it is imperative to ensure that your recording devices are properly connected. While the ideal scenario involves using a dedicated microphone and an audio interface, any USB microphone will also function effectively. The primary consideration is to confirm that your chosen microphone is compatible with your computer and that all necessary drivers are installed and kept up to date. This proactive measure will help prevent potential recording issues down the line.
The environment in which you record plays a pivotal role in the quality of your audio. It is strongly recommended to choose a quiet room to effectively avoid any extraneous background noise in your audio recording. If you find yourself recording in a larger space, you will likely require an echo remover tool to mitigate any unwanted reverb.
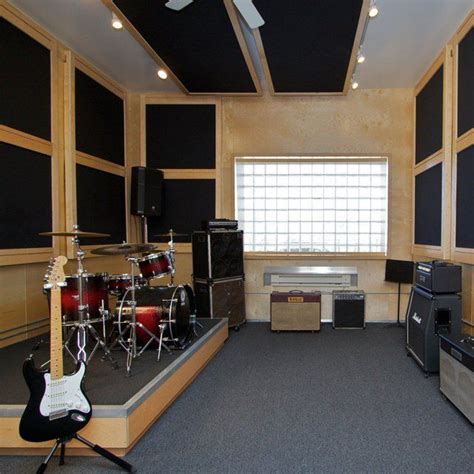
For those who can, treating the room where you are recording is highly beneficial. This might involve using acoustic panels or other sound-dampening materials. However, if this is a one-time project or you lack the resources for room treatment, the most practical approach is to record in a room that is as quiet as humanly possible. Rest assured, this guide will provide you with actionable tips to edit your audio within DaVinci Resolve after the recording phase is complete, addressing any ambient noise or acoustic imperfections.
Step 2: Setting Up Your Folders in DaVinci Resolve
The subsequent crucial step in mastering how to record audio in DaVinci Resolve involves strategically choosing where to save your audio files. This organizational approach is vital for maintaining order within each project. By setting up designated folders, you can easily access your audio files outside of DaVinci Resolve, facilitating seamless sharing or further work in different software applications if the need arises.
Begin by opening the specific project in DaVinci Resolve where you intend to record the voice-over audio. If you are already actively working within a project, you can proceed directly to the next step.
In the bottom right corner of the DaVinci Resolve interface, you will observe a cogwheel icon. Clicking on this icon will open the comprehensive Project Settings window.
Within the Project Settings window, you will notice a variety of options presented on the left-hand side. Scroll down this list until you locate the "Capture and Playback" section, and then select it.
Continue scrolling down within the "Capture" section until you find the "Save Clips To" option. Click on the "Browse" button adjacent to this option. This action will prompt a file browser to appear, allowing you to navigate your computer's file system and locate the specific folder where you wish your voice-over clips to be saved. You have the flexibility to choose a dedicated folder solely for voice-overs, your main project folder, or even an external storage device.
Having your voice-over files meticulously organized will significantly simplify your workflow, especially as you progress to editing your project in DaVinci Resolve. Should you accidentally erase your voice-over from the Timeline, a well-organized folder structure ensures you can quickly retrieve it. Furthermore, if you choose to record your audio on a separate device and need to transfer the voice-over to your computer for continued editing, having a designated save location makes the file transfer process remarkably easy.
Step 3: Creating a New Track in DaVinci Resolve
It is highly probable that your DaVinci Resolve project already contains audio tracks derived from your video footage or other separately recorded audio clips. Consequently, you will need to create a new, dedicated audio track specifically for recording your voice-over. Follow these precise steps to establish a new voice-over track in DaVinci Resolve; this method can be applied to add any type of audio track your project might require.
Firstly, transition to the "Fairlight" tab, which is prominently located at the bottom of the DaVinci Resolve interface. This tab is represented by an icon resembling a music note. This is the dedicated workspace within DaVinci Resolve where all audio-related editing and manipulation takes place.
On the left-hand side of the Timeline within the Fairlight page, you will observe the track numbers and detailed information pertaining to all existing elements in your current project. Right-click within this area, select "Add Track" from the ensuing dropdown menu, and then choose "Mono" if you are utilizing a single microphone. There might be specific project scenarios where you intend to record using two microphones connected to your audio interface, or perhaps you are employing a stereo microphone. In such cases, you would select "Stereo." However, for the vast majority of voice-over applications, a mono track is entirely sufficient.
The newly created track will instantly appear in the list of tracks, situated beneath the existing ones.
This new voice-over track will typically be assigned an identifier such as "A" followed by a track number. For instance, if your video footage already has an audio track labeled "A1," your recently added track would likely be designated "A2" with a default name like "Audio 2."
When working with multiple audio files, it is a highly recommended practice to rename your tracks within DaVinci Resolve to prevent any potential confusion. To rename your voice-over track, simply double-click on its current name (usually "Audio" followed by a number) and assign it a more descriptive and relevant name, such as "Speech," "Voice Over," or even the speaker's name.
With your new voice-over track successfully created and appropriately named, you are now ready to configure your microphone and prepare it for recording.
Step 4: Patching Your Microphone
Now, let's proceed with the essential step of preparing your microphone to record voice-overs within DaVinci Resolve. There are two distinct methods to accomplish this, and this guide will elucidate both, empowering you to select the approach that best aligns with your personal workflow for recording audio in DaVinci Resolve.
Method 1: Through the DaVinci Resolve Mixer
Begin by selecting the new track you created in the preceding step. This action explicitly informs DaVinci Resolve which track you intend to use for recording audio. Following this, navigate to your "Mixer" tab.
If the "Mixer" tab is not immediately visible, look for a series of icons in the top right corner of the DaVinci Resolve interface. These typically include "Mixer," "Meters," "Metadata," and "Inspector." Click on the "Mixer" icon to make the Mixer panel appear alongside the Timeline on the right side of your screen.
Within the Mixer section, you will observe your voice-over track displayed vertically. Directly beneath each track's name, you will see the indication "No Input," signifying that your microphone is not yet connected or recognized by DaVinci Resolve.
Click on the "No Input" text, and then select "Input" from the dropdown menu that appears. This action will open the "Patch Input/Output" window, a critical interface for routing audio signals.
In this window, you will be presented with options to select both inputs and outputs. This allows DaVinci Resolve to correctly identify the audio source (your microphone) and determine where to send the recorded data. You will notice that this window is logically divided into two main sections: on the left side, you will find "Source," and on the right side, "Destination."
Firstly, you need to choose the source that will be used to record audio â in this case, it is the microphone you will be using for your voice-over. The options displayed here will vary depending on the specific microphone and audio interface you are using. If you are utilizing a USB microphone, you will likely see it listed as a single, distinct option. However, if you are using an audio interface that offers multiple input channels, you will see the number of available inputs on your interface displayed. If you know precisely which input your microphone is connected to, select that specific input. If you are unsure, do not worry; we can revisit and adjust this setting later.
Next, on the right-hand side of the window, select the destination for your audio track. This should correspond to the new track you created specifically for your voice-over. Ensure that the correct track is selected here.
Before proceeding, verify that all relevant selections are highlighted. Click the "Patch" button to establish the link between your chosen audio source and the designated destination track. Once the patching is complete, you can close the "Patch Input/Output" window.
Upon returning to the Mixer, you should now see your microphone listed under the "Input" section for your voice-over track. This indicates that you are successfully connected and ready to engage the record function and commence recording.
Method 2: Through the DaVinci Resolve Fairlight Menu
An alternative and equally effective method for patching your microphone involves utilizing the DaVinci Resolve Fairlight menu. Navigate to the menu bar at the top of the DaVinci Resolve window and click on "Fairlight." From the dropdown menu that appears, select "Patch Input/Output."
This action will open the same "Patch Input/Output" window as described in Method 1. Here, you will proceed to select your audio source device (your microphone or audio interface) on the left side and the dedicated voice-over track as the destination on the right side.
After making your selections, click the "Patch" button to create the connection, and then close the window.
What if We Select the Wrong Source/Destination?
Should you inadvertently make a mistake when selecting the correct Source or Destination track, do not be alarmed! DaVinci Resolve provides a straightforward solution to rectify such errors.
Return to the Mixer tab. Click on the "Input" designation for your track. This will reopen the "Patch Input/Output" window. Within this window, click on the "Un-Patch" button. This action will effectively disconnect your current Source and Destination settings. You can then proceed to re-select the correct options. Choose the accurate microphone input and the appropriate destination track. Once you have made the correct selections, click the "Patch" button again to re-establish the connection. Finally, close the window.
Step 5: Arming the Track for Recording
Arming a track is a critical preparatory step that signifies your readiness to begin recording your voice-over. It essentially communicates to DaVinci Resolve that this specific track is prepared and designated for recording. It is important to understand that simply clicking the general record button in the transport controls will not initiate recording on a specific track unless that track has been armed beforehand.
Locate your newly created voice-over track. Directly beneath the track name and its associated controls, you will observe three letters enclosed within squares: "R," "S," and "M." Hover your mouse cursor over the letter "R." A tooltip will appear, displaying the text "Arm for record." Click on the "R" button. It will then turn red, visually indicating that the track is now armed for recording.
As soon as you arm the track by clicking the red "R," you should observe the level meters in the Mixer panel responding. If your monitoring setup is correctly configured, your voice should also begin to play through your speakers or headphones, depending on your selected output device.
If you see the level meters moving and hear your voice (or at least observe signal activity), it signifies that all settings are correct, and you are now fully prepared to press the main record button and commence the creation of your voice-over.
Conversely, if you do not observe any activity on the Mixer's level meters at the moment you arm the track, it strongly suggests that you have selected the incorrect audio source. To resolve this, you will need to revisit Step 4 and re-patch your source and destination, ensuring you choose the correct input device for your microphone. After correcting the patching, repeat the track arming process.
Step 6: Checking Your Audio Levels
Before diving into the actual recording, it is essential to carefully check and adjust your audio levels. This often involves adjusting the gain on your microphone or audio interface. As you speak into the microphone, you will see the audio level meter display a spectrum of colors: green, yellow, and red. The objective is to maintain your audio levels primarily within the green and yellow zones, ensuring they remain below 0 on the meter. If your audio signal consistently exceeds 0, the meter will display red, indicating that your voice-over is "clipping." Clipping results in unwanted distortion and a significant degradation of audio quality.
To prevent clipping, you can reduce the gain by turning the gain knob on your external audio interface or microphone. If your microphone does not feature an external gain knob, DaVinci Resolve offers built-in controls to adjust this. Navigate to the Mixer tab. Click on the "Input" button for your voice-over track. From the dropdown menu, select "Path Settings." A window will appear, displaying three virtual knobs. Adjust the knob labeled "Record Level." Once you have set the appropriate level, close the window.
Get PERFECT Audio in Davinci Resolve (Start to Finish)
Step 7: Recording Your Voice-Over in DaVinci Resolve
The moment has arrived to record your voice-overs in DaVinci Resolve! Before you initiate recording, it is highly advisable to mute the playback of your project. This prevents you from hearing your own voice simultaneously while you are speaking, which can be a significant distraction. While some low-latency audio interfaces might minimize this issue, allowing for simultaneous recording and monitoring, many setups can introduce a noticeable delay (latency). Hearing a delayed version of your voice can disrupt your rhythm and lead to an uneven performance. Therefore, follow these steps before pressing the record button:
- Locate the speaker icon situated on the far right of the Timeline menu bar.
- Click on this speaker icon. This action will mute all playback audio from your project.
Now, here is the procedure for recording audio in DaVinci Resolve:
- Positioned in the middle of the transport control dashboard, you will find the classic media playback buttons. Click on the record button, which is depicted as a red circle. As soon as you press this button, it will turn solid red, and a visual waveform will begin to appear on your designated audio track, representing your recorded audio.
- Proceed to record your voice-over. When you have finished speaking the desired segment, click on the stop button, which is represented by a black square.
- To listen to your recording, first, "unarm" the track (by clicking the red "R" button again, turning it back to its original state) and then "unmute" your project's playback (by clicking the speaker icon again). Play back the newly recorded track to assess your performance. It may take some practice to consistently achieve the perfect settings and deliver voice-overs exactly as you envision them. However, DaVinci Resolve provides all the necessary tools to ensure your voice-overs sound exceptionally professional, so consistent practice is key to mastery!
Step 8: Recording Multiple Takes on DaVinci Resolve
When recording voice-overs, it is entirely natural for the results not to be perfect on the first attempt. Fortunately, the robust tools available within DaVinci Resolve make this process manageable and efficient. If you make a mistake during a recording, the most effective approach is to stop and immediately restart recording from the point where the error occurred.
To re-record a specific section:
- Stop the current audio recording in DaVinci Resolve.
- Listen back to the stereo or mono track to precisely identify the location of the mistake within your voice-over.
- Position the playhead in the Timeline at the exact starting point where you wish to re-record.
- Ensure your voice-over track is armed for recording (the "R" button is red) and that your project playback is muted (the speaker icon is engaged).
- Press the record button. DaVinci Resolve will begin recording your voice-over again from the playhead's position, effectively overwriting the previous take on the Timeline.
- Continue recording your voice-over until you achieve the desired result for that particular section.
While it may appear as though you are simply overwriting the existing audio on the Timeline, it is important to understand that DaVinci Resolve is storing each of these re-recorded segments. If you examine the Media Pool, you will see all the distinct audio clips that have been created during these multiple takes within the track. Continue this process of re-recording sections until you are completely satisfied with the overall quality and delivery of your voice-over.
Editing Your Audio in DaVinci Resolve: Refining Your Recordings
Learning how to record audio in DaVinci Resolve is a fundamental skill, but it is only one part of the equation. Mastering the art of audio editing is equally, if not more, crucial for achieving a professional polish. Much like you meticulously edit your video footage in DaVinci Resolve, you possess the capability to refine and enhance your audio tracks with a similar level of precision. Here are several powerful editing techniques to elevate the sound of your voice-over recordings.
Leveraging Editing Layers for Seamless Compounding
Remember those multiple takes you recorded? DaVinci Resolve allows you to view and manage all of these takes directly on the Timeline, enabling you to meticulously select the best parts from each and seamlessly combine them into a cohesive whole.
To access this functionality:
- Navigate to the "View" menu in the upper part of the DaVinci Resolve interface.
- Scroll down the dropdown menu. Near the end, you will find an option labeled "Show Audio Track Layers." Select this option.
Once "Show Audio Track Layers" is enabled, all the individual audio clips you recorded for that track will become visible, stacked one above the other. You can then click on each clip, reposition it along the Timeline, and even move it vertically to align with other takes. The audio clip positioned highest on the stack will be the one that is ultimately heard during playback. If you have multiple takes layered across the Timeline, you can easily reorder them by dragging them from their current position to a higher or lower layer.
To further aid in organization, you can assign distinct colors to each take. Right-click on the audio clip you wish to color-code, select "Clip Color" from the dropdown menu, and choose one of the available colors. This visual cue is incredibly helpful for marking takes you particularly like or those you intend to use as the primary audio.
When you are satisfied with the arrangement and selection of your audio layers, you can return to a single-track view by going back to the "View" menu and de-selecting "Show Audio Track Layers." This will present your audio track in its consolidated form, allowing you to continue with other aspects of your project editing.
Employing EQ to Sculpt Your Track's Tone
Adding Equalization (EQ) to your audio in DaVinci Resolve is a powerful technique for cleaning up your recording and shaping its tonal characteristics.
To apply EQ:
- Select the audio track you wish to process.
- Ensure that the "Mixer" panel is visible.
- Within the Mixer, locate the section for your selected track. Click on the three dots (ellipsis) to open the channel strip options. Ensure that "EQ" is checked or enabled. You should now see an "EQ" section displayed within the Mixer's channel strip, typically located beneath the main level controls. If it's not immediately visible, you may need to scroll down within the Mixer panel.
- Double-click on the "EQ" section to open the full Equalizer window. This window provides a visual representation of the audio spectrum and displays various frequency bands, each with adjustable settings.
- Here, you can precisely adjust the frequencies. For instance, if your recording suffers from low-frequency background noise (like rumble or hum), you can attenuate or reduce the energy in the lower frequency bands (often labeled Band 1). Conversely, if you notice a harsh, hissing sound (often associated with high frequencies), you can lower the gain in the higher frequency bands (such as Band 6).
- Experiment with adjusting the mid-range frequencies to enhance vocal clarity and presence. Crucially, use the preview function as you make changes to hear the immediate impact of your adjustments. The goal is to achieve a clear, crisp, and balanced sound for your voice-over.
Once you are content with the way your voice-over sounds after applying EQ adjustments, you can simply close the Equalizer window in DaVinci Resolve. Remember, you can always return to the EQ window at any point to make further refinements or adjustments as needed.
Advanced Audio AI for Noise Reduction and Vocal Enhancement
DaVinci Resolve also offers advanced audio processing capabilities, including sophisticated AI-powered tools designed to enhance vocal quality and remove unwanted noise. These features can be invaluable for transforming raw recordings into polished, professional audio.
Within the Fairlight page, you can access these tools through the Inspector panel (Cmd+I or Ctrl+I). Under the "Audio Effects" section, you can add various plugins. Look for effects like "Noise Reduction," "De-Esser" (for reducing sibilance), "Expander/Gate" (to reduce background noise between spoken words), and "Parametric EQ" (for detailed frequency shaping).
The "Voice Isolation" effect, powered by AI, can be particularly effective at separating speech from background noise, even in challenging recording environments. Experiment with these tools, starting with subtle adjustments, and always listen critically to the results. The ability to "Hear It For Yourself" by toggling these advanced AI features on and off allows for direct comparison and helps you to discern the precise impact of each setting on your vocal track. Features like "Remove Wind," "Remove Noise," "Remove Pops & Plosives," "Level Audio," "Remove Rustle," and "Remove Echo" can be individually applied and fine-tuned to address specific audio imperfections.
Ultimately, DaVinci Resolve stands out as one of the most capable and versatile video editing software solutions available on the market today. This tutorial has focused on its powerful audio recording functionalities. While it is renowned for its video editing prowess, its capabilities extend significantly into audio production. By following these detailed steps, you can confidently record and edit professional-sounding voice-overs directly within DaVinci Resolve, enhancing the overall quality and impact of your video projects. Remember to always save your project frequently (File > Save Project) and, when you are ready to share your work, navigate to the "Deliver" section to export your final video or audio file, ensuring you select the appropriate export settings for your needs.