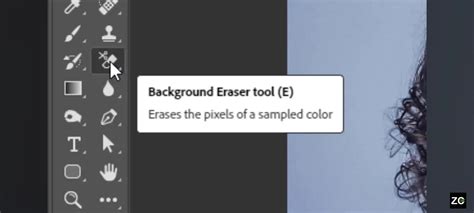
The Background Eraser Tool in Adobe Photoshop is a powerful, albeit sometimes misunderstood, utility designed to help users remove unwanted areas from their images. While its name suggests a sole focus on backgrounds, this tool functions as a sophisticated color eraser, selectively deleting pixels based on sampled colors. This tutorial, updated for Photoshop CS6 and fully compatible with Photoshop CC, will delve into the intricacies of the Background Eraser Tool, exploring its functionalities, settings, and best practices for achieving professional results.
Understanding the Core Functionality of the Background Eraser Tool
At its heart, the Background Eraser Tool is a color-sensitive brush. Instead of simply deleting all pixels it passes over, it samples specific colors and erases only those that match the sampled hue. Photoshop itself has no inherent understanding of what constitutes a "background" versus a "foreground" element in a photograph; it relies entirely on the user's guidance through color sampling. This color-erasing capability means it can be used to remove any specific color from an image, not just the perceived background.
The tool is accessed by clicking and holding the standard Eraser Tool icon in the Photoshop Toolbar, revealing the Background Eraser Tool beneath it. Like other brush tools, its size can be adjusted using the left bracket key [ to decrease size and the right bracket key ] to increase it. For finer control over edge softness, the Shift key can be combined with the bracket keys: Shift + [ for softer edges and Shift + ] for harder edges.
How the Background Eraser Samples and Erases Colors
The default operation of the Background Eraser Tool is based on color sampling from the area directly beneath the crosshair at the center of the brush cursor. A larger circle surrounding this crosshair indicates the area from which Photoshop will erase pixels that match the sampled color. For instance, if you wish to erase a blue column while preserving adjacent green columns, you would position the crosshair over the blue area. As you drag the tool, Photoshop continuously samples the color under the crosshair. Even if the larger brush circle encroaches upon the green columns, they will remain untouched because their color does not match the sampled blue. This precise color-based erasure allows for meticulous removal of unwanted elements right up to the edges of desired subjects.
If an error occurs during the erasing process, such as accidentally erasing a portion of your intended subject, the standard undo shortcut Ctrl+Z (Windows) or Command+Z (Mac) can be used to revert the action. Areas that have been erased will typically display a checkerboard pattern, signifying transparency. This transparency is a key concept, especially when working with Photoshop's default "Background" layer.
Navigating Photoshop's Layer System with the Background Eraser
Initially, images are often placed on a "Background" layer, which has specific limitations. Transparency is not permitted on a Background layer. However, when you use the Background Eraser Tool on a Background layer and successfully erase pixels, Photoshop automatically converts this layer into a regular layer (often named "Layer 0"). It does this by assuming the user intends to create transparency, effectively bypassing the restriction of the Background layer. This automatic conversion is a convenience that allows for immediate non-destructive editing, though it's always good practice to be aware of this underlying process.
Advanced Sampling Options: Continuous, Once, and Background Swatch
The behavior of the Background Eraser Tool can be precisely controlled through the Sampling Options found in the Options Bar at the top of the Photoshop interface. There are three main sampling modes:
Continuous: This is the default setting. As you drag the Background Eraser Tool across the image, Photoshop continuously samples the color under the crosshair. This mode is highly effective when the background you intend to erase has a variety of colors or subtle gradients. It allows you to meticulously follow the edges of your subject while the tool adapts to the changing background colors.
Once: In this mode, Photoshop samples the color under the crosshair only at the moment you first click your mouse button. Once that initial color is sampled, the tool will only erase pixels matching that specific color, regardless of what color the crosshair passes over afterward, as long as the mouse button is held down. This setting is particularly useful for removing intricate areas of a uniform color, such as sky visible between the leaves of a tree. If you accidentally move the crosshair over a different color while in "Once" mode, and the mouse button is still depressed, Photoshop will sample that new color and begin erasing it.
Background Swatch: This mode instructs Photoshop to erase pixels that match the current Background color set in the Tools panel. To utilize this effectively, you would first select the desired background color from the Color Picker to closely match the color you want to remove from your image. This mode is most effective when dealing with solid, uniform background colors.
Controlling the Area of Erasure: Limits Options
The "Limits" setting in the Options Bar dictates where Photoshop can search for pixels to erase, based on the sampled color.
- Contiguous (Default): This setting ensures that Photoshop only erases pixels that are physically touching the pixel currently under the crosshair. This means the tool cannot "jump" across elements like tree branches, fence posts, or any other object that separates areas of the same color. For instance, if you're trying to erase the sky around a tree, "Contiguous" will efficiently remove the sky surrounding the tree's outer edges. However, it will be unable to erase the blue sky trapped between the leaves and branches.

Find Edges: Similar to "Contiguous," "Find Edges" also requires pixels to be physically touching the crosshair. However, it is more precise and excels at preserving sharp edge details of your subject. While it improves edge definition, it still faces the same limitation as "Contiguous" in reaching isolated areas of color.
Discontiguous: This setting frees Photoshop to erase any pixels anywhere in the image that match the sampled color, irrespective of whether they are touching the crosshair. As long as the matching pixels fall within the larger brush circle, they are candidates for erasure. This is invaluable for removing scattered elements, such as the blue sky visible through the gaps in a tree's foliage. Once you've sampled the sky color, you can drag the eraser within the tree's silhouette, and it will efficiently remove all visible sky pixels. However, even with "Discontiguous," some subtle color variations or "fringing" might remain around the edges, especially when viewed against a contrasting background.
Fine-Tuning Erasure with Tolerance
The "Tolerance" setting is a critical parameter that determines how closely a pixel's color must match the sampled color for it to be erased. The default Tolerance value is 50%, which often serves as a good starting point.
Lower Tolerance: If you find that the Background Eraser Tool is inadvertently erasing parts of your main subject because its color is too similar to the background, you should try a lower Tolerance setting. This makes the tool more selective, erasing only colors that are very close to the sampled hue.
Higher Tolerance: Conversely, if you observe "color fringing" â thin halos of the background color remaining around the edges of your subject â increasing the Tolerance value can help. A higher Tolerance allows the tool to erase a wider range of similar colors, effectively removing more of the background fringe.
For example, if you are erasing sky around a tree and notice leftover darker blue areas, increasing the Tolerance to 70% (after increasing it from the default 50%) might be necessary to capture these nuances, especially when using the "Discontiguous" limit. Adding a contrasting background, like black, behind your image can make these remaining fringed areas more apparent.
Protecting Your Subject: The Protect Foreground Color Option
When even with precise adjustments to Limits and Tolerance, the Background Eraser Tool continues to affect your subject, the "Protect Foreground Color" option becomes indispensable. This feature allows you to designate a specific color within your image that Photoshop will actively protect from being erased.
To use this, you first need to sample the color you wish to protect. Temporarily switch to the Eyedropper Tool by pressing and holding Alt (Windows) or Option (Mac). Click on the color within your subject (e.g., a flower petal) that you want to preserve. This sampled color then becomes your designated "Foreground Color." With this color protected, you can then proceed to use the Background Eraser Tool. Photoshop will now avoid erasing any pixels that match this protected foreground color, even if they fall within the brush's sampling area. This is particularly useful for complex subjects with intricate details, ensuring that delicate elements like flower petals remain intact while the surrounding background is removed.
Real-World Application: Erasing Sky from a Tree
Let's consider a practical scenario: removing the sky from an image containing a tree.
- Initial Setup: Ensure your image is on a layer that can have transparency (not a locked Background layer). If it is, convert it to a regular layer.
- Select Tool: Choose the Background Eraser Tool.
- Sample Color: Position the crosshair over the sky and click to sample the blue color.
- Set Limits: For the sky around the tree, "Discontiguous" is usually the best choice to reach sky pixels between branches.
- Adjust Tolerance: Start with the default Tolerance of 50%. If you see remaining sky, especially darker shades, increase it. If the tree starts getting erased, decrease it.
- Erase: Drag the tool around the tree. Use the bracket keys to adjust brush size as needed for different areas.
- Refine: Zoom in to check for any missed sky areas or any sky color fringing on the tree. You might need to switch to "Find Edges" for cleaner edges or use a lower Tolerance if the tree is being affected.
- Protect Foreground (if necessary): If parts of the tree are being erased, sample a color from the tree using
Alt/Option+ click and then proceed with erasing the sky.

Beyond the Background Eraser: Other Eraser Tools in Photoshop
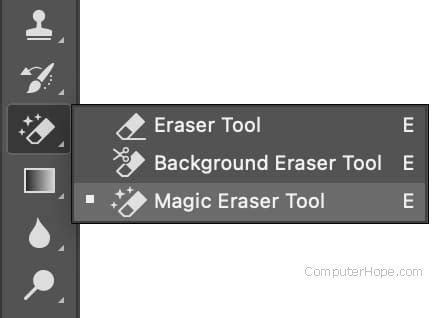
Photoshop offers a suite of eraser tools, each with distinct capabilities:
Standard Eraser Tool: This is the most basic eraser. It can be configured as a brush, pencil, or block and simply deletes pixels it passes over. It has settings for size, hardness, opacity, and flow.
Magic Eraser Tool: Similar to the Magic Wand selection tool, the Magic Eraser selects and erases areas of similar color with a single click. Its effectiveness depends on the "Tolerance" setting, which determines the range of similar colors to be erased. It's excellent for quickly removing large, uniform areas of color.
Destructive vs. Non-Destructive Editing: A Crucial Distinction
It's vital to understand that the Eraser Tool, including the Background Eraser, is a destructive editing tool. When pixels are erased, they are permanently deleted. This means they cannot be recovered once the action is performed and the file is saved. To mitigate this risk, it is strongly recommended to duplicate your layer before using any eraser tool. This way, you always have an untouched original to revert to.
Alternatives to Direct Erasure: Layer Masks
For non-destructive editing, Layer Masks are the preferred method. Instead of deleting pixels, Layer Masks allow you to hide them. Any part of the image painted black on a layer mask becomes invisible, while white reveals the layer content. Gray tones create semi-transparency. The advantage is that hidden pixels are not lost; they can be revealed again by painting with white on the mask. This flexibility makes Layer Masks ideal for complex edits where you might need to adjust your selections or reveal previously hidden elements.
Keyboard Shortcuts and Workflow Enhancements
Efficiency in Photoshop is greatly enhanced by keyboard shortcuts. The primary shortcut for selecting the Eraser Tool is E. Beyond brush size adjustments, mastering shortcuts for switching between tools, adjusting opacity, and using modifier keys like Alt/Option for sampling can significantly speed up your workflow.
Understanding Eraser Modes: Brush, Pencil, and Block
The standard Eraser Tool, and to some extent the Background Eraser, can operate in different modes, primarily influencing the shape and hardness of the erased area:
- Brush Mode: Offers soft edges and can be further customized with hardness, size, and opacity settings, mimicking a traditional paintbrush.
- Pencil Mode: Provides hard-edged, precise results, similar to using a digital pencil.
- Block Mode: Erases in a square shape, often used for precise, geometric edits or when working with layer masks.
"Auto Erase" and Other Advanced Features
While not part of the Eraser Tool itself, the "Auto Erase" option, found within the Pencil Tool settings, offers a unique functionality. When enabled, it attempts to erase pixels of the foreground color, replacing them with the background color. If it encounters pixels that are not the foreground color, it replaces them with the foreground color. This can be useful for targeted color replacement in specific scenarios.
When working with multiple layers, the "Erase to History" option allows you to revert changes made since a specific saved state or snapshot in your History panel. This provides a safety net for complex editing sequences.
Preserving Transparency: Saving as PNG
To retain the transparency created by the Background Eraser Tool (or any other method that introduces transparency), it is crucial to save your image in a format that supports transparency, such as PNG. Saving as a JPEG will fill any transparent areas with a solid color, typically white, effectively losing the transparency.
Conclusion: Mastering the Art of Erasure
The Background Eraser Tool, while named for a specific task, is a versatile color-erasing instrument in Photoshop. By understanding its sampling methods (Continuous, Once, Background Swatch), its spatial limitations (Contiguous, Find Edges, Discontiguous), and the critical role of Tolerance and Protect Foreground Color, users can effectively remove unwanted elements from their images. While it is a powerful tool, remembering its destructive nature and considering non-destructive alternatives like Layer Masks are essential for professional image editing. Mastering these tools and techniques will significantly enhance your ability to refine and perfect your photographs, enabling you to achieve high-quality, professional results.