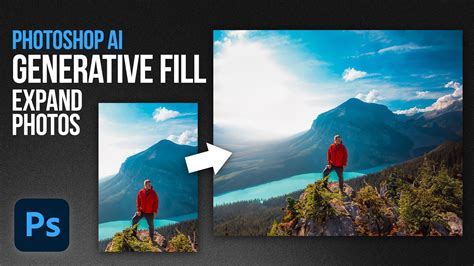
In the dynamic world of graphic design and photographic post-processing, the ability to seamlessly expand or create backgrounds in Adobe Photoshop is a fundamental skill. Whether you're dealing with an image where the original background is too small for your intended use, or you wish to transform a photograph into a unique backdrop, Photoshop offers a robust suite of tools to achieve professional results. This article will guide you through various techniques, from simple canvas adjustments to intricate content-aware manipulations and creative pattern generation, unlocking endless creative possibilities and bringing your visions to life with just a few clicks.
Expanding Existing Backgrounds: The Canvas and Content-Aware Approaches
There are instances where we may encounter a situation where the background of a photo is too small. By simply dragging and using a tool, we can expand the image background seamlessly and achieve a natural blend.
Method 1: Simple Canvas Extension for Simple Backgrounds
For images with relatively simple backgrounds and clear subject outlines, a straightforward approach involves extending the canvas.
- Open your image: Do this by navigating to "File" > "Open" in the menu bar and then choosing your image.
- Increase the canvas size: We need to increase the canvas width. For example, in the image below, we're increasing the overall width by 1000px. This is often done using the Crop Tool. Select the Crop Tool from the toolbar on the left. Then, click and drag the handles on the corners or edges of the image to extend the canvas.
- Observe the transparent area: After increasing the width of the image on both sides, the transparent area becomes visible.
- Resize the image: Click and drag the handles on the bounding box to resize the image. Hold down the "Shift" key to horizontally stretch the image. The final result is shown in the following image, where the expanded width on both sides has been automatically filled in.
Of course, the above method of operation is only suitable for images with relatively simple backgrounds and clear subject outlines. But what if the background is more complex? How can we expand the background in Photoshop?
Method 2: Content-Aware Scale for More Complex Scenarios
When dealing with more complex backgrounds, Photoshop's "Content-Aware Scale" feature can be a powerful ally. This tool intelligently analyzes the image content and attempts to scale it in a way that preserves important details while expanding the background.
- Select your subject: Start by using a selection tool to create a selection around the subject. You can use the "Quick Selection Tool" or the "Lasso Tool" among others. The goal is to isolate the main element so that it is not distorted during the scaling process.
- Name your selection (optional but recommended): In the pop-up window, you can choose any name you like for the selection. Just make sure it's something memorable. This helps in managing selections, especially in complex projects.
- Apply Content-Aware Scale: Click on "Edit" in the menu bar, then select "Content-Aware Scale" from the dropdown menu.
- Configure the options: At this point, pay attention to the "Protect" section in the toolbar above. You can select specific areas or layers to protect from scaling. Since this is just an explanatory example, the content-aware fill may not provide optimal results without careful adjustment.
Method 3: Content-Aware Fill for Seamless Background Extension
The "Content-Aware Fill" feature offers a more sophisticated way to fill in expanded areas of an image, making it ideal for complex backgrounds where simple stretching would lead to undesirable artifacts.
- Extend the Canvas: Begin by using the Crop Tool to extend the canvas beyond the original image boundaries, creating the space you want to fill. Click and drag the handles on the corners or edges of the image to extend the canvas.
- Select the Area to Fill: Photoshop will automatically select the newly created transparent area. If not, you can manually select it.
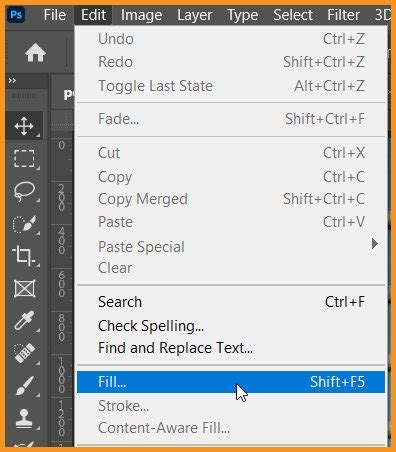
- Access Content-Aware Fill: Go to the "Edit" menu and select "Content-Aware Fill."
- Configure the Settings: In the dialog box, you can adjust settings to control how Photoshop fills the selected area. The tool samples pixels from the surrounding image to intelligently generate content that matches the existing background. You can refine the sampling areas to guide Photoshop's fill.
- Confirm and Deselect: Once you are satisfied with the preview, click "OK" to apply the fill. Then, go to "Select" > "Deselect" to remove the selection.
Method 4: The Clone Stamp Tool for Precise Control
For situations demanding absolute precision or when automated tools struggle with intricate patterns or unique textures, the "Clone Stamp Tool" remains an invaluable asset. This tool allows you to manually paint with pixels sampled from another part of the image.
- Create a New Layer: Open your image in Photoshop and click on the "Create a new layer" button in the Layers panel. Working on a new layer ensures that your cloning efforts do not alter the original image.
- Select the Clone Stamp Tool: You can find this tool in the toolbar on the left.
- Set the Source Point: Hold down the "Alt" key (or "Option" key on a Mac) and click on the part of the image you want to clone. This defines the source area from which pixels will be sampled.
- Paint and Clone: Release the "Alt"/"Option" key and begin painting over the area you want to extend. The tool will copy pixels from the source point to your brush location, allowing you to meticulously recreate or extend background elements.
The Clone Stamp Tool - Photoshop
Just to recap, we delved into the magic of the Content-Aware Scale, the Crop Tool, the Content-Aware Fill, and the Clone Stamp Tool. Each offers a unique approach to expanding backgrounds, catering to different levels of complexity and user control.
Transforming Photos into Unique Backgrounds
Beyond expanding existing backgrounds, Photoshop also empowers you to transform an entire photograph into a novel background or wallpaper. This technique can yield abstract, colorful, and entirely new visual textures.
The Power of Single Row/Column Marquee Tools
Photoshop's "Single Row Marquee Tool" and "Single Column Marquee Tool," often hidden behind the "Rectangular Marquee Tool," are surprisingly effective for creating repeating patterns that can form the basis of unique backgrounds. While Adobe may not heavily promote them, these tools serve a distinct purpose in creative image manipulation.
- Duplicate Your Background Layer: To preserve your original image, it's crucial to duplicate the background layer. Use the keyboard shortcut "Ctrl+J" (Windows) / "Command+J" (Mac).
- Select the Single Column Marquee Tool: In the Tools palette, click and hold your mouse down on the Rectangular Marquee Tool. After a second or two, a fly-out menu will appear, showing you all the tools that are hiding behind it. Select the "Single Column Marquee Tool."
- Create a Column Selection: Click anywhere inside your image. Photoshop will select a single column of pixels, extending from top to bottom. To maximize color diversity in your resulting background, click in an area with a good assortment of colors.
- Copy the Selection to a New Layer: Press "Ctrl+J" (Win) / "Command+J" (Mac) to copy the selected column of pixels onto a new layer.
- Stretch the Column: Use Photoshop's Free Transform command ("Ctrl+T" / "Command+T"). Position your mouse cursor close to the column until it turns into two small arrows, one pointing left and the other right. Click and drag the column horizontally to the right, stretching it to cover the entire image width. Press "Enter" (Win) / "Return" (Mac) to accept the transformation. The photo is now obscured by a repeating horizontal pattern.
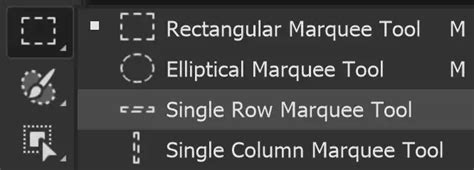
- Repeat with the Single Row Marquee Tool: Hide the horizontal pattern layer by clicking its visibility icon (eyeball) in the Layers panel. Select the "Single Row Marquee Tool" from the fly-out menu.
- Select a Row: Click on the original photo layer ("Layer 1" in this example) to ensure the photo is selected. Click anywhere inside the image to select a single row of pixels, extending from left to right. For color variety, choose an area with a good range of colors horizontally.
- Copy the Row to a New Layer: Press "Ctrl+J" (Win) / "Command+J" (Mac) to copy the selected row to a new layer.
- Stretch the Row: Use Free Transform ("Ctrl+T" / "Command+T"). Hover near the row until your cursor becomes two arrows, one pointing up and the other down. Click and drag the row vertically to cover the entire image height. Press "Enter" (Win) / "Return" (Mac) to confirm. The photo is now hidden behind a repeating vertical pattern.
Blending Patterns for Unique Background Effects
With two pattern layers created, you can blend them to achieve a wide array of unique background effects.
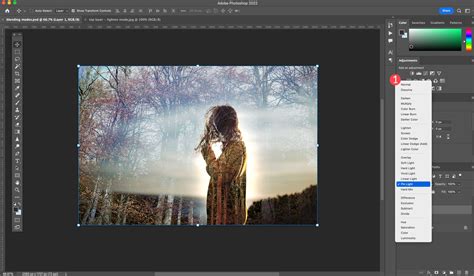
- Opacity Adjustment: Turn the horizontal pattern layer back on. Select this layer and lower its opacity. For instance, reducing the opacity of "Layer 2" to 50% will blend the two patterns together.
- Layer Blend Modes: Reset the opacity to 100%. Navigate to the blend mode option in the Layers palette (top left, next to Opacity) and select a different blend mode from the dropdown list. Experiment with modes like "Multiply," "Screen," "Overlay," or "Hard Light" to see how they interact. For example, changing the blend mode of "Layer 2" to "Multiply" creates a distinct background effect.
- Layer Masks and Gradients: For more controlled blending, use a layer mask. Set the blend mode back to "Normal" and opacity to 100%. Add a layer mask to the pattern layer by clicking the Layer Mask icon at the bottom of the Layers palette. Select the Gradient Tool. Right-click (Win) / Control-click (Mac) inside the document and choose a "black to white" gradient. Click and drag the gradient across the image (e.g., diagonally from top-left to bottom-right) to fade the patterns into each other.
Incorporating Your Photo into the New Background
Once you've created your desired background effect, you can place your original photo back into the composition.
- Arrange Layers: Ensure your photo layer ("Layer 1") is positioned above your pattern layers in the Layers palette. A quick shortcut to move a layer to the top is "Shift+Ctrl+]" (Win) / "Shift+Command+]" (Mac).
- Resize the Photo: Use Free Transform ("Ctrl+T" / "Command+T"). Hold down "Shift+Alt" (Win) / "Shift+Option" (Mac) and drag any of the corner handles inward to make the photo smaller, revealing the newly created background behind it.
- Add Effects (Optional): To make the photo stand out, you can add effects like a drop shadow. This is done by double-clicking the photo layer to open the Layer Style dialog box, then selecting "Drop Shadow" and adjusting its settings.
The Clone Stamp Tool - Photoshop
Streamlining Your Workflow with Advanced Controllers
While Photoshop's tools are powerful, mastering intricate workflows can be time-consuming. For those looking to significantly streamline their Photoshop experience, consider specialized hardware.
TourBox: An Extension of Your Creative Self
TourBox is an advanced controller specifically designed for creative tools like Photoshop. It offers a customizable array of buttons, dials, and scroll wheels that can be mapped to specific Photoshop functions, shortcuts, and actions. In essence, TourBox is not merely an accessory, but an extension of your creative self, allowing for faster and more intuitive manipulation of tools and settings without constantly reaching for the keyboard or mouse. This can be particularly beneficial for repetitive tasks involved in background manipulation, selection, and layer management.
Best Practices for Background Work in Photoshop
Regardless of the method employed, certain best practices will enhance your results:
- Work Non-Destructively: Always aim to work on duplicate layers or use adjustment layers and masks. This allows for easy modifications and corrections without permanently altering the original image data.
- Use High-Resolution Images: Starting with high-resolution images provides more detail to work with, especially when expanding or cloning.
- Consider Your Subject: When expanding backgrounds, ensure the subject's edges remain clean and well-defined. Masking or refining selections is often necessary.
- Match Lighting and Color: When compositing images or extending backgrounds, pay close attention to matching the lighting, color temperature, and overall tone between the subject and the background for a realistic blend.
- Save Regularly: Photoshop can be resource-intensive. Save your work frequently to avoid losing progress due to unexpected crashes.
By understanding and applying these techniques, you can effectively expand existing backgrounds, create entirely new ones from your photographs, and elevate your graphic design and photo-editing projects to a professional level.