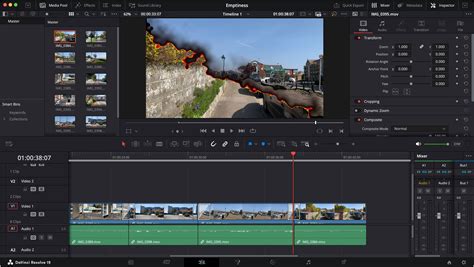
In the dynamic world of video editing, efficiency is paramount. As new tools and features are introduced into sophisticated software like DaVinci Resolve, understanding the nuances of basic operations can significantly streamline your workflow. One such fundamental yet powerful function is "ripple delete." This article delves into what ripple delete is, how it differs from a standard delete, and why mastering it is crucial for any video editor, from novice to professional.
The Core Difference: Delete vs. Ripple Delete
At its heart, video editing involves arranging and refining segments of footage. Sometimes, you need to remove a portion of a clip. This is where the distinction between a regular "delete" and a "ripple delete" becomes critical.
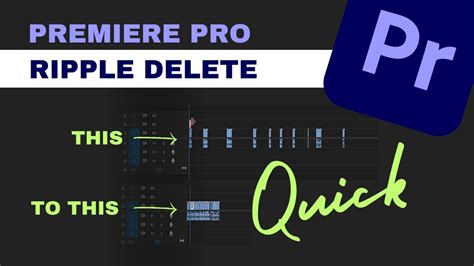
A basic delete operation, when applied to a selected clip or portion of a clip, simply removes it from the timeline. However, this leaves a gap. In a typical editing scenario, especially when you have multiple tracks with elements like text, audio, or sound effects precisely placed, this gap can disrupt the entire arrangement. You would then have to manually shift all subsequent clips to close this gap, which is a time-consuming and often tedious process.
The ripple delete function, on the other hand, is designed for seamless editing. When you perform a ripple delete on a selected clip, it not only removes the clip but also automatically closes the gap created by its removal. It does this by shifting all the clips that come after the deleted segment forward, effectively fusing the two adjacent clips (or the beginning of the timeline and the clip after the deleted section). This preserves the overall timing and flow of your edit without manual adjustments.
The user's experience highlights this clearly: "If i want to cut a clip where the Playhead is and delete everything to the left till the next cut and close the gap. This will also close the gap and bring the rest of the timeline to the next cut section." Similarly, for the right side of the playhead, a ripple delete "would bring everything that is to the right on timeline to the playhead position." This automatic adjustment is the key advantage.
Why Ripple Delete is Indispensable for Editors
As a filmmaker, course creator, and full-time traveler, Daniel emphasizes, "using ripple delete is incredibly useful." For newcomers to editing, "understanding how to use ripple delete is something you should consider mastering immediately." The reason is straightforward: ripple delete significantly speeds up the editing workflow.
Consider a scenario where you've meticulously placed text, audio, and stickers at specific points on your timeline. If you then decide to remove a section of video, a simple delete would leave awkward blank spaces. "Then ripple delete can be a very necessary feature. This will delete your clip and automatically back your timeline up to fill the gap where the deleted footage lived. Seamless and save a lot of time whilst editing." This seamless integration ensures that your carefully constructed timeline remains intact and professional.
Ripple Delete Across Different Platforms
While the core functionality of ripple delete is consistent across professional editing software, the specific keyboard shortcuts can vary. The user notes a key difference observed when comparing DaVinci Resolve on Windows to macOS and iPadOS.
On a Windows computer, DaVinci Resolve typically assigns the "Backspace" key for a "Delete Selected" function and the "Del" key for "Ripple Delete." This dedicated key for ripple delete makes it readily accessible.
However, for Mac and iPad users, the situation can be different. The user observed that on these platforms, there might only be the Backspace key available, which usually performs a standard delete. To achieve a ripple delete on a Mac, the common keyboard shortcut is Cmd + Delete. For Windows users, it's Ctrl + Backspace. These shortcuts are crucial for maintaining an efficient editing pace, as they allow editors to perform this operation without having to reach for the mouse.
The user also mentions that DaVinci Resolve for iPad is a powerful tool, and while specific shortcuts might adapt to touch interfaces or external keyboards, the concept of ripple delete remains a vital function. The availability of external keyboards for iPads often allows users to leverage these familiar shortcuts.
Beyond DaVinci Resolve, ripple delete is a standard feature in many other popular video editing tools, including Premiere Pro and Filmora, underscoring its universal importance in modern editing.
DaVinci Resolve Ripple Delete in 10 SECONDS!
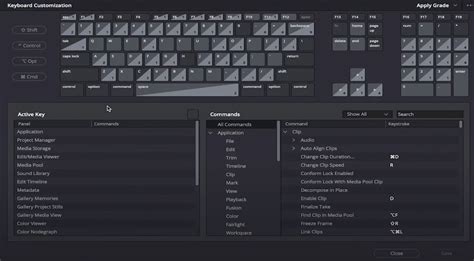
Essential Keyboard Shortcuts for DaVinci Resolve
To further enhance editing speed and efficiency, familiarizing oneself with essential keyboard shortcuts is a must. These hotkeys are designed to keep your work flowing without interruption:
- Normal Edit Mode: 'A'
- Blade Tool: 'B' (This allows you to make cuts on your timeline.)
- Split Clip at Playhead: 'Ctrl + \' (Windows) / 'Cmd + /' (Mac). This is a very efficient way to divide a clip precisely where your playhead is positioned.
- Join Clip: 'Alt + \' (Windows) / 'Cmd + \' (Mac). The inverse of splitting, this allows you to merge adjacent clips.
- Ripple Delete: 'Ctrl + Backspace' (Windows) / 'Cmd + Delete' (Mac). As discussed, this is the key shortcut for removing a clip and closing the gap automatically.
- Toggle Enable/Disable Clip: 'D'. Sometimes, instead of deleting a clip entirely, you might want to temporarily disable it. This shortcut allows you to do so easily.
- Slip Edit/Slide Edit: 'T' + drag. These advanced editing techniques allow for fine-tuning clip placement and timing.
- Zoom: 'Ctrl + o' / 'Cmd + o' (for zooming in/out). Precision often requires zooming into the timeline for detailed work, while a broader view is needed for overall structure.
- Full-Screen Viewer: 'Shift + F'. This maximizes your viewing area, essential for critical assessment of your edit.
- Save: 'Ctrl + S' (Windows) / 'Cmd + S' (Mac). Regular saving is a fundamental habit for any digital workflow.
Mastering these shortcuts, especially the ripple delete function, transforms the editing experience from a series of manual adjustments to a fluid, intuitive process. It’s not just about saving time; it’s about maintaining creative momentum and producing polished results with greater ease.
The constant evolution of video editing software means new controls and tools are continually being added, increasing complexity. To navigate this landscape effectively, video editors must remain adaptable and proficient with the fundamental tools. Understanding and implementing functions like ripple delete is a foundational step that pays significant dividends in productivity and the quality of the final output. For those looking to deepen their knowledge, courses like Domestika Basics: Introduction to DaVinci Resolve offer comprehensive insights into mastering such powerful software.