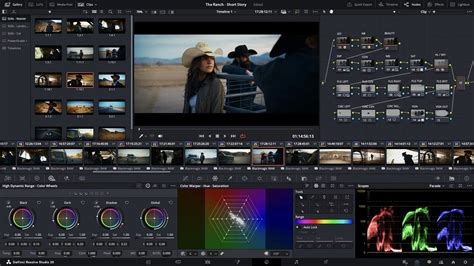
DaVinci Resolve, a powerful and professional video editing software, offers a robust set of default project settings. However, many users find themselves repeatedly adjusting these defaults to match their specific workflow needs, particularly concerning frame rates. This article explores various methods for customizing DaVinci Resolve's project settings, focusing on how to establish preferred defaults that streamline the creation of new projects.
Understanding DaVinci Resolve's Default Project Settings
When a new project is initiated in DaVinci Resolve, it comes with a set of predefined parameters. These defaults are designed to be a general starting point, but they may not align with every user's requirements. A common scenario is the need to change the default frame rate from 24 frames per second (fps) to a broadcast standard like 29.97 fps. This recurring adjustment can be time-consuming, especially for editors who consistently work with specific frame rates.
The default settings encompass more than just the frame rate. They can include color space, timeline resolution, audio settings, and even the configuration of control panels. While the out-of-the-box defaults are functional, the ability to tailor them to individual needs significantly enhances efficiency.
The "Save As" Template Project Method
One widely adopted technique for managing project settings is the creation of "template" projects. This method involves setting up multiple dummy projects, each pre-configured for a specific workflow or frame rate. For instance, an editor might create separate templates for 23.976 fps, 24.00 fps, and 29.97 fps projects.
Within each template project, users can establish a desired bin structure, define all video parameters, tweak favorite transitions, set the color space, adjust panel settings, and enable AutoSave features. When starting a new job, the user selects the most appropriate template and then uses the "Save As" function to name the new project according to the client and project details. This approach ensures that a significant portion of the initial setup is already completed, saving considerable time and effort.
This method is particularly beneficial for users who work on a diverse range of projects with varying technical specifications. It provides a structured and organized way to ensure consistency across different types of work. The "Save As" approach also allows for project-specific customizations within the template itself, such as pre-loaded common clips or specific output render source configurations.
Leveraging Project Presets for Default Settings
DaVinci Resolve offers a more integrated system for managing custom settings through project presets. This feature allows users to save a collection of project settings that can be applied to any new project.
Creating a Project Preset
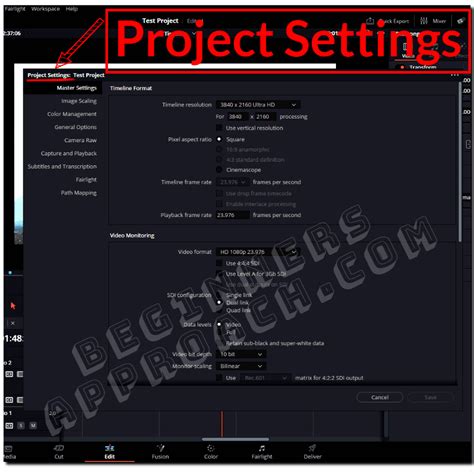
To create a project preset, navigate to File > Project Settings (or use the shortcut Shift+9). Within the Project Settings window, locate the ellipsis button (…) in the top-right corner, positioned above the "Project Master Settings." Clicking this button reveals a menu where you can choose "Save Current Settings as Preset."
This action prompts you to name your preset. Once saved, this preset can be applied to any new project. This is a highly effective method if you occasionally need to switch between different sets of configurations, such as when working with clients who have specific delivery requirements.
Applying a Project Preset
When you start a new project, you can access the "Presets" option from the same ellipsis button in the Project Settings. Selecting your saved preset will instantly apply all the pre-configured variables to the new project, eliminating the need for manual adjustments.
Setting a Default Project Preset for Habitual Overrides
For users who frequently override DaVinci Resolve's default project settings with a particular preset, there's a way to make these custom settings the system's default. This is especially useful if you consistently work with a specific frame rate, like 29.97 fps for NTSC regions or 25 fps for PAL regions, and find yourself changing it every time you start a new project.
Making a Preset the System Default
To set a custom preset as the system default, open File > Project Settings (Shift+9). Again, click the ellipsis button (…) in the top-right corner. From the list of your saved presets, select the one you wish to use as your default. Then, choose the option "Set as Default Preset." A confirmation dialog will appear; select "Set" to confirm.
How To Establish NEW DEFAULT PROJECT SETTINGS in DaVinci Resolve
Once this is done, every new project you create in DaVinci Resolve will automatically adopt the settings from your chosen default preset. This significantly streamlines the workflow for editors who have a consistent set of project requirements.
The Importance of a Fallback Preset
It is crucial to understand that setting a default preset is a persistent change that might not be easily reversible. Therefore, it is strongly recommended to create a backup preset of DaVinci Resolve's original default settings before making any changes. This "Resolve defaults" preset will serve as a fallback, allowing you to easily revert the system to its original state if needed. To create this fallback, simply go through the process of saving a preset after opening a fresh project, before making any modifications.
Beyond Frame Rate: Comprehensive Project Configuration
While frame rate is a common point of customization, users may need to configure a much broader array of settings to suit their projects. Michael Gissing highlights the complexity of setting up a new project, emphasizing that it involves more than just the frame rate. His method, which involves a detailed "Save As" template, accounts for approximately 50 different configurable elements.
These elements can include:
- Bin Structure: Organizing media logically within the project.
- Color Space: Defining the working color environment, crucial for color grading.
- Raw Settings: Configuring parameters for camera raw footage.
- Timeline Names: Establishing consistent naming conventions for timelines.
- Output Render Sources: Setting up export parameters.
- Control Panel Settings: Configuring hardware control surfaces.
- Often-Used Clips: Pre-loading frequently accessed media.
- Start Timecodes: Defining the starting point for timecode.
- Test Signals and Slates: Including necessary broadcast or production elements.
The setup for such comprehensive configurations can take anywhere from 5 to 10 minutes. This detailed approach ensures that every new project begins with a fully tailored environment, minimizing the need for adjustments later in the post-production process.
Considering Different Workflows and User Needs
The choice between using "Save As" template projects and setting a default project preset depends heavily on individual workflows and the frequency of changes. For editors who work on a wide variety of projects with vastly different specifications, maintaining a library of template projects might be more flexible. This allows for easy selection of the most appropriate starting point for each unique job.
Conversely, if an editor consistently works within a narrow range of parameters, such as always using 29.97 fps and a specific color space, setting a default project preset offers the greatest efficiency. This eliminates repetitive manual adjustments and ensures immediate compliance with established project standards.
Laurence Grayson's advice, shared through Frame.io Insider, emphasizes the practical application of these features. He notes that while Resolve's defaults are useful, "color is complicated and there may be times when you need to make changes to these defaults." His recommendation to create project presets addresses this need for flexibility. However, he also stresses the power of making these presets the system default for habitual overrides, while cautioning users to create a fallback preset to maintain reversibility.
Ultimately, mastering the customization of DaVinci Resolve's project settings empowers editors to build a more efficient and personalized post-production environment, tailored to their specific creative and technical demands.