PicMonkey has revolutionized the way users approach digital collage making, offering a dynamic and intuitive platform for both beginners and seasoned designers. Gone are the days of needing to perfectly edit every photo before integrating it into a collage. PicMonkey empowers creativity by allowing for real-time photo editing directly within the collage layout, fostering a more fluid and spontaneous design process. This tutorial will guide you through the comprehensive features and techniques for crafting stunning collages, from basic adjustments to advanced video integration and artistic layouts.
Seamless Photo Editing within Collage Cells
One of the most significant advancements in PicMonkey's Collage Maker is the ability to perform basic edits on individual images without leaving the collage interface. When you hover your cursor over an image placed within a collage cell, an "Edit" button becomes visible. Clicking this button reveals an editing palette, clearly highlighting the selected image with a white outline.
The "Basic" tab within this palette provides essential tools for immediate adjustments. You can effortlessly rotate and flip images to achieve the desired orientation. Exposure adjustments are also readily available, allowing you to fine-tune the brightness and contrast of each individual photo. For precise control over image presentation within its cell, the "Size" slider is a major win. This slider allows you to adjust the image's scale, and once the size is to your liking, you can click and drag the image within the cell to find its perfect placement. Complementing the "Size" slider are the "Fit to cell" and "Fill cell" buttons, offering quick options for how the image should occupy the available space. All edits made to an image within a cell are retained even if you move that image to a different cell, ensuring your adjustments are preserved throughout the design process.

Expedited Access to the Full Editor
For more extensive editing needs that extend beyond basic adjustments, PicMonkey offers a streamlined shortcut to its full Editor. The "Edit" button located in the top toolbar will transport your entire collage to the Editor. This is particularly useful for applying text, graphics, or more complex edits that need to affect the overall composition. A key advantage here is that there is no need to save and name your collage before accessing the Editor, allowing for a continuous workflow.
However, it's crucial to understand the implications of this transition. Once your collage has been taken to the Editor, you cannot return to the Collage Maker to make further structural changes to the layout, background, or individual cell edits. Therefore, this step should be reserved for when you consider the design elements such as the layout, background, individual image edits, and swatch cells to be finalized.
One-Click Effects for Instant Enhancement
The "Effects" tab within the individual image editing palette provides a quick and easy way to apply stylistic enhancements. This section features six popular one-click effects that can instantly transform the look of an image. Simply click on an effect to apply it, and a checkmark will appear over the selected effect, indicating its active status. If you decide the effect isn't quite right, clicking "Original" will revert the image to its initial state. This non-destructive editing approach ensures you can experiment freely with different looks.
Deeper Editing with "Open Image in Editor"
When the six one-click effects are not sufficient, PicMonkey offers the "Open image in Editor" option. This feature magically transports the selected image to the full Editor environment, again, without the need for saving or naming. Here, you gain access to the entire suite of PicMonkey's powerful editing tools. While the image will appear in the Editor in its original, uncropped size, rest assured that PicMonkey remembers the cropped dimensions you had set within the collage. This ensures that when you bring the edited image back into your collage, it maintains its intended framing.
How to edit photos in picmonkey
Upon completion of your edits in the main Editor, an orange "Back to Collage" button is prominently displayed at the top of the panel. Clicking this button seamlessly returns your newly edited image to its designated spot within your collage, preserving all other elements and their placements.
Embracing the Dynamic World of Video Collages
Beyond static images, PicMonkey fully supports the creation of dynamic video collages. These visual narratives are incredibly effective for capturing attention, telling a compelling story, or demonstrating a series of steps. In the realm of social media, video collages offer a powerful way to present multiple pieces of content within a single post, maximizing engagement. The process of creating a video collage in PicMonkey is designed to be straightforward, following a simple five-step process.
How to Make a Video Collage in 5 Steps
Create a PicMonkey Account and Access Collage Maker: If you don't already have one, sign up for a PicMonkey account. Navigate to the Collage Maker tool. After selecting your desired canvas size, you will then choose a collage layout, which dictates the number of cells you'll initially have. This layout can be modified later by adding or removing cells as your design evolves.
Choose a Collage Layout: PicMonkey offers a wide array of pre-designed collage layouts to suit various needs. You can select a layout that best fits the number and arrangement of images or videos you intend to use. Remember, you have the flexibility to change this layout at any point during the design process.
Fill the Collage Cells with Videos and Images: This is where your collage comes to life. Click on the "Photos & Video" tab. You can drag and drop stock photos or videos provided by PicMonkey directly into a cell. Alternatively, click the "Add photo or video" button at the top to upload your own media from your computer. Once uploaded, drag and drop these files into the desired cells.
Adjust the Sizing and Spacing of the Cells: The ability to precisely control the dimensions and arrangement of cells is key to a polished collage. To resize an individual cell, click on it and drag the horizontal or vertical handles. You'll observe that other cells adjust in relation to the one you're resizing. You can also change the size of the image within the cell. To add a new cell, simply drag an image onto your collage and hover between existing cells until a blue bar appears, then release. This automatically creates a new cell.
Fine-tuning the spacing and borders is also crucial. The "Spacing" slider in the collage editing panel allows you to increase the space between cells. A lock icon next to the "Spacing" slider controls whether the outer border resizes proportionally with the inner borders. When unlocked, you can independently adjust the spacing of the outer border and the inner cell borders.
Add Text and Graphics to Your Video Collage: To further enhance your video collage, you can incorporate text and graphics. These elements are placed "on top" of your collage and are managed as individual layers in the "Layers" palette. You have extensive customization options for both text and graphics, just as you would in any other PicMonkey design. A pro tip for perfect alignment involves turning on the alignment tools, accessible via the "Settings" (wheel icon) in the bottom toolbar. Once your video collage is complete, you can preview it by clicking the play button and then download it as a video file to your desktop.
Leveraging Templates for Rapid Video Collage Creation
For marketers and businesses, PicMonkey's pre-designed video collage templates offer a swift path to creating engaging advertisements. Video content is increasingly dominant in online advertising, and ads incorporating video formats tend to achieve higher engagement rates.
Video Collage Infographics for Pinterest
PicMonkey's collage maker is exceptionally well-suited for creating video collage infographics, particularly for platforms like Pinterest. These collages can effectively illustrate step-by-step processes, making them highly "actionable" for viewers seeking to learn or replicate something. Pinterest emphasizes that top-performing video pins grab attention immediately and offer value through instruction or demonstration. Business account holders can even promote these pins as ads. To create a video collage for Pinterest, select a Pinterest pin template, open Collage, choose a layout, and populate the cells with your videos.
Additional resources for Pinterest design in PicMonkey include:
- Pinterest templates
- Infographic templates
- Stock videos
- Graphics
- Tutorials and further reading on creating Pinterest collages:
- 8 Video Marketing Ideas to Boost Your Brand - see #5 for Pinterest
- Cropping Video for Social Media Post Sizes
- Creating Pinterest Pins that Move the Masses
- Use a PicMonkey Pinterest Template to Create a Primo Pin
- Pinterest for Business: How to Market Successfully

Crafting a Video Mood Board Collage
Collage is intrinsically linked with mood boards, making them a perfect pairing for visualizing ideas. Mood boards serve multiple purposes: sharing visual concepts with collaborators, organizing the vision for a new business or rebrand, gathering inspiration for projects, assessing how disparate elements work together, or simply for creative enjoyment.
Instead of adhering to rigid grid layouts, PicMonkey supports free-form "art collages." This approach allows for overlapping photos and videos, the incorporation of graphics, and the placement of non-rectangular photos in any non-linear fashion. Text can also be strategically positioned. PicMonkey provides templates specifically designed for this style of collage, simplifying the process of replacing placeholder images, adding text, modifying fonts, and integrating graphics to tell a visual story. These art collages are ideal for vision boards, cards, phone wallpapers, and Instagram posts.
Creating an Art Collage
Choose an Art Collage Template: Access "Templates" from the left-hand tabs. Search for "collage" to find "Blank collage" and "Photo collage" template categories. Preview templates by clicking on them within the editor. Select one to begin customization.
Incorporate Photos into Your Art Collage: Click on the blank image blocks to replace them with your chosen photos. You can right-click or use the "Replace image" button in the Image palette. Add as many photos as needed or delete any unwanted elements from the canvas.
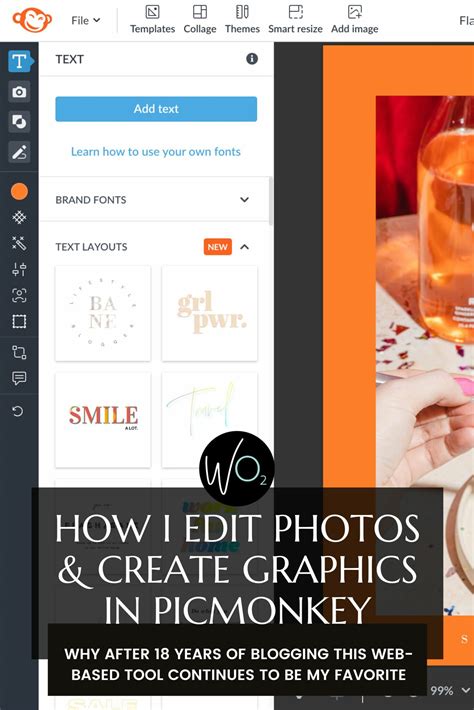
Add Text to Your Art Collage: Select "Text" from the left toolbar to add or modify text. Customize the size, font, color, and effects like drop shadows or outlines.
Enliven Your Art Collage with Customizable Graphics: The "Graphics" tab in the left toolbar allows you to add graphics. Browse or search for desired graphics and customize their colors, size, or erase parts using the Graphic palette. Graphics like "Tape" and "Polaroid Frame" are particularly well-suited for art collages, but a vast selection is available for exploration.
Bonus Idea: Image in a Shape Mask
A creative technique involves using graphics as masks for images. Add a graphic to your canvas and size it as desired. Then, navigate to the "Textures" tab. Applying a photo as a texture will cause it to adopt the shape of the graphic. By clicking "Add your own texture" and selecting an image, it will appear contained within the boundaries of the shape graphic, creating a visually striking effect. Multiple graphics can be used, with a single image applied across all of them.

A Comprehensive DIY Tutorial for Printable Photo Collages
For those looking to create printable photo collages, PicMonkey offers a user-friendly, web-based solution that is largely free to use, with optional premium features.
How to Make a Printable Photo Collage using PicMonkey: A DIY Tutorial
Start with "Create a Collage": Navigate to PicMonkey and select "Create a Collage." The Collage screen will appear.
Import Your Photos: Click the photo icon on the left sidebar to open photos from your computer. You can add multiple photos at once.
Select a Layout: Beneath the photo import button is the "Layout" button. Browse the various layout options. While many are free, approximately 40% of PicMonkey's features require a paid subscription. Choose a layout that suits your needs; for example, the "Tile Border" layout is suitable for arranging multiple pictures.
Arrange and Adjust Images: Drag and drop your photos into the designated cells. If there are empty cells you wish to remove, click on the empty box to reveal an "X" and then click the "X" to delete the cell. To resize photos within their cells, grab the edge and drag.
Edit Individual Pictures: If you have a premium membership, you can edit individual pictures by clicking the "Edit" button that appears when hovering over an image. This opens a window where you can select "Open image in Editor" for more advanced adjustments, such as converting to black and white.
Add Swatches for Color and Backgrounds: Click the "Swatches" button (the third button on the left). Here you can add color swatches to your collage. PicMonkey offers seasonal swatches, or you can upload your own. Drag and drop a swatch to apply it. Be mindful of accidental large cells; these can be removed by clicking the "X" twice.
Customize Background and Spacing: Use the "Background" button (the last button on the bottom left) to change the spacing between pictures, round picture edges, create a transparent background, or select a background color.
Set Print Dimensions: For printable collages, it's essential to set the correct dimensions. Reverse the numbers for landscape orientation if needed. Be aware that changing the size may slightly distort pictures, so you might need to readjust them afterward.
Add Text: Click the "Add Text" button (the "Tt" icon) to incorporate text. Customize the text's size, color, alignment, and font. You can even use different fonts for individual letters.
Save Your Collage: Once satisfied, click the "Save" button above your collage and follow the prompts.
Expanding Your Design Horizons with PicMonkey's Editor
PicMonkey's tutorial section highlights its comprehensive suite of tools for image editing and graphic design. Users can quickly master basics like sizing and cropping, and advance to techniques such as masking and cloning to create professional-looking images.
Key Editing Features and Tutorials:
- Resizing and Formatting Instagram Photos: Learn to adapt photos for Instagram's specific dimensions.
- Making a Circle Image: Create circular images suitable for profile pictures and design elements.
- Turning Photos into Illustrations: Utilize PicMonkey's effects to transform photographs into artistic illustrations.
- Creating Mirror Images: Employ unique editing tools to generate mirrored effects.
- Layering Images: Master the use of layers for complex designs and photo manipulation.
- Pop Art Filter: Apply a Warhol-esque filter for a vibrant, pop art aesthetic.
- Instant Photo Background Eraser: Effortlessly remove photo backgrounds with a single click.
- Monogram Maker: Design custom monogram logos.
- Photo Overlays: Learn to add captivating photo overlays to enhance images.
PicMonkey is continuously evolving, with newer versions offering a more user-friendly experience than earlier iterations. The platform emphasizes that nearly every element within a collage can be manipulated, moving beyond rigid grid structures to allow for highly customized designs.
How to edit photos in picmonkey
Advanced Collage Customization and Resizing
PicMonkey's collage maker offers unparalleled flexibility. You can start with a template and transform it entirely, or begin with a blank canvas. The platform allows for easy switching between templates, even converting a standard design into a collage.
Manipulating Layouts and Dimensions
The collage creation process involves several tiers of tabs on the left sidebar. The first tier is for importing photos, where you can select multiple images at once. The second tier presents a variety of layouts, serving as starting points for your design. Crucially, you can observe the dimensions of your collage along the bottom of the screen and input specific numbers for precise sizing. Alternatively, you can resize the entire collage by hovering over an outer border until two thin blue lines appear, then dragging the double arrow to stretch or shrink.
The "Swatches" tab allows for the addition of color and background elements, with options to choose from pre-set themes or upload your own. When dragging photos from the left sidebar, you can hover between cells until a blue line forms, indicating where the photo will be placed without altering the collage's overall dimensions. Thin blue lines between cells also allow you to adjust individual cell sizes by dragging. This level of manipulation means your collage can look drastically different from the initial template.
The final tier of tabs provides "Background" options, enabling you to leave cells empty for text placement or fill them entirely.
Saving and Exporting Your Collage
Your PicMonkey creations are automatically saved to "Hub," PicMonkey's cloud storage, preserving them as multi-layered files for future editing. If your collage includes video or animated GIF graphics, you must download it to your computer before sharing. Otherwise, you can export your collage as a JPG, PNG, or PDF (for Pro subscribers), or upload it directly to social media platforms.
The Infinite Possibilities of Collage Making
PicMonkey's collage maker is a versatile tool suitable for a wide range of applications, including:
- Wedding announcements
- Business brochures
- Graduation announcements
- New baby announcements
- Invitations
- Mood boards
- Vision boards
- Instagram posts
- Social media content collections
The platform also offers additional tutorials on related topics, such as aesthetic collage ideas, creating video collages, Instagram Story collages, mirror images, and side-by-side photos.
Understanding PicMonkey's Interface and Tools: A Video Guide
PicMonkey provides a series of short tutorial videos to guide users through its features:
- Section 01: PicMonkey Basics:
- "Your Homepage" (01:29)
- "Start Designing Fast" (04:57) - An overview of PicMonkey's tools.
- "Upload and Edit Photos" (03:13)
- "Starting With a Blank Canvas" (02:11)
- Section 02: Templates & Tools:
- "Using Designer-Crafted Templates" (02:31)
- "Meet: the Collage tool" (02:25) - Specifically covers collage creation.
- "Multi-Page Feature" (01:45) - For projects with multiple pages.
- "Smart Resize Tool" (01:01) - For efficiently resizing designs to various dimensions.
These resources, combined with the intuitive design of PicMonkey's Collage Maker, empower users to create impactful and visually appealing collages with ease, whether for personal projects or professional applications.