In the realm of digital design, particularly for eye-catching online content like YouTube thumbnails, the ability to add distinct outlines to images is a powerful technique. These outlines serve to isolate subjects, enhance their pop, and ensure they stand out against any background. While the visual effect might appear simple, achieving it effectively in Adobe Photoshop involves a series of precise steps. This guide aims to demystify the process, breaking down how to create those sought-after white outlines around images, transforming your visuals from ordinary to extraordinary.

The Foundation: Preparing Your Image in Photoshop
The journey to creating a compelling outline begins with selecting and preparing your image within Photoshop. The success of the subsequent steps hinges on how well you isolate the foreground element from its background.
Opening Your Image
The first action is to open the image you intend to work with. Navigate to "File" in Photoshop's menu and select "Open." Browse to the location of your image file and select it. Alternatively, you can create a new, blank document and then drag your desired image onto this canvas. However, opening the image directly often simplifies the process by avoiding the need to manage multiple background layers later on.
Isolating the Foreground: The Crucial Selection Process
With your image open, the next critical step is to meticulously select the foreground - the part of the image you want to keep and apply an outline to - from the background. Photoshop offers several tools for this, but the "Quick Selection Tool" is often the most efficient, especially when there's a clear contrast between the foreground and background.
For this process to be effective, a strong contrast between the background and foreground is highly beneficial. If you are photographing subjects specifically for this purpose, using a green screen can significantly simplify background removal. In the absence of a green screen, strive to create a background that uses colors distinct from those in your foreground subject.
Once the Quick Selection Tool is active, click and drag over the area you want to select. If the tool incorrectly selects areas that should not be included, you can refine the selection using the "+" and "-" options available with the tool. This allows you to add or subtract from your current selection.
The "Zoom" feature in Photoshop becomes your indispensable ally during this stage. Zooming in as close as possible is paramount for achieving clean edges. Carefully refine your selection, ensuring the background is removed and the foreground is precisely captured. While perfection is the goal, don't get bogged down in minute details; sometimes, cropping the image slightly further can be a more efficient way to avoid excessive editing. This part of the process may require some practice, especially if your image lacks strong shadows or other defining contrasts.
Copying and Layering the Foreground
After successfully selecting your foreground, the next step is to isolate it onto its own layer. This is achieved by copying and pasting the selected area. On a Mac, use the keyboard shortcut Command + C to copy, followed by Command + V to paste. For PC users, the equivalent shortcuts are Control + C and Control + V. This action effectively "separates" your selected foreground from the original background, presenting it as a distinct element on a new layer.
Decluttering Your Layers: Deleting Unnecessary Elements
At this point, your Layers panel will likely show multiple layers. If you opened your image directly, you'll typically have the original image layer and the newly created foreground layer. If you pasted your image into a new project, you might have the original background layer, the foreground layer, and potentially an initial blank background layer.
To proceed, delete the original image layer and any extraneous background layers. Your Layers panel should now contain only the selected foreground with a transparent background. This transparent background is what allows the outline to be clearly visible later.
Applying the Outline: The Power of Layer Styles
With your foreground isolated on its own transparent layer, you can now move on to applying the visual flourish - the outline. Photoshop's Layer Styles provide a non-destructive and highly customizable way to achieve this.
Accessing Blending Options
Right-click on your foreground layer in the Layers panel. From the context menu that appears, select "Blending Options." This will open the Layer Style dialog box, a powerful window that allows you to add various effects to your layer.
Implementing the Stroke Effect
Within the Layer Style dialog box, locate and select the "Stroke" option. Checking the box next to "Stroke" will immediately apply an outline to your selected foreground. You'll notice an outline appearing around your image on the canvas.
The "Stroke" effect offers a wealth of customization. Here, you can precisely define the appearance of your outline.
- Size: This slider controls the width of the outline. You can set it to be a subtle border or a bold, prominent stroke.
- Position: You can choose whether the stroke is applied to the "Inside," "Center," or "Outside" of the layer's pixels. For most outline effects, "Outside" is the preferred setting.
- Color: Click on the color swatch to open the Color Picker. Here, you can select any color for your outline. For the popular white outline effect, simply choose white.
- Opacity: This setting determines how transparent the stroke is. A 100% opacity will result in a solid, opaque outline. Reducing the opacity allows pixels from underlying layers to show through, creating a softer effect.
- Blending Mode: This controls how the stroke interacts with the pixels beneath it. "Normal" is typically used for solid outlines.
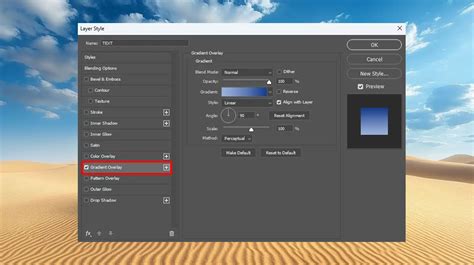
- Fill Type: For a standard outline, "Color" is the appropriate fill type. However, Photoshop also allows you to use patterns or gradients for more complex stroke designs.
The "Difference" setting within the Blending Mode options for the Paint Bucket tool is relevant for understanding how color similarity affects fills, but for applying a defined outline using Layer Styles, direct color selection is key. The "Tolerance" setting in the Paint Bucket tool defines how similar in color filled pixels must be to the pixel you click, which is a different concept from applying a uniform stroke.
The concept of "opacity" in Photoshop is crucial across various tools. For the Paint Bucket tool, it "allows pixels under a paint stroke to show through." For Layer Styles, it sets the "opacity of the paint you apply" or, in the context of the stroke, the opacity of the outline itself.
When using a fill layer, you "apply a fill or a pattern to your image, instead of using one of the brush tools." This is an alternative method for applying color or texture, distinct from the stroke effect.
For those who desire a less opaque foreground while maintaining a strong outline, you can reduce the "Fill" opacity within the Layer Style settings. This scales down the opacity of the letters or pixels themselves while preserving the solidity of the outline.
Advanced Outline Techniques: Multiple Strokes and Vector Shapes
Photoshop also offers the flexibility to apply multiple outlines to a single layer, which can create depth and visual interest. To add a second stroke, click the plus sign (+) next to the existing "Stroke" effect in the Layer Style box. This adds another stroke layer above the first, allowing you to customize its size, color, and position independently.
Another advanced method for creating outlines, particularly for text, is by converting the text layer into a vector shape. This offers more precise control and scalability but can make subsequent text editing more challenging. To do this, right-click on your text layer and choose "Convert to Shape." You can then apply a stroke to this vector shape via the Layer Style menu.
It's important to note that while Photoshop's desktop version offers extensive options for outlining text and shapes, the functionality on Photoshop for the iPad is currently more limited, primarily allowing for changes to fonts and opacity without the ability to apply strokes directly through Layer Styles.
How to Make a Double Stroke / Multiple Strokes in Adobe Photoshop 2023 (fast Tutorial)
Exporting Your Masterpiece
Once you are satisfied with the appearance of your outlined image, the final step is to export it for use in other applications or platforms.
Saving as a PNG for Transparency
To preserve the transparent background and ensure your outline remains prominent, it is essential to save your image in a format that supports transparency, such as PNG. Go to "File" > "Export" > "Export As…" (or "Save As…" and choose PNG). Select the PNG format, and ensure that the transparency option is enabled. This will create a file that can be seamlessly integrated into other designs, such as thumbnails in tools like Canva or RelayThat.
While Photoshop is a powerful tool for the entire design process, many users find that combining it with other user-friendly platforms can streamline their workflow. However, for those who wish to accomplish the entire task within Photoshop, the tools and techniques described here provide a comprehensive pathway.
Considerations for Text Outlines
While this guide primarily focuses on outlining images, the principles can be applied to text as well. However, when outlining text, it's important to consider the typographical intentions of the font designer. Typography designers invest considerable effort in refining the appearance and profile of their fonts, and an outline can sometimes disrupt this intended aesthetic. Therefore, when applying outlines to text, do so with a clear purpose and an understanding of how it might affect readability and design harmony.
The process for outlining text is similar: select the text layer, access the Layer Style menu (by clicking the FX icon or double-clicking the side of the layer), and apply a "Stroke." As with image outlines, you can adjust the size, color, position, and opacity of the text stroke.
Conclusion: Unleashing Your Creative Potential
Mastering the art of adding outlines in Photoshop is a valuable skill for anyone looking to enhance their visual content. By understanding the interplay of selection tools, layer management, and the power of Layer Styles, you can create professional-looking graphics that command attention. Whether for social media thumbnails, website graphics, or any other visual project, the ability to cleanly isolate and stylize elements with distinct outlines opens up a world of creative possibilities.