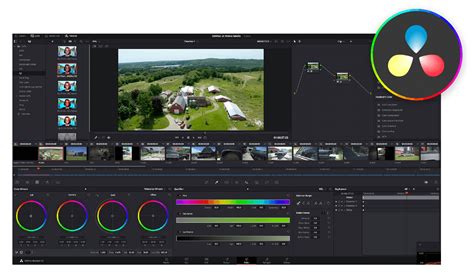
DaVinci Resolve, a powerhouse in video editing, color correction, and visual effects, offers a robust platform for bringing text to life. For those looking to add a dynamic and engaging "write on" effect to their projects, understanding the tools within Resolve, particularly the Fusion page, is key. This tutorial will guide you through creating a captivating text animation, transforming static words into a visually appealing narrative element. Whether you're a seasoned editor or new to the intricacies of Fusion, this process is designed to be accessible and rewarding, ultimately enhancing the professional polish of your video content.
Understanding the Foundation: DaVinci Resolve and Text Effects
DaVinci Resolve is renowned for its comprehensive suite of tools, seamlessly blending professional non-linear video editing with industry-leading color correction capabilities. This integrated approach makes it an ideal choice for a wide spectrum of users, from beginners to seasoned professionals. Within this versatile software, the Effects Library serves as a gateway to numerous quick text effects. For more intricate and customized animations, the Fusion page provides a node-based environment that allows for the creation of complex visual sequences. Animating text with keyframes offers granular control over motion and timing, enabling precise adjustments to achieve the desired visual outcome. The choice between different methods often hinges on the desired complexity of the effect, with each offering distinct levels of customization.
To begin, users typically access the Effects Library, often found in the upper left corner of the DaVinci Resolve interface. Scrolling through the various categories, one will find the "Titles" section, which houses a variety of pre-built text effects. For more advanced manipulation, the Fusion page is the destination. When preparing to animate text, the foundational steps involve setting the initial keyframe. This is achieved by locating the specific properties within the Inspector panel that you wish to animate, such as Position, Zoom, or Rotation. Subsequently, adjusting these property values creates a new position or state for the text, thereby establishing the subsequent keyframe. Playing back the timeline then reveals the animation, illustrating how the text evolves according to the defined keyframes.
Implementing the "Write On" Effect in Fusion
The "write on" effect, where text appears to be drawn or written onto the screen character by character, is a popular and effective way to add emphasis or a narrative flow to video content. While DaVinci Resolve offers various methods for text manipulation, the Fusion page provides a particularly powerful and flexible environment for achieving this specific animation. This section details the step-by-step process, leveraging the provided information to guide users through the creation of this engaging visual.
The process begins on the Edit page. First, a background clip, such as the example featuring "beautiful tropical trees," is placed on the timeline. To ensure this background is visible and accessible within Fusion, an "Adjustment Clip" is dragged from the Effects Library and positioned above the background clip on the V2 track. Locking the V1 track is a practical step to prevent accidental alterations to the underlying footage. With the playhead positioned over the Adjustment Clip, the user navigates to the Fusion page. The advantage of using an Adjustment Clip in this context is that it allows the Fusion composition to be built directly over the existing footage, providing immediate visual feedback. The viewer can be set to full screen for a more immersive experience.

Within Fusion, the "T" icon, representing the Text+ effect, is selected. This action automatically introduces a Text+ node into the node graph, typically connected to a Merge1 node. For better organization, it's advisable to drag the Text1 node and place it above the Merge1 node. Similarly, the MediaIn and MediaOut nodes can be repositioned to streamline the graph's appearance.
Selecting the Text1 node brings up the Inspector and a text input field. Here, the desired text is entered. For instance, typing "TRAVEL" in all capital letters is a starting point. The choice of font significantly impacts the aesthetic; a handwritten style, such as "Masiku" (often available from sites like dafont.com), can lend a more organic feel to the write-on effect.
A common challenge with certain fonts is that letters can be too close together, potentially causing issues during the animation. To address this, the "Tracking" slider in the Inspector is adjusted to the right, increasing the spacing between characters. The "Size" slider can also be used to enlarge the text as needed.
The core of the "write on" effect is achieved using a mask. On the keyboard, pressing "Shift + Spacebar" opens a tool selection window. Searching for and adding the "Mask Paint" tool is the next step. This tool is appended to the node graph, typically appearing above the Text node, and is selected by default. At this stage, the text may disappear; this is expected. In the Inspector, under the "Mask" tab, selecting "Invert" will make the text reappear, but now it's ready to be masked.
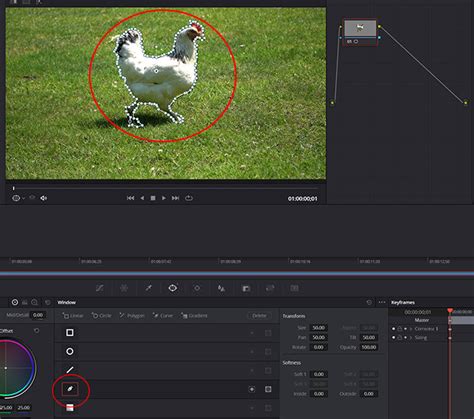
The brush type needs to be set to "Stroke." This is done by clicking the brush icon on the left side of the interface and selecting "Stroke." A small green circle will appear, which will be used to draw over the letters. To ensure the brush is appropriately sized, it should be slightly larger than the thickest part of the letter being painted. This is adjusted within the Inspector under "Controls," by expanding the "Brush Controls" drop-down menu and increasing the "Size" slider. The "Softness" slider should be moved as far left as possible, as a hard edge is generally desired for this effect. Crucially, within the "Stroke Controls" drop-down menu, the "Stroke Animation" option must be set to "Write On."
Now, the actual "writing" begins. The user clicks and drags the brush over each letter, mimicking the natural flow of handwriting. It's vital to maintain a consistent stroke and avoid lifting the cursor, as releasing it mid-stroke will require starting over. If a mistake is made, "Command+Z" (or "Control+Z" on PC) can be used to undo. While this part of the process can be sped up in a tutorial, users are advised to proceed slowly and deliberately to avoid errors.
Once the entire word has been traced, the text may still be invisible. To reveal it, return to the "Mask" tab in the Inspector and uncheck "Invert." The next step involves animating the duration of the write-on. The "Keyframes" tab is opened, and the "MaskPaint1" and "Stroke1" options are expanded. The "End" property, which represents the points of the stroke, is selected. All these points are highlighted, turning yellow, and then "Time Stretch" is applied. This tool allows for the adjustment of the animation's duration. By hovering over the end of the time stretch indicator and dragging inwards significantly, the animation speed can be compressed. The result is a fluid "write on" text animation that appears dynamically on the screen.
Exploring Diverse Text Effects in DaVinci Resolve
Beyond the "write on" effect, DaVinci Resolve empowers users to create a wide array of text animations and styles, each contributing to a more polished and visually engaging video. These effects can be combined and customized to align with a specific creative vision, making text a powerful storytelling tool.
One popular effect is "Text with Video Inside," which allows video clips to be incorporated directly within the characters of the text, creating a dynamic and layered visual. Animated Text in a broader sense encompasses various movements, such as text scrolling across the screen, scaling in and out, or rotating, adding a sense of motion and dynamism. Stroke Titles offer a bold, modern aesthetic, emphasizing the outlines of the text for a strong visual impact. Gradient Titles utilize color transitions within the text, providing a fresh and contemporary feel, and can be further enhanced by animating these gradients over time.
Text Box Animations are crucial for scene composition, controlling the entry and exit of text containers to guide the viewer's eye. The Wiggle Text Effect introduces a subtle or dramatic shake to the text, adding energy or a sense of urgency. Circular Text arrangements offer a unique way to present information, placing text along a curved path. For vibrant and eye-catching visuals, Multi-color Text allows for dynamic color changes, either gradually over time or in response to specific triggers.
The Digital Glitch Effect imparts a corrupted, modern, and often edgy look to text, suitable for specific stylistic choices. Drop Shadow and Background Effects are fundamental for enhancing text readability and ensuring it stands out against busy backgrounds. As previously detailed, Keyframe Animations remain a cornerstone, providing precise control over the position, rotation, scale, and opacity of text elements. Finally, Motion Graphics involve the sophisticated integration of text with other visual elements, creating complex and animated sequences that elevate the overall production value.
Troubleshooting Common Text Effect Issues in DaVinci Resolve
While DaVinci Resolve offers extensive capabilities for text animation, users may occasionally encounter challenges. Understanding these potential pitfalls and their solutions can save considerable time and frustration.
A primary distinction to be aware of is between Basic Text and Text+. Basic Text, often found in simpler templates, may have limitations in accepting certain advanced effects or animations. Text+, on the other hand, is specifically designed for more complex styling and animation, making it the preferred choice for intricate effects like the "write on" animation. When an effect doesn't behave as expected, verifying that you are using a Text+ element is a crucial first step.
Drag and Drop Issues can arise when applying effects. It's important to ensure that effects are being dragged onto the correct layer. While effects can be applied to video clips, they might not always integrate directly with Basic Text layers. If an effect from the Effects Library is applied to a text layer, and the corresponding controls (like the OpenFX tab) do not appear in the Inspector, it often indicates an incompatibility between the effect and the text type being used.
The OpenFX Tab is a key indicator of effect compatibility. After applying an effect to a Text+ layer, this tab should become visible in the Inspector panel, providing access to the effect's parameters. If this tab is absent, the effect is likely not compatible with the current text layer.
Finally, Software Updates play a critical role in stability and functionality. Outdated versions of DaVinci Resolve can sometimes lead to unexpected behavior or prevent certain features from working correctly. Regularly checking for and installing the latest updates is recommended, as these often include crucial bug fixes and performance enhancements. Ensuring that your hardware also meets the software's requirements is also essential for smooth operation.
By understanding these core principles and troubleshooting common issues, users can effectively leverage DaVinci Resolve's powerful text animation capabilities to produce captivating titles and dynamic visual elements that significantly enhance their video projects. Experimentation with various tools and techniques, combined with practice, will lead to proficiency in adding sophisticated text effects with speed and confidence.