Photoshop, long revered as the industry standard for raster graphics editing, once offered a surprisingly robust set of tools for three-dimensional manipulation and rendering. While these legacy 3D features have been removed as of July 2024, understanding their functionality provides valuable insight into the evolution of digital art and the capabilities that shaped it. This article delves into the intricacies of Photoshop's former 3D environment, exploring its core components, workflows, and the creative potential it unlocked.
Understanding the Foundation: Meshes and Materials
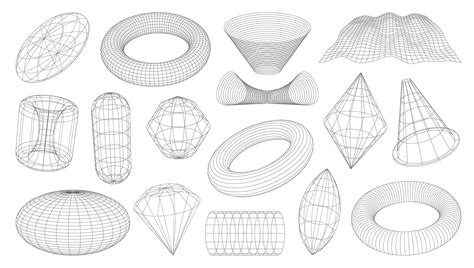
At the heart of any 3D model lies a mesh, the underlying skeletal structure built from thousands of individual polygons. A 3D model always comprises at least one mesh, though it can combine multiple. In Photoshop, these meshes could be visualized in various render modes and manipulated independently. While direct alteration of polygons wasn't possible, users could transform meshes by scaling them along different axes or changing their orientation. Photoshop also allowed for the creation of custom 3D meshes, either by utilizing pre-supplied shapes or by converting existing 2D layers into 3D forms.
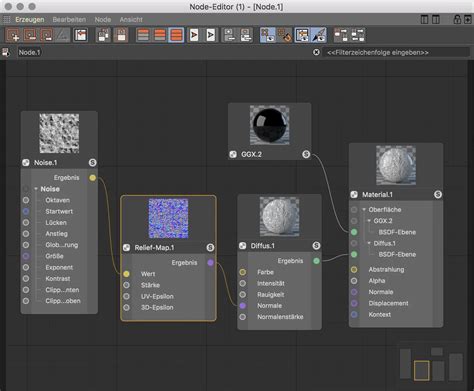
Associated with each mesh were one or more materials, which dictated the visual appearance of the mesh. The complexity of these materials was further enhanced by texture maps, essentially 2D image files that imbued surfaces with qualities such as color, pattern, shininess, or bumpiness. A single Photoshop material could utilize up to nine different texture map types, contributing to its overall aesthetic. These texture map types included diffuse maps for color and pattern, bump maps for surface detail, normal maps for more intricate surface variations, and environment maps for realistic reflections.
The Photoshop 3D Panel: Your Command Center
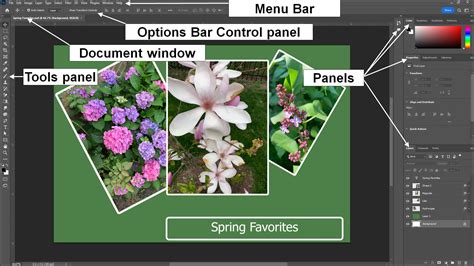
The Photoshop 3D panel served as the central hub for managing and interacting with 3D objects within the application. This panel facilitated a more intuitive workflow by organizing and providing access to various 3D elements. Users could easily select individual components like scenes, meshes, materials, or lights, with the Properties panel dynamically updating to display relevant settings.
The panel's top section displayed a list of components, filterable by clicking icons representing Scene, Meshes, Materials, or Lights. This allowed for focused adjustments without clutter. For instance, clicking the Scene button would reveal all scene components, while selecting a specific mesh or light would filter the display to show only those elements. For deeper dives into material properties, users could access the Materials picker and various drop-and-select tools.
Manipulating 3D Objects and Scenes
Interacting with 3D objects in Photoshop was designed to be both powerful and accessible. On-image controls enabled users to edit entire 3D scenes without needing to constantly switch between workspace panels. Object bounding box controls provided an intuitive way to resize and reposition models. Clicking an object once activated its controls, and hovering over specific planes would highlight them for manipulation along that axis.
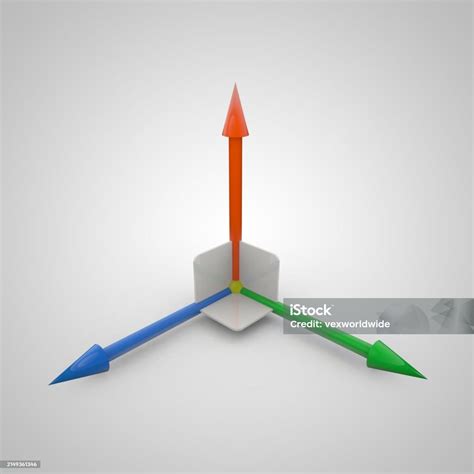
The 3D object tools were specifically designed for altering the position and scale of a 3D model. These included tools for rotating, repositioning, and scaling. For precise control, the 3D Axis offered a visual representation of the X, Y, and Z axes, allowing users to drag along specific axes for linear movement or click on curved segments for rotation. The ability to constrain movement to an object plane by dragging within the intersection of two axes further refined precision.
Similarly, 3D camera tools allowed for dynamic changes to the scene's viewpoint. These tools facilitated orbiting, rolling, panning, and walking the camera through the 3D space. The camera's field of view could be adjusted, and settings like "Maintains parallel lines without convergence" and "Sets depth of field" offered advanced photographic control within the 3D environment.
Scene, Mesh, and Light Settings
Quick access to scene properties was available by right-clicking the canvas away from 3D objects. The Properties panel was a crucial element, displaying settings relevant to the currently selected individual element, whether it be a mesh, material, or light. To introduce new illumination to a scene, users could click the document icon at the bottom of the Scene and Lights sections. The Coordinates icon within the Properties panel was particularly useful for entering precise numerical locations for objects, cameras, and lights, ensuring exact placement.
Lighting Your 3D World
Realistic lighting is paramount in creating believable 3D scenes, and Photoshop offered a range of lighting options. The default Image-Based Light (IBL) provided an ambient illumination that wrapped around the scene. Beyond IBL, Photoshop supported Infinite, Spot, and Point lights, each offering distinct lighting characteristics. Infinite lights simulated directional light sources like sunlight, while Spot lights cast illumination in a cone shape. Point lights radiated from a single point.

Users could adjust the color and intensity of existing lights, as well as add new ones to sculpt the mood and form of their 3D creations. The properties of each light, such as color and shadow diffusion, could be finely tuned. For instance, the Inner and Outer options for light attenuation controlled how light intensity decreased with distance, mimicking real-world light falloff.
Shadow Rendering and Quality
Photoshop offered improved OpenGL shadows, and users could specify shadow quality to best suit their computer's capabilities through Edit > Preferences > 3D (Windows) or Photoshop > Preferences > 3D (Mac OS). For achieving high-quality shadows and reflections, the Ray Trace rendering mode was essential. During Ray Traced rendering, tiles were temporarily drawn across the image. The rendering process could be interrupted by clicking the mouse or pressing the spacebar. The Ray Trace rendering tile size could be adjusted from its default, which was based on the computer's core count. To ensure shadows were cast from the ground plane onto meshes, the option 3D > Ground Plane Shadow Catcher was available.
Texturing and Material Creation
The creation and application of textures and materials were central to defining the surface appearance of 3D models in Photoshop. A mesh could have one or more materials associated with it. The Materials panel listed all materials used in a 3D file and allowed for the creation of new materials or the modification of existing ones.
Photoshop's material system supported various texture map types:
- Diffuse Map: This map defined the base color and pattern of the material. It could be a solid color or any 2D image.
- Bump Map: A grayscale image that created the illusion of surface detail and texture without altering the underlying mesh geometry. Lighter values in the bump map created raised areas, while darker values created flatter areas.
- Normal Map: Similar to bump maps, normal maps added surface detail but utilized multi-channel (RGB) images to represent X, Y, and Z components of surface normals, offering more sophisticated detail.
- Environment Map: Applied as spherical panoramas, these maps captured the surrounding environment and influenced reflections on the 3D model's surface.
- Reflection Map: Controlled the glossiness and reflectivity of the material.
- Gloss Setting: Defined the dispersion of reflected light, affecting the sharpness and focus of reflections.
- Illumination Map: Influenced the overall brightness and how light interacted with the material.
Users could create or load texture map files, or even paint directly onto the 3D model to generate texture maps. The ability to edit texture maps as Smart Objects allowed for non-destructive workflows, with updates to the texture file automatically reflected on the 3D model.
Material Presets and Customization
Material presets offered a quick way to apply groups of texture settings, streamlining the workflow. Users could also create and save their own custom material presets for future use. The panel provided options to rename, delete, append, or replace saved material groups.
Converting 2D to 3D and Advanced Workflows
Photoshop provided several pathways for converting 2D elements into 3D objects, expanding creative possibilities:
- 3D Postcards: 2D layers could be converted into 3D postcards, essentially planes with 3D properties. The original 2D layer would then serve as the diffuse texture map for this postcard.
- Repoussé: This technique simulated metalworking by extruding a 2D object in 3D space, creating depth and relief.
- 3D Volume: For multi-frame files like DICOM medical imaging, Photoshop could construct a 3D volume, allowing for manipulation and viewing from any angle. This was particularly useful for visualizing complex internal structures.
The process of creating a 3D volume involved combining individual slices into a unified 3D object. Various 3D volume render effects could then be applied to optimize the display of different materials within the scan, such as bone or soft tissue.
Work Paths from 3D Layers
A unique feature allowed users to convert the current rendering of a 3D layer into a Work Path via 3D > Make Work Path from 3D Layer. This could be useful for extracting vector-based outlines from 3D models for further manipulation in 2D.
Rendering and Performance Considerations
The rendering process in Photoshop transformed the 3D scene into a final, high-quality image. Different render settings determined how 3D models were drawn, with options ranging from quick previews to detailed final outputs. The Ray Traced render setting was known for its ability to produce realistic reflections and shadows.
Performance was a key consideration. OpenGL shadows provided improved rendering speed, and users could adjust Ray Trace rendering tile size based on their computer's specifications. For faster interactive work, draft resolutions were often used. The Render for Final Output setting was available for high-quality animations.
Cross-Sections for Internal Views
Photoshop's 3D capabilities also included the ability to create cross-sections. This feature allowed users to slice through a model and view its interior content. A planar cross-section could be created at any angle, and its position and orientation could be precisely controlled using the 3D Axis. This was invaluable for examining the internal structure of complex models.
Animation in 3D Space
While not its primary focus, Photoshop offered capabilities for animating 3D elements. Users could animate the position of objects or cameras over time by setting keyframes. This allowed for the creation of smooth motion effects and dynamic camera movements. The ability to tween transitions between render modes also contributed to animated sequences.
The Evolving Landscape: Removal of 3D Features
It is crucial to reiterate that as of July 2024, Photoshop's legacy 3D features have been removed. Adobe's decision to phase out these tools was driven by several factors, including the evolution of specialized 3D software and the technical challenges of maintaining compatibility with modern operating systems and hardware. The removal process began with Photoshop version 22.5.
For users who continue to rely on these features, Adobe recommended using Photoshop 22.2 or earlier. They also offered a Technology Preview preference ("Deactivate Native Canvas") that could emulate the last known working state for 3D features, though this was a temporary measure.
While Photoshop's direct 3D modeling and rendering capabilities have been sunset, its strengths in compositing 3D elements into photographs remain. The principles and workflows learned from Photoshop's 3D past continue to inform and enhance digital art creation, even as dedicated 3D applications like Adobe Stager and Substance Painter take center stage for more complex 3D pipelines. The legacy of Photoshop's 3D tools, though no longer actively developed, represents a significant chapter in the software's history and its journey as a comprehensive creative suite.