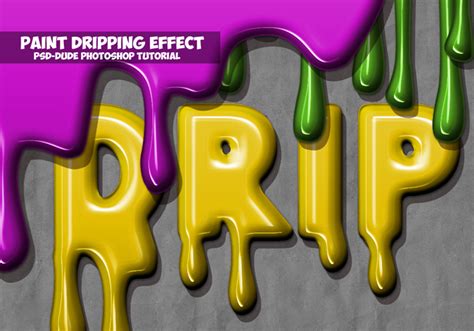
The drip effect, a captivating visual technique that mimics the natural flow of liquids like paint, water, or ink, has become an indispensable tool in the digital design landscape. Its versatility allows it to transform ordinary visuals into compelling narratives, adding emphasis, conveying motion, and injecting personality into brand identities. From campaign visuals and event posters to editorial artwork and promotional assets, the judicious application of drips can elevate designs, drawing the viewer's eye and reinforcing a specific aesthetic. This tutorial will guide you through the process of creating an amazing, artistic paint drip effect in Adobe Photoshop, utilizing powerful tools like Liquify, custom brushes, and layer masks.
Preparing Your Canvas: Setting Up Your Image
Before diving into the creative process, it's crucial to prepare your base image. For optimal results, open the photo you intend to work with by navigating to File > Open. Ensure your image is in RGB Color mode and 8 Bits/Channel. The ideal image dimensions for this effect range from 1500 to 4000 pixels wide or high, with the image initially set as the Background layer. If you are working with a different stock photo, consider applying an "Unfinished Coloured Pencil Sketch Effect" as a foundational layer to enhance the artistic outcome.
Photoshop's AI-powered tools, such as the Remove Background tool, are invaluable for cleanly separating your subject from its original background. This allows for quick creation of rich imagery without the need for manual compositing or the sourcing of additional assets. Once your subject is isolated, you can begin to apply the dripping effect with precision.
Crafting Custom Brushes: The Foundation of Your Drips
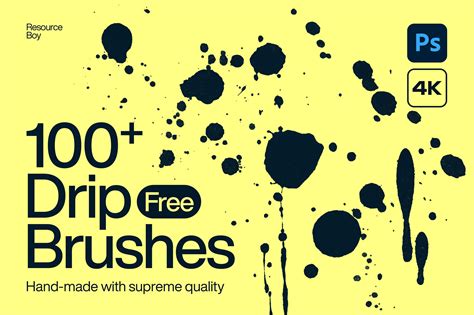
The essence of a convincing drip effect lies in the quality and variety of your brushes. Photoshop allows you to create and define custom brushes from specific shapes, providing granular control over the appearance of your drips.
Create New Layers for Brushes: Go to
Layer > New > Layerto create a new layer and name itBrush_1. Repeat this process to create additional layers namedBrush_2,Brush_3,Brush_4, andBrush_5. These layers will serve as canvases for your drip shapes.Draw Your Drip Shapes: With the
Brush_1layer selected, choose the Pen Tool (P). Ensure the tool mode is set to Shape, and set the Fill color to#000000(black). Carefully draw a dripping shape. This can be a simple teardrop, a more irregular, organic flow, or even a stylized drip. The key is to create a distinct shape that will serve as the basis for your brush.Define Brush Presets: Once you have drawn your first drip shape on
Brush_1, you will define it as a brush. Navigate toEdit > Define Brush Preset. Give your brush a descriptive name, such asDripping_Brush_1. Repeat this process for each of the drip shapes you draw on the subsequent layers (Brush_2throughBrush_5), naming them accordingly (e.g.,Dripping_Brush_2,Dripping_Brush_5). Having a variety of drip shapes and sizes will contribute to a more natural and dynamic final effect.
Applying the Drip Effect: Bringing Your Image to Life
With your custom brushes ready, you can now begin to apply the dripping effect to your chosen image. This stage involves strategically placing the drips and refining their appearance.
Isolating Your Subject (if not already done): If you haven't already, use the
Remove Backgroundtool to isolate your subject. This ensures that the drips appear to emanate from or flow over your subject realistically.Creating a Painting Effect: To create a painting-like effect from a specific area of your photo, begin by Control-clicking on the thumbnail of your subject layer. This will create a selection of your subject. Hide the original subject layer. Select your Background layer and press
Control-Jto duplicate the selected area onto a new layer. Name this layerSubject.Applying Stylistic Filters: With the
Subjectlayer selected, go toFilter > Sharpen > Sharpento enhance details. Then, pressControl-Shift-Uto desaturate the layer, converting it to grayscale. Next, apply theDiffusefilter: go toFilter > Stylize > Diffuseand choose theAnisotropicmode. Repeat this filter application once more for a more pronounced effect.Transforming the Layer: To further manipulate the texture and flow, go to
Edit > Transform > Rotate 90° clockwise. This rotation can help create a more dynamic, downward-streaming appearance.Adding Contrast and Depth: To introduce contrast to the subject, duplicate the
Subjectlayer by holding theAltbutton and dragging the layer above itself. Name this new layerSubject_Brightness. PressControl-Alt-Gto create a clipping mask, ensuring this layer only affects theSubjectlayer below it. Desaturate thisSubject_Brightnesslayer by pressingControl-Shift-U. Adjust the opacity or blending modes of this layer to fine-tune the contrast and overall look.Painting the Drips: Now, select your
Subjectlayer and choose the Brush Tool (B). Select one of your custom-created dripping brushes. Decide where you want to place the first paint drip. Click and drag to apply the brush stroke. To achieve a diverse and natural effect, continuously change the brush size and select different custom brushes you created earlier. Repeat this process across your image, strategically placing drips to enhance form, add movement, or create a specific artistic statement.
How To Create The Paint Drip Effect In Photoshop - Step By Step Tutorial
Refining the Effect: Layer Masks and Vignettes
To ensure a polished and professional outcome, several refinement techniques are employed. Layer masks offer non-destructive editing, allowing for precise control over where the effect is visible, while a vignette can help focus attention on the subject.
Applying Layer Masks: After painting your drips, you may want to refine their appearance or blend them more seamlessly. Select the layer containing your drips and go to
Layer > Layer Mask > Reveal All. This creates a white layer mask, meaning the entire layer is visible. You can then use a black brush to paint on the mask and hide parts of the drips, or a white brush to reveal them. To quickly reset your foreground and background colors to default black and white, pressDon your keyboard. PressingXinverts these colors.Creating a Vignette Effect: A vignette can draw the viewer's eye towards the center of the image. To create one, press
Control-Ato select the entire canvas. Go toLayer > Layer Mask > Hide Selection. This creates a black layer mask that hides the entire layer. Now, select the Brush Tool (B) with a large, soft brush and white as your foreground color. Paint on the layer mask around the edges of your canvas to gradually reveal the layer, creating a subtle darkening effect that frames your subject. Adjust the opacity of this layer to control the intensity of the vignette.
Advanced Techniques and Creative Applications
The dripping effect is not limited to traditional paint. Its application can be extended to various scenarios to enhance visual storytelling and brand differentiation.
Food Photography: Apply the drip effect to specific features of a dish, such as melted cheese on a pizza, sauce dripping from a burger, or syrup cascading down a dessert. This exaggerates texture and creates a sense of motion and indulgence, making the food appear more appetizing.
Typography and Graphics: Incorporate drips beneath artist names, date headers, or illustrated elements to reinforce a bold or street-style aesthetic. Apply the effect to stylized avatars or sticker-style illustrations to introduce movement and a tactile quality.
Emphasis and Motion: When used with intention, the paint dripping effect becomes more than just a style; it becomes a tool for emphasis. Use it to call attention to new releases, highlight key information, or add a dynamic visual flow to your designs.
Brand Personality: The drip effect can contribute significantly to brand personality. A sleek, controlled drip might suggest sophistication, while a more chaotic, widespread drip could evoke a sense of rebellion or artistic freedom.
Creative Workflow and Collaboration: Creative Cloud Libraries
To streamline your creative workflow and maintain consistency, especially when collaborating with teammates, leverage Adobe Creative Cloud Libraries. You can save your custom brushes, textures, layer styles, and other design elements to your Creative Cloud Library. This allows you to quickly access and apply them across different projects, ensuring a cohesive look and feel. Seamless collaboration is facilitated as team members can share and utilize the same assets, boosting efficiency and maintaining brand integrity.

By mastering these techniques, you can transform ordinary images into visually striking compositions. The dripping paint effect, when applied thoughtfully, is a versatile design element that supports both storytelling and brand differentiation, adding a unique artistic flair to your digital creations. The ability to create these effects in Photoshop empowers designers to push creative boundaries and produce truly captivating imagery.