Adobe Photoshop offers a suite of powerful tools designed to refine and perfect digital images. Among these, the Eraser tool stands out as a fundamental utility for removing unwanted elements, correcting mistakes, and preparing images for further editing. While its name suggests a simple deletion function, Photoshop's Eraser tools are far more nuanced, offering varying degrees of control and specific applications for different editing scenarios. This guide delves into the intricacies of Photoshop's Eraser tools, from the standard Eraser to its specialized counterparts, the Background Eraser and the Magic Eraser, providing a comprehensive understanding for users of all skill levels.
The Standard Eraser Tool: Versatility in Removal
The standard Eraser Tool in Photoshop is a versatile utility for removing specific parts of an image. It operates by either making pixels transparent or matching them to the image's background color, depending on user-defined settings. This flexibility allows for precise modifications without necessarily causing irreversible damage, especially when employing best practices.
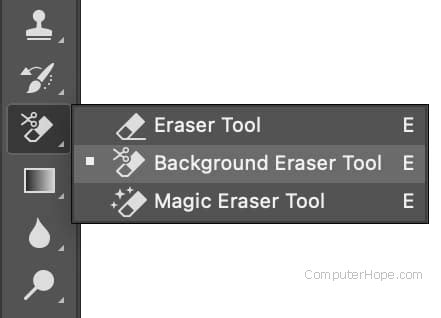
When using the Eraser Tool, users will first encounter the Options Bar, which presents a range of settings to customize the erasing effect. Key among these are the mode, brush size, and opacity. The Eraser Tool offers three distinct modes: Brush, Pencil, or Block.
- Brush Mode: This mode provides softer edges, allowing for more natural blending and subtle removals. Within this mode, users can adjust the size, hardness, and opacity of the brush tip to control the extent and intensity of the erase. Changing the opacity is particularly helpful when a subtle erasure is desired, while modifying the flow allows for control over the speed of the erasing movement.
- Pencil Mode: Mimicking a traditional pencil, this mode offers hard-edged results, ideal for precise, sharp removals.
- Block Mode: This mode utilizes a square shape for the eraser, providing a distinct geometric effect.
Beyond these modes, the Eraser Tool features a variety of brush settings that can optimize workflow. For instance, changing the opacity can be helpful when we want to erase part of an image subtly, while modifying the flow lets us control the erasing movement's speed. One helpful feature in the Eraser Tool is the "Auto Erase" option, which replaces an erased area with the background color, set from the color swatch.
Destructive Editing and Best Practices
It is crucial to understand that the Eraser Tool is considered a destructive tool. When erasing pixels, they are permanently removed rather than hidden, which might cause issues for future edits. To work around this, it's advisable to duplicate the background layer in the Layers Panel before erasing. This creates a backup, allowing for easy reversion if an edit is regretted.
To erase parts of an image, one can simply select the Eraser Tool from the Toolbar and drag across the desired areas. The eraser will either make pixels transparent or match them to the image background color based on the settings chosen in the Options Bar.
For those working with multiple layers, the option to "Erase to History" allows for control over the eraser's impact on the layer hierarchy. More advanced users might opt to use Layer Masks instead of directly erasing pixels. Layer Masks allow you to hide parts of an image non-destructively, meaning the hidden portions can be revealed later by adjusting the mask. This offers a significant advantage for maintaining editability.
The Background Eraser Tool: Precision for Background Removal
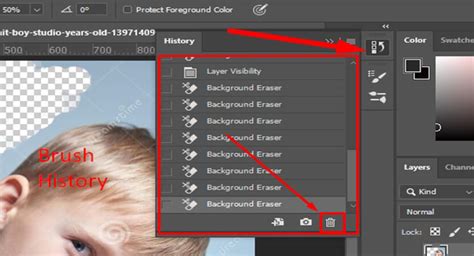
The Background Eraser Tool is specifically designed to remove background elements in an image while preserving the main subject. It operates by detecting the difference between the desired foreground and background colors, making it easier to erase without affecting the main subject's integrity. This tool is particularly useful when attempting to isolate a subject from its surroundings.
Understanding Key Settings
To make the most of the Background Eraser Tool, it's important to understand its key settings, which are found in the Tool Options Bar.
Sampling: This setting controls how the Background Eraser Tool samples the background colors of your image. It offers three options:
- Continuous: The tool continuously samples colors as you drag the cursor. This is useful for backgrounds with varying shades.
- Once: The Background Eraser Tool samples the color only once, from your first click. This is effective when the background color is relatively uniform.
- Background Swatch: This option allows you to choose a specific color as the background to be erased. This is powerful when you know the exact color you want to remove, even if it's not directly under your cursor.
Limits: These settings tell the Background Eraser Tool where to look for pixels that match the color you want to erase. They are located next to the Sampling options and offer different ways to constrain the tool's behavior:
- Find Edges: This is often the most useful setting for preserving the integrity of your subject. When "Find Edges" is selected, the tool attempts to detect the boundaries of your subject and erases only the pixels that appear to be background, thereby maintaining the object's edge details.
- Discontiguous: This option erases pixels of similar color that are contiguous to the sample point.
- Contiguous: This option erases all pixels of similar color within the brush area.
Tolerance: The Tolerance settings determine the range of colors that will be erased.
- If there is a high color contrast between the object and the background (i.e., many distinct colors in your picture), then use higher tolerance settings to capture a broader range of background hues.
- If the object and background share similar colors (i.e., few distinct colors in your picture), then use lower tolerance settings to ensure only the precise background color is affected.
Protect Foreground Color: Enabling this option will help in preserving your desired foreground colors from being erased. This is a critical setting when working with subjects that have colors similar to the background.
Practical Application
When using the Background Eraser Tool, it's recommended to start from the edges of your object. Choose the "Find Edges" Limits setting and adjust the Brush size, Sampling, Tolerance, and Protect Foreground Color settings based on your specific image. After carefully erasing around the edges, you can then switch to a larger brush size and erase the rest of the background.
It's important to note that mastering the Background Eraser tool requires time and practice. It is not a quick, 15-minute job for complex images. Additionally, this tool works best for solid-color backgrounds, such as a plain white background or a green screen.
11 Shortcuts to Remove Background in One Click! - Photoshop Tutorial
The Magic Eraser Tool: Effortless Color Removal
The Magic Eraser Tool is another valuable addition to Photoshop's erasing arsenal. It functions similarly to the Magic Wand selection tool but, instead of creating a selection, it automatically erases the selected area. This tool is exceptionally efficient for removing large areas of similar color.
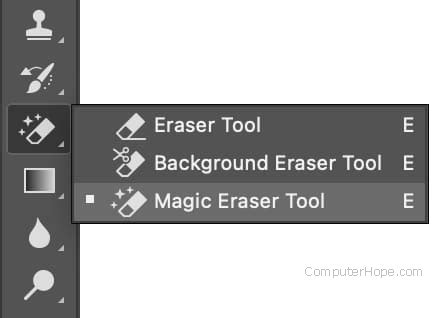
The Magic Eraser works by detecting and erasing areas of similar color in the image. By modifying the Sampling and Limits settings (similar to the Background Eraser Tool), you can alter the precision of color selection in the image. This can be a time-saving alternative to the regular Eraser, particularly when working with large, uniform areas of color.
For instance, if you have an image with a solid blue sky that you wish to remove, the Magic Eraser can quickly select and delete all contiguous blue pixels with a single click, provided the Tolerance is set appropriately. If the sky has subtle gradients, adjusting the Tolerance will be key to achieving a clean removal without affecting clouds or other elements.
Keyboard Shortcuts for Efficiency
As photographers and digital artists, we often rely on Photoshop's suite of tools to refine and perfect our images. Efficiency is paramount, and knowing keyboard shortcuts can significantly improve workflow. The shortcut for the Eraser tool in Photoshop is simply pressing the "E" key on your keyboard. Knowing these shortcuts makes it easier to switch between tools, like the pencil tool and the Eraser Tool, allowing for a more fluid editing process.
Beyond Erasers: Layer Masks for Non-Destructive Editing
While the Eraser tools are powerful, they are inherently destructive. For a non-destructive workflow, which allows for greater flexibility and reversibility, Layer Masks are the preferred method for removing or hiding parts of an image. To erase an image without permanently removing pixels, we recommend using Layer Masks. Layer Masks allow you to hide parts of an image non-destructively, meaning the hidden portions can be revealed later by adjusting the mask. This is an essential technique for professional image manipulation.
Alternative Solutions: Online Background Removers
While Photoshop offers sophisticated tools for background removal, mastering them can be time-consuming. For users seeking a quick and hassle-free alternative, especially for simpler background removal tasks, online tools provide a convenient solution. These online services can often remove backgrounds of varying complexity within seconds, offering a rapid way to isolate subjects without extensive editing knowledge.
Choosing the Right Tool: A Matter of Goal and Complexity
The choice between Photoshop's Background Eraser Tool, Magic Eraser Tool, or an online background remover ultimately depends on your specific goal and the complexity of the image. If you aspire to become a Photoshop professional and require fine-grained control over every aspect of your edits, then investing time in mastering Photoshop's tools is the way to go. For quick, straightforward background removals, especially for solid-color backgrounds, the Background Eraser or Magic Eraser can be highly effective. For even faster results or for those less familiar with Photoshop's intricacies, online background removers offer a practical and efficient alternative.
By understanding the unique capabilities and applications of each erasing tool within Photoshop, and by being aware of alternative methods, users can make informed decisions to best suit their editing needs and achieve professional-quality results. Mastering these tools is crucial for creating polished images for any photography portfolio or creative project.