Since its release in 1987, Adobe Photoshop has become the world’s leading image editing software. One reason for Photoshop’s enduring popularity among photographers, designers, and artists is its ability to make precise selections of any area in any image - a must for photo editing, photo collaging, illustration, and more. Whether you’re a Photoshop wizard with years of experience under your belt or a complete newbie just testing out the waters, you’ll turn to the quick selection tool, again and again, to make accurate selections in an instant. Photoshop treats the quick selection tool like a brush, so you can find it grouped with the magic wand tool under the brush icon. The quick selection tool was first introduced in Photoshop CS3. It’s not available in earlier versions of Photoshop, so this tutorial will assume you have CS3 or higher.
Understanding the Quick Selection Tool's Capabilities
What makes the quick selection tool stand out as one of the most precise and yet easy-to-use tools of its kind? Unlike other Photoshop selection tools, the quick selection tool selects not only colors but also textures. As you use the tool, Photoshop is continuously analyzing the image so that it automatically selects pixels that are similar in texture, color, and patterns. This ability to analyze and select based on multiple image attributes makes it a powerful asset for a wide range of editing tasks. The Quick Selection tool works best on pictures with many different colors and contrasts.
Navigating the Quick Selection Tool Interface
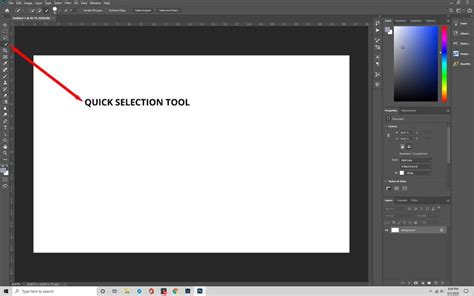
Locate the quick selection tool from the toolbox menu that’s docked on the left side of your screen. It's the fourth option from the top, and looks like a paint brush making a dotted line. Like any standard brush, the quick selection tool can have its own brush presets. Since you’ve opened the tool for the first time, this menu should be empty right now.
At the top of the screen, you'll find several options for managing your selections. The brush mode section offers three options for managing the selections you make:
- New selection: As its name indicates, this option creates a new selection.
- Add to selection: This option adds more pixels to the current selection, which works the same as holding down the Shift key. But unlike other selection tools, you don’t need to manually select "add to selection." The tool is already in "Add to selection" mode by default, indicated by the small plus sign (+) displayed in the center of the tool's cursor.
- Subtract from selection: This option removes pixels from the current selection, which works the same as holding down the Alt key (Windows) or Option key (Mac).
As with any standard brush, you can adjust the size of the Quick Selection tool's cursor. Press the left bracket key [ to make the cursor smaller or the right bracket key ] to make it larger. You can also resize the cursor by holding down Control + Option (Mac) or Alt + right-click (Windows) and dragging left/right to decrease/increase brush diameter, or up/down to increase/decrease hardness/softness. Zooming in when working on edges that are hard to select allows you to see edges more clearly and adjust your tools accordingly.
Practical Application: Selecting a Flower
For the purposes of this tutorial, we’ll practice with an image of a flower. You can download a copy from Unsplash here.
- Select the Quick Selection Tool: Ensure the brush mode is set to "New selection."
- Initiate the Selection: Click on the top left corner of the practice image.
- Expand the Selection: To continue selecting the flower, click on pixels adjacent to the selection. Photoshop will continue to "magically" select pixels around the flower as long as you continue to click and drag.
- Correcting Mistakes: If you make a mistake and select unwanted areas, undo the action by pressing
CTRL + Z(Windows) orCommand + Z(Mac). Alternatively, hold theALT(Windows) orOption(Mac) key to deselect unwanted parts of the selection. If you find that you’re over-selecting pixels, your brush might be too large. - Refining the Selection: Once you've made your initial selection, the "Refine Edge" option becomes available. This powerful tool allows you to make your selection more accurate and detailed by softening and smoothing the edges. To access it, type "refine edge" in the top search bar and press Enter.
Object Selection Tool & Quick Selection & Magic Wand - Toolbar Explained [Photoshop for Beginners]
The Power of Refine Edge
The Refine Edge menu is a separate panel that offers multiple options for creating incredibly accurate selections.
- Refine Mode: This allows you to select options for displaying your selection and making adjustments for a smooth and accurate edge. Refine Mode can display your selection on various backgrounds to reveal problem spots.
- Edge Detection: This includes a special brush for refining the selection’s radius, found just to the left of the Edge Detection options. When you select the refine radius brush, you’ll find options at the top of the toolbar for adjusting the radius of your selection. Use this brush to paint on your selection. The "Smart Radius" option, often checked by default, helps to intelligently detect edges.
- Adjust Edge: This section includes several options for detailing selection edges, with both a slider and counter for precision adjustments. For instance, "Shift Edge" at -21% (as seen in the example) can help to subtly choke the selection inwards, reducing fringing. "Feather" can soften the edges, and "Contrast" can sharpen them.
- Output: The output section includes a checkbox to "Decontaminate Colors," which eliminates any color remnants that other tools haven’t already cleaned up. This is particularly useful for selections with halos.
With our selection now completed and saved, you can hit delete to remove the original background. This will bring up a prompt for fill options, allowing you to choose a fill color for the new background.
Advanced Techniques and Workflows
The Quick Selection tool is not only incredibly powerful but also easy to use. It samples colors and textures in the same way as in the first selection. For example, with the background selected, you can make it black and white by going to Image > Adjustments > Black & White.
Working with Layers: When you're not sure if the final product will look good, consider making a copy of all your current layers first. Making a layer copy preserves an unedited version of the image, which you can use for reference. You can even blend the two versions of the image if desired.
Deselecting and Reselecting: To deselect an active selection, press Command + D (Mac) or Control + D (Win) at any time. To reload a previously saved selection, press Command + Option + 2 (Mac) or Control + Alt + 2 (Win) to load the luminosity of an image as a selection.
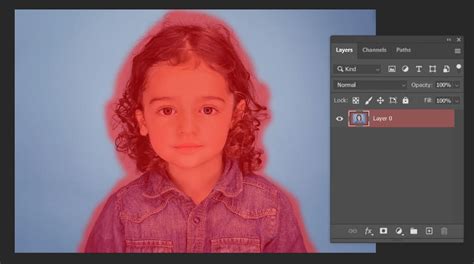
Quick Mask Mode: To preview a selection as a mask (where red represents the masked area by default), tap the Q key to toggle Quick Mask mode. Option + click (Mac) or Alt + click (Win) on the Quick Mask icon to invert the selection when entering Quick Mask mode. Double-clicking the Quick Mask icon in the Tool panel enables changing the color of the Quick Mask overlay, which can be helpful when viewing the Quick Mask over an image where the subject or background is similar to the default red overlay. While in Quick Mask mode, tap the Tilde key (~) to display Quick Mask as a grayscale mask, or tap it again to return to the red overlay view. Command + 2 (Mac) or Control + 2 (Win) allows you to view the Quick Mask while editing the composite image.
Transforming Selections: With an active selection, you can choose Select > Transform Selection to use transformation handles to modify the selection's size, rotation, and perspective. Shortcuts similar to transforming layer content apply here. For example, Command + Shift + drag (Mac) or Control + Shift + drag (Win) on a corner anchor point can skew the image. Right-clicking within the transformation bounding box brings up a context-sensitive menu with transform options. Press Return (Mac) or Enter (Win) to apply the transformation.
Saving Selections: After making complex selections, if you think you might want to use the selection again, choose Select > Save Selection to save it as an alpha channel. Alpha channels can be saved in several file formats including .psd and .tif.
Leveraging AI and Advanced Tools
Photoshop continues to evolve with AI-powered features that enhance selection capabilities.
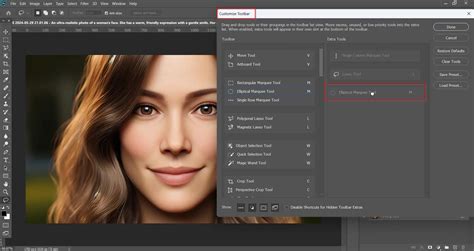
- Object Selection Tool: This tool uses artificial intelligence to help make selections of objects within an image. Choose between "Rectangular" or "Lasso" mode and drag a loose rectangle or lasso around an object. Photoshop will then help identify and "shrink-wrap" the selection around the subject.
- Select Subject: This feature has been trained on portraits and uses AI to quickly select the primary subject in an image, creating accurate selections around difficult attributes like hair.
- Sky Replacement: For easily replacing skies, choose
Edit > Sky Replacement. Photoshop's AI and machine learning can select the sky and allow you to choose from presets or load new skies. This feature offers adjustments for the sky and foreground, as well as a Sky Brush for manual refinement.

Fine-Tuning with Select and Mask
For more control after making a selection, the "Select and Mask" workspace is invaluable. Access it by choosing Select > Select and Mask or by clicking "Select and Mask" in the Options bar when a selection tool is active.
Within "Select and Mask," you have global refinements like:
- Smooth: Reduces jaggedness in the selection.
- Feather: Softens the edge of the selection.
- Contrast: Sharpens the edge of the selection.
- Shift Edge: Moves the selection edge inwards (choke) or outwards (spread).
The workspace also provides specialized brushes like the "Refine Edge Brush Tool" which is excellent for hair and other fine details. You can use "Object Aware" or "Color Aware" modes within the Refine Edge Brush Tool, often yielding superior results depending on the image. The "Select Subject" and "Refine Hair" buttons within this workspace offer quick, AI-driven selections for primary subjects and intricate hair details.
Additional Selection Modification Techniques
- Maximum and Minimum Filters: These filters can expand or contract a selection by a decimal number. To use them, first make a selection, then enter Quick Mask mode (
Q). Then, chooseFilter > Other > Minimumto contract orFilter > Other > Maximumto expand the selection. The "Preserve Roundness" and "Preserve Squareness" options can help maintain the integrity of shapes during these operations. - Temporary Adjustments: Sometimes, increasing the contrast between the subject and the background temporarily can make selection easier. Add an adjustment layer (like Curves or Levels) and boost the contrast significantly before making your selection.
The Quick Selection tool, along with its complementary features like Refine Edge and the Select and Mask workspace, opens up a world of creative possibilities for image-makers of all kinds, enabling efficient and precise manipulation of image elements.