Your Facebook cover photo is the first visual impression many people have of your profile or page. It's prime real estate on your social media presence, offering a unique opportunity to tell a story, showcase your personality, or highlight your brand. For those looking to maximize this space, a photo collage can be an incredibly effective tool. This tutorial will guide you through the process of creating a compelling Facebook cover photo collage, from understanding the dimensions to selecting and arranging your images, and finally, saving your masterpiece.
Understanding Facebook Cover Photo Dimensions and Purpose
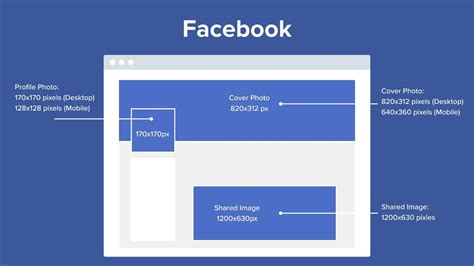
Before diving into the creative process, it's essential to understand the technical specifications and strategic purpose of a Facebook cover photo. The current dimensions for a Facebook cover photo are 851px x 315px. This landscape-oriented rectangle is crucial for ensuring your collage displays correctly across various devices, from desktop computers to mobile phones. On mobile devices, the standard size is 640 x 360 pixels, which means the sides of your wider desktop image might be cropped. Therefore, it's wise to keep any critical information or focal points towards the center of your design to ensure they are visible on all screen sizes.
The purpose of your cover photo extends beyond mere aesthetics. For individuals, it's a chance to express hobbies, passions, or share cherished memories with friends and family. For businesses and brands, it's a powerful marketing tool. Photo collages help brands tell a visual story quickly, capture attention in busy newsfeeds, and communicate more information in a single glance compared to individual images. They can be used to highlight different aspects of your business, showcase products, share behind-the-scenes moments, display customer testimonials, or even feature mouthwatering food photography. Using your cover photo collage effectively can drive interest and engagement with your profile or page.
Choosing Your Platform: Free and User-Friendly Tools
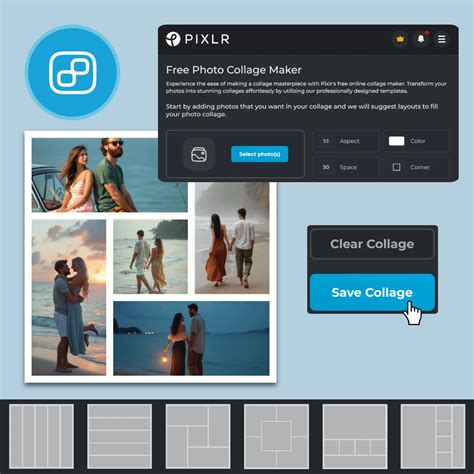
Fortunately, creating a professional-looking collage doesn't require advanced design skills or expensive software. Several free and easy-to-use online tools are available. Adobe Express is a prime example, offering a free plan that includes thousands of templates, photo editing capabilities, effects, animation, and 2GB of storage. It's designed for all skill levels, making it accessible whether you're a seasoned designer or just starting. Another excellent option is Promo.com's Free Online Collage Maker, which allows you to communicate your brand story efficiently. Canva is also a popular choice, known for its seamless user experience and a vast library of over 1 million premium images, graphics, and illustrations, many of which are free. BeFunky also offers a free collage maker with a library of professional layouts.
These platforms provide a significant advantage by offering customizable templates and intuitive design tools. You can start fast with pro templates that are ready-to-use, or if you prefer a more hands-on approach, you can "DIY" and start from scratch with a blank canvas. The availability of these tools democratizes design, allowing anyone to create impactful visuals.
Step-by-Step Guide to Creating Your Collage
The process of creating a Facebook cover photo collage is generally straightforward, regardless of the platform you choose. While specific button placements might vary, the core steps remain consistent.
1. Select a Template or Start from Scratch
Most collage makers offer a wide array of pre-designed templates. These templates often come with pre-defined grids or layouts that make it easy to drag and drop your photos into place, rather than having to manually lay out each photo and frame. Have a look at the cells within a template and select as many as you like that best suit the number of photos you intend to use. For a Facebook cover photo, it's often suggested to pick a template with simpler grids without too many boxes, especially when you're starting. This allows you to focus on the quality of your chosen images and how they fit together.
Alternatively, you can opt to start from scratch with a blank canvas. This gives you complete freedom in terms of layout, but it requires more planning and effort.
2. Add Your Photos
Once you have your template or canvas, it's time to add your images. You can upload your own personal snapshots or product images. If you don't have the perfect photos, most platforms offer access to massive libraries of stock photos and videos. You can search for topics that align with your brand, audience, and goals. For example, a hobby photographer like Danika Dickson, who primarily uses natural light and captures the "little things that mean so much," might upload personal snapshots of her family, everyday life, or nature.
3. Arrange and Customize Your Images
This is where your creativity truly shines. After uploading your photos, drag and drop them into the cells of your chosen layout. Once your images are inside the template, you can edit each one by clicking on the photo. You have options to zoom, rotate, and flip to get the perfect design. You can also adjust the size and position of each image to ensure a harmonious composition.
Many platforms allow you to create space between images by adding an optional border. You can also adjust the spacing and even the corner rounding of these cells in the "Customize" tab. Experiment with different layouts and cell sizing to achieve the look you desire. Think about the story you want to tell and choose the photo grid that will help your audience visualize your brand story or personal narrative.
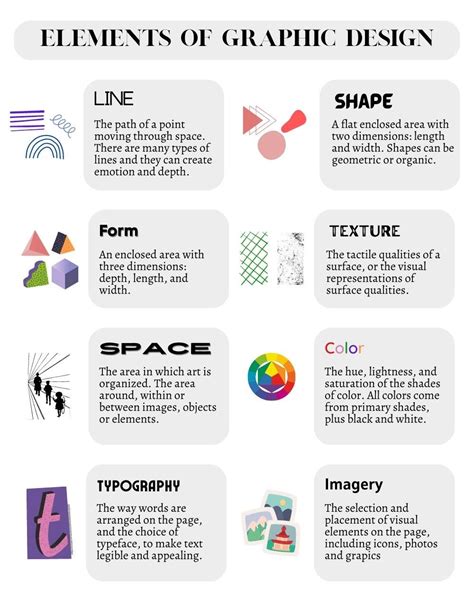
4. Enhance Your Collage with Graphics and Text
To make your design pop, consider adding decorative elements. Most collage makers provide access to a vast library of graphics, icons, and illustrations. Use search functions to find elements that complement your theme. Drag, resize, and position these graphics for a playful or professional touch.
If you need to add a title, business name, or a call-to-action, open the "Text" tab. You can then use the text properties toolbar to style your typography, choosing fonts, colors, and sizes that align with your overall aesthetic.
5. Apply Photo Effects and Adjustments
To further refine your collage, explore photo effects. You can experiment with effects like "Chromatic" or "Vintage" to match your desired aesthetic. These tools allow you to fine-tune the mood and visual appeal of your images, ensuring they work cohesively within the collage. You can also adjust brightness, contrast, saturation, and other parameters to achieve a consistent look across all your photos.
6. Save Your Masterpiece
Once you're happy with your design, it's time to save your work. Look for a "Save" button, typically located at the top of the screen. Some platforms, like PicMonkey, offer cloud storage (called "Hub") where your work will autosave, allowing you to make tweaks later if needed.
When saving, pay attention to the file format and resolution. For Facebook cover photos, a JPG or PNG format is generally recommended. Ensure the resolution is appropriate for web use to maintain image quality without creating an excessively large file size. If you're unsure about the ideal dimensions or how your image will appear, you can always use a free image resizer tool to make sure you get the ideal look for your profile photo.
How To Design A Facebook Cover Photo In Canva (Easiest Way) (2026 Guide)
Advanced Tips for a Stunning Collage
- Tell a Story: Don't just randomly place photos. Think about a narrative. For example, if you're a baker, arrange photos to show the ingredients, the baking process, and the final delicious product.
- Maintain Visual Consistency: While variety is good, ensure your photos have a somewhat consistent color palette or style. This could involve using similar filters or ensuring all photos are taken in natural light, as Danika Dickson prefers.
- Consider Negative Space: Don't feel the need to fill every single pixel. Strategic use of negative space can make your collage more visually appealing and less cluttered.
- Mobile Optimization: Remember that your cover photo will be viewed on mobile devices, which often crop the sides. Keep important elements centered.
- Experiment and Iterate: Absolutely. Enjoy experimenting with different templates and color schemes, making multiple versions until you achieve the perfect design. Don't be afraid to try different arrangements and effects.
By following these steps and tips, you can create a dynamic and engaging Facebook cover photo collage that effectively communicates your message, whether it's a personal statement or a brand's story. Have fun â go forth and be creative!