The quest for a timeless photographic aesthetic has led many digital artists back to the warm embrace of analog film. In an era increasingly dominated by the sterile perfection of digital, the nuanced character, subtle imperfections, and rich tones of film photography hold a unique and enduring appeal. Lightroom film presets have emerged as a pivotal tool in this pursuit, offering a bridge between the convenience of digital capture and the coveted look of classic film stocks. This article delves into the world of filmic Lightroom presets, exploring their purpose, application, and the underlying principles that make them so effective in shaping our visual narratives.
The Allure of Analog: Why Film Presets Resonate
For decades, film was the undisputed medium of photography. Each film stock, from the renowned Kodak Portra with its flattering skin tones to the vibrant landscapes captured by Fujifilm Velvia, possessed a distinct character. The advent of digital photography brought unparalleled flexibility and efficiency, yet for many, something was lost in translation. The crisp, often clinical, output of early digital cameras lacked the organic warmth and emotional depth that film naturally conveyed. This longing for nostalgia, for a tangible, almost soulful quality, is precisely what filmic Lightroom presets aim to recapture.
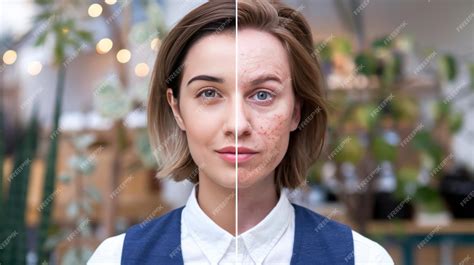
The appeal of film often lies in its perceived authenticity, its "human" touch. The subtle grain, occasional light leaks, and gentle color shifts, rather than being seen as flaws, contribute to a feeling of organic reality. In a digital landscape saturated with hyper-realistic imagery, the filmic aesthetic stands out as something more grounded, more relatable, and evocative of cherished memories, even for those who never experienced shooting with film.
Demystifying Lightroom Presets: More Than Just a Click
At its core, a Lightroom preset is a saved collection of editing settings. These settings, meticulously adjusted in Lightroom's Develop module, can encompass a wide array of parameters, including exposure, contrast, highlights, shadows, white balance, color grading, clarity, vignette, and grain. With a single click, these saved adjustments can be applied to another photograph, instantly transforming its appearance and imbuing it with a specific stylistic character.
Lightroom presets are invaluable for streamlining workflows, especially when dealing with large batches of images. Once a desired look is achieved on one photograph, saving those settings as a preset allows for rapid application to an entire shoot, ensuring visual consistency across a gallery. This is particularly beneficial for professional photographers aiming to establish a cohesive brand identity.
However, it is crucial to understand that presets are not a universal panacea. A preset designed for a brightly lit outdoor scene may not yield desirable results on an image shot in low-light indoor conditions. Presets apply a static set of adjustments, and their effectiveness is contingent upon the original image's capture settings and lighting. Therefore, they should be viewed as a powerful starting point, a means to quickly guide an image towards a desired aesthetic, rather than an infallible, one-size-fits-all solution.
Beyond Presets: Understanding Profiles and Their Role
While presets offer a comprehensive suite of adjustments, Lightroom also features "profiles." Profiles function at a more foundational level, influencing how Lightroom interprets the raw data from your camera. They act as a base layer for your edits, affecting color and tone before you even begin manipulating individual sliders. Think of a profile as defining the fundamental color science and tonal rendering of an image, while a preset builds upon that foundation with specific slider adjustments.
Some presets are built upon custom profiles that are created externally from Lightroom. These custom profiles can shift the way Lightroom renders colors and tones, providing a unique starting point for the preset's adjustments. If you appreciate the color and tonal characteristics of a preset but wish to retain greater control over other aspects like exposure or grain, you can often apply its associated profile manually from the Profiles panel. This offers a flexible approach, allowing you to leverage the foundational look of a preset without committing to all of its bundled adjustments.
The "Filmic" Approach: Grounding Your Edits in Analog Reality
The term "filmic" when applied to Lightroom presets signifies a deliberate attempt to emulate the aesthetic qualities of traditional analog film stocks. This goes beyond merely applying a color tint; it involves understanding and replicating the inherent characteristics of film, such as its unique tonal rolloff, shadow detail, color rendition, and grain structure.
Why In-Camera Profiles Can Fall Short
Many photographers initially experiment with in-camera profiles, but often find themselves dissatisfied with the results, returning to edits that now seem "gross." This dissatisfaction stems from a lack of a consistent baseline. Without a grounding point, edits can easily become overdone, losing the subtle nuances that define a pleasing aesthetic. Filmic presets provide this essential baseline, guiding adjustments to stay within the realm of analog fidelity.
The Principle of Grounding
A core tenet of the filmic editing process is "grounding." This means establishing a starting point that is as close as possible to real analog film. By applying a filmic preset that emulates a specific film stock (e.g., Portra 400-like, Ektar 100-like, or Delta 3200-like), photographers gain perspective. Even after applying a preset, quick exposure adjustments are made to balance the session, ensuring a cohesive feel across all images. This grounding prevents over-editing and helps avoid the "overcooked" look that can plague digital images.
The beauty of grounding lies in its ability to foster flexibility. By starting with a reliable analog foundation, photographers can then choose to expand their edits with modifications, other filters, or even venture into more complex tools like Photoshop for chemical-based effects. The grounding ensures that even when deviating from a pure film look, the edit remains intentional and controlled.
The "Why" Behind the Film Look
The persistent appeal of film isn't merely a trend; it's rooted in our innate connection to analog qualities. In an increasingly digital and sometimes artificial world, the tangible, imperfect character of film offers a sense of reality and emotional resonance. It taps into a collective nostalgia, creating images that feel familiar and cared for.
Crafting the Filmic Aesthetic: A Workflow Approach
Achieving a convincing filmic look involves more than just applying a preset. It's a deliberate workflow that prioritizes intentionality and understanding.
1. Building a Custom Foundation (Profile Creation)
The process often begins before Lightroom, potentially in Photoshop's Adobe Camera Raw. This stage involves creating a custom profile that softens sharpness and reduces the inherent contrast of digital files. This "opens up" the image, allowing highlights to fall off more gently and whites to retain texture. A lookup table (LUT) can then be applied to shift the color into a more film-like space. This restrained, foundational profile is then exported to Lightroom.
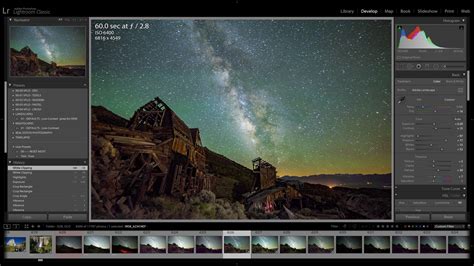
2. Shaping Tone with Presets
In Lightroom, the custom profile serves as the base for applying a carefully crafted preset. This preset focuses on shaping the tonal structure, adjusting the density of primary colors, adding midtone structure, and introducing microcontrast judiciously. Global contrast, clarity, and texture sliders are often avoided, as they rarely emulate film realistically. Instead, gentle curves and local adjustments are employed to create an image that feels present but not overpowering.
3. Controlling Highlight Rolloff
Digital highlights tend to clip harshly, unlike the smooth rolloff of film. Monitoring the histogram and using the tone curve to compress the upper end, while exposing conservatively, helps maintain detail in the highlights. The goal is to allow light to feel natural rather than clinical.
4. Mindful Shadow Adjustments
Shadows in film are not simply dark areas; they contain valuable information. Lifting shadows slightly in the curve and sometimes raising the black point can introduce a desirable softness, reminiscent of scanned negatives. Deepening blacks to pure zero is often avoided, as a touch of "air" in the shadows can enhance the image's presence.
5. Subtle Color Balancing with Camera Calibration
The Camera Calibration panel in Lightroom offers a more nuanced way to shift colors than the HSL panel. Subtle adjustments to primary color channelsâpushing blues towards aqua, greens towards yellow, and fine-tuning reds based on lightingâcan replicate the characteristic shifts seen across different film stocks. This also aids in creating a consistent base for images shot under varying light conditions.
6. Introducing Global Warmth
Many Kodak film stocks possess a perceptible warmth in their whites and midtones. This can be replicated using Lightroom's global color grading wheel, applying a touch of warm yellow at low saturation. While not overtly noticeable, its absence can make an image feel colder and flatter.
7. Handling Skin Tones with Restraint
Digital files can sometimes exaggerate skin tones, particularly under mixed lighting. Adjusting skin tones through color grading and targeted radial masks to control warmth and reduce magenta is key. Saturation sliders are used sparingly; the aim is for skin to feel natural and "lived-in," not artificially glowing.
8. Adding Authentic Texture with Real Grain
Film grain is an intrinsic part of its structure, not merely a surface effect. Lightroom's built-in grain can appear artificial, especially at high resolutions. A more authentic approach involves using Photoshop actions to introduce grain in varying densities across shadows, midtones, and highlights, then merging it into the image. This creates grain that feels integrated rather than layered on top.
9. Saving as a Combined Workflow
Once a custom profile and preset are refined, they can be saved as a combined preset. This allows for a single-click application at the start of each edit, reducing decision fatigue and ensuring consistency across an entire project. Subsequent adjustments then focus on exposure, temperature, and minor contrast tweaks.
10. Re-evaluating with Distance
It is often beneficial to step away from an edit and revisit it later with fresh eyes. This distance helps to maintain objectivity and prevent over-editing, ensuring the final image aligns with the intended aesthetic.
The Evolution of Editing: From Presets to AI
While filmic Lightroom presets have been instrumental in achieving consistent analog looks, they possess inherent limitations due to their static nature. This is where the emergence of AI-powered editing solutions like Imagen signals a significant advancement.
Imagen, for instance, moves beyond pre-made presets by learning a photographer's unique editing style through their existing work. By analyzing thousands of edited photos, the AI creates a "Personal AI Profile" that can then be applied to new images with remarkable speed and consistency. This adaptive approach ensures that edits are tailored to each specific photograph, rather than applying a blanket effect.
For photographers who may not have a large catalog of edited images, "Talent AI Profiles" offer another avenue. These are AI profiles created by leading photographers, allowing users to achieve professional results quickly. The key difference lies in adaptability: traditional presets are blunt instruments, while AI profiles are intelligent, adaptable tools.
AI and the Filmic Aesthetic
To achieve a film look with tools like Imagen:
- Curate Your Best Work: Select a substantial portfolio of consistently edited photos that represent your desired film aesthetic.
- Ensure Consistency: The selected photos should share a cohesive look and feel.
- Let the AI Work: Upload your curated images to train the AI.
- Apply and Refine: Use the trained AI profile on new shoots, and continue to upload refined edits to further fine-tune the profile.
Alternatively, starting with a "Talent AI Profile" and using it as a base for further personalization is also a powerful strategy.
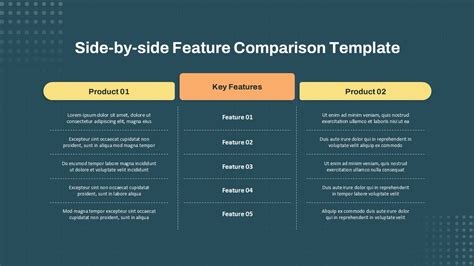
Presets vs. AI: A Business and Creative Decision
Incorporating film presets or AI editing tools into a workflow is not merely an artistic choice; it's a strategic business decision. A consistent visual style is paramount to brand identity. When clients view a portfolio, they should see a cohesive body of work that reflects a clear artistic vision. AI editing excels in maintaining this consistency across an entire gallery, strengthening brand identity and building client trust.
Furthermore, in today's fast-paced market, quick turnaround times are essential. The efficiency gained from AI editing can significantly reduce delivery times, leading to happier clients and freeing up photographers to focus on other critical aspects of their business, such as marketing, client communication, and, most importantly, capturing more images.
Tools like Imagen enhance creativity by automating tedious, repetitive tasks, allowing photographers to dedicate more energy to conceptualization and artistic expression. They don't replace creativity; they amplify it, enabling the creation of more emotionally resonant and impactful images.
Frequently Asked Questions About Presets and AI Editing
1. Do Lightroom presets alter original RAW files?No, Lightroom employs non-destructive editing. All adjustments are saved as instructions within the Lightroom catalog, leaving your original RAW files untouched.
2. Are free presets as good as paid presets?While some free presets can be decent, paid presets generally offer higher quality, more thoughtful design, and better consistency.
3. Do presets work equally well across different camera brands?Ideally, no. Different camera sensors render color and tone distinctively. A preset designed for a Canon might not look identical on a Sony or Nikon. Custom profiles can help mitigate these differences.
4. How does Lightroom's sync feature compare to AI editing like Imagen?Lightroom's sync applies identical settings to all selected photos. Imagen, conversely, analyzes each photo individually and applies custom settings based on your AI Profile and the photo's specific characteristics.
5. What is the recommended number of photos for training an AI profile?Imagen recommends a minimum of 3,000 photos, but more is generally better. The key is that these photos should be consistently edited in the desired style.
6. Can AI tools edit JPEGs?Yes, but you will likely need to create a separate AI profile using your edited JPEGs.
7. What is the cost of AI editing services like Imagen?Imagen typically uses a pay-per-edit model, making it competitive, especially considering the time saved.
8. Is there a risk of AI editing making photos look generic?With tools like Imagen, the opposite is true. Because your Personal AI Profile is based on your unique editing, the results reflect your style, not a generic filter.
9. Can AI tools handle foundational edits?Absolutely. AI is designed to manage the time-consuming foundational edits, freeing you up for more creative tasks.
10. Can AI profiles be refined over time?Yes, by consistently uploading your final, tweaked edits, you can fine-tune your Personal AI Profile.
11. How well do AI tools integrate with existing workflows?Tools like Imagen are designed for deep integration with Lightroom Classic, fitting seamlessly into established professional workflows.
12. Is data security a concern with AI editing services?Reputable services like Imagen take data security seriously. Your original photos are typically not stored long-term on their servers.
13. What if I don't have enough photos to train an AI profile?A "Lite Profile" option can be a quicker way to start, often created using a preset and answering style-related questions.
The pursuit of the filmic aesthetic in digital photography is a testament to the enduring power of analog's character. Filmic Lightroom presets have been an invaluable tool in this journey, offering a tangible connection to the warmth and soul of film. As technology advances, AI-powered solutions are pushing the boundaries further, offering unprecedented levels of consistency, speed, and personalization. By embracing these evolving tools, photographers can refine their craft, enhance their creative process, and continue to produce images that resonate deeply with emotion and timeless beauty.