Are the built-in fonts in Photoshop a little boring for your taste? Maybe you've been using the same ones for years and feel like you want to use something else. Fortunately, the process of installing new fonts is straightforward once you've downloaded them, opening up a world of creative possibilities for your designs. This guide will walk you through various methods for adding fonts to Photoshop, ensuring you can always find the perfect typeface for your project.
Understanding Font Licensing: A Crucial First Step
Before diving into the installation process, it's essential to be aware of font licensing. Since every font is regarded as its own piece of software, it's bound by licensing agreements when you install it onto your computer. Each font comes with some type of license, which you can check on the End-User License Agreement that comes with any font you download. A desktop license will allow you to install a font onto your computer and use it in any application, which makes it fine to use for personal projects. However, problems may arise when you want to add a font to Photoshop for use in commercial work.
Even if a font is advertised as a free download, it may still have restrictions regarding commercial use. In the same respect, it’s possible that someone may upload a font and describe it as ‘free’ without the original designer’s permission. When working for clients, it's imperative that you check the font license and purchase any licenses if needed - your client is unlikely to be happy if they receive a strongly worded letter from the owner of the font.
Navigating Adobe Fonts: Seamless Integration and Licensing Peace of Mind
Adobe Fonts offers a convenient solution to licensing concerns. It is part of the Creative Cloud subscription, providing a vast library of typefaces all cleared for personal and commercial use, with seamless integration with Creative Cloud. If you are online and logged into Creative Cloud, you can access Adobe Fonts from inside the app or online.
To add fonts using Adobe Fonts:
- Open Adobe Creative Cloud: Launch the Creative Cloud desktop application.
- Access Fonts: Click on the font icon located at the top right of the window and select "Manage Fonts." You may need to log in to your Adobe account if you aren't already.
- Browse and Search: Within your browser, you can search for fonts based on various criteria. Explore classifications like "Sans Serif" for body copy, or use the "Properties" search options to find specific styles, such as bold fonts.
- Preview Fonts: Most font libraries offer preview options. You can change the sample text to get a better feel for how the typeface looks before installing it, and you can also adjust the text size in this preview.
- Activate Fonts: Once you've found a font you like, simply click "Activate Font." It's that easy!
The fonts you activate through Adobe Fonts will appear in the font menus of all your desktop applications, including Photoshop, Illustrator, InDesign, Microsoft Office, and iWork. Fonts are added on your computer through the Creative Cloud desktop app. Start by browsing the library of fonts and add tags or filters to refine your list. When you find a font you like, click to view its family page. Once the fonts are added, they will appear in the font menu of each application, alongside all of your locally installed fonts. You can add as many fonts as you'd like, but it's recommended to keep your added fonts list relatively short to optimize performance. Please note that Adobe Fonts that have not been used in several months may need to be reinstalled for use in non-Adobe apps. You can quickly reinstall fonts from the Creative Cloud desktop by clicking the "Install" button next to the font name in your "Added Fonts" list.
How to Use Adobe Fonts in Photoshop & Illustrator
Installing Fonts Downloaded from Online Libraries
Beyond Adobe Fonts, numerous online font libraries offer a wide selection of free and paid fonts. When you download fonts from these sources, they often come in compressed formats like .ZIP, .7zip, or .rar files.
Downloading and Extracting Font Files
- Source Your Font: Browse your chosen online library to find a font that suits your project. Many established sites offer filtering options to narrow your search by parameters like font type. When you find a font you like, click the "download" button.
- Locate the File: The next step is to locate the font file in your computer's Downloads folder.
- Extract Compressed Files: If the folder is zipped, double-click on it to access the contents. If you downloaded multiple fonts, they will each typically have their own separate folder. If the files are in a .7zip or .rar format, you can easily extract them using compatible software like 7-Zip or WinRAR. Right-click on the file and select the appropriate extraction option.
Installing Fonts on Windows
For Windows users, there are a couple of primary methods to install downloaded fonts:
Method 1: Direct Installation
- After extracting the font files, locate the actual font file, which usually has a .ttf (TrueType Font) or .otf (OpenType Font) extension.
- Right-click on the font file.
- Select "Install" from the context menu. This will make your font available across all applications on your computer, not just Photoshop.
- You should see visual confirmation that Windows is installing your font.
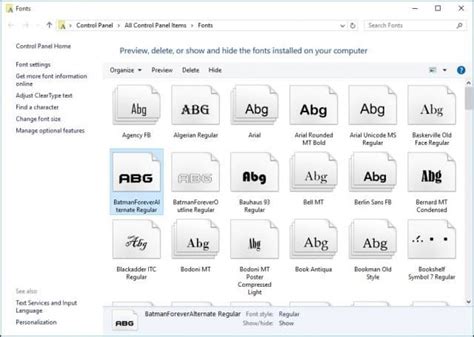
Method 2: Using the Control Panel
- If the direct "Install" option isn't readily available, you can use the Control Panel.
- Search for "Control Panel" in the Windows search bar and open it.
- Navigate to "Appearance and Personalization."
- Click on "Fonts."
- Drag and drop the extracted font files directly into the Fonts folder within the Control Panel.
Once the font is installed, open Photoshop. You should find your desired font in the Character tab or the font dropdown menu within the Type tool options.
Installing Fonts on macOS
Mac users have a slightly different, but equally simple, process for installing fonts:
- Download and Extract: Download your font from a source on the internet and extract the files if they are compressed (double-clicking a .ZIP file usually does the trick).
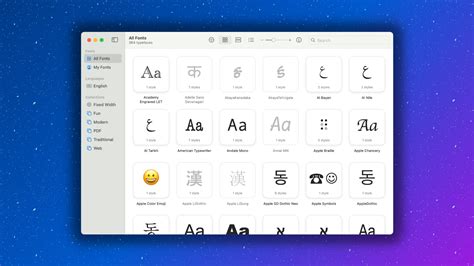
- Open Font Book: Locate the actual font file (.ttf or .otf). Double-click on the font file. This will automatically open it in your Mac's Font Book application.
- Install Font: In the Font Book window, you will see a preview of the font. Click the "Install Font" button, typically located in the lower-left corner of the window.
Your new .ttf or .otf font should now be installed and available in Photoshop. Similar to Windows, most applications on your Mac will recognize and be able to use the newly installed font.
Installing Fonts on iPad
Adding fonts to Photoshop on an iPad requires an extra step as they need to be installed via an iOS configuration profile.
- Using the Creative Cloud App: If you've created a document using fonts added from Adobe Fonts on your computer or laptop, you might find that these fonts aren't available by default when you open the document on your iPad. In this scenario, you'll likely encounter a message like "Replace Missing Fonts" or "Transform With Missing Fonts." To resolve this, ensure you have the latest iPadOS version installed. Then, download the Adobe Creative Cloud app from the App Store. Open the app, sign in to your Adobe account, and tap "Fonts" at the bottom of the screen. This will allow you to access and sync your activated Adobe Fonts.
- Third-Party Apps: For fonts downloaded from external libraries, you may need to use third-party apps from the App Store that allow you to download fonts and package them into a configuration profile that can then be installed on your iPad.
Font File Types: TTF vs. OTF
When you download fonts, you'll most commonly encounter two file types: TTF (TrueType Font) and OTF (OpenType Font).
- TTF (TrueType Font): This is an older format that uses glyph tables to define the appearance of its characters. It's a widely compatible format.
- OTF (OpenType Font): This format is more modern and uses glyphs alongside Compact Font Format tables. OTF fonts have the potential for smaller file sizes and often include more advanced typographic features, such as ligatures and stylistic alternates. Although OTF fonts are becoming more popular, TTF still remains a viable alternative, and it's generally easier to create than OTF.
Both TTF and OTF fonts are generally compatible with Photoshop and most operating systems. It's best to look for these extensions to ensure compatibility.
Considerations for Creative Projects
Rasterizing Text for Artistic Effects
Once you've added your font and used the Type tool to add text to your project, you might want to apply artistic effects. To do this, you may need to rasterize your text first. Rasterizing converts the text into a bitmap pixel-based image, allowing you to apply filters and effects that are not possible on live text layers. To rasterize, right-click on the text layer in the Layers panel and select "Rasterize Type." Be aware that once rasterized, the text is no longer editable as text; you'll be working with pixels.
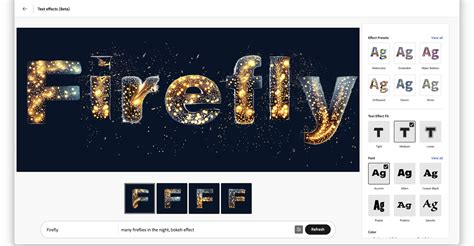
AI-Generated Text Effects
While you cannot generate fonts directly with Adobe's Firefly AI model, you can generate text effects that can mimic custom fonts. The Firefly Text Effects tool, available with an Adobe Express Premium Plan, allows you to enter text and use prompts to describe the desired look. You can also upload reference images for style inspiration. You can adjust settings to control the strength and visual intensity of the effect. Once generated, you can download the stylized text as a PNG file and drag it into Photoshop as a layer. It's important to remember that this is not a font; it's an image of stylized text.
Conclusion: Embracing Typographic Diversity
Learning how to add fonts to Photoshop is a necessity for designers, allowing you to search beyond the confines of built-in Adobe Fonts. Whether you're incorporating your own custom font designs or working with specific brand fonts for a client, knowing how to insert them quickly is crucial for bringing your creative vision to life. Thankfully, it's typically a painless process, allowing you to add your custom font choice in a matter of minutes. Whether you choose the convenience of installation via Adobe Fonts and Creative Cloud or prefer another method, it's a great idea to know more than one way to accomplish this. This ensures you always have the typographic tools at your disposal to elevate your designs.