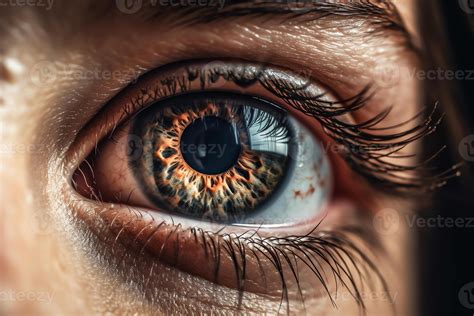
Red-eye is a persistent photographic phenomenon that can detract from otherwise perfect shots, turning captivating portraits into images marred by an unnatural, glowing crimson in the pupils. This issue arises when a camera's flash, positioned close to the lens, reflects directly off the blood-rich retina at the back of the eye. While modern cameras and smartphones have advanced significantly, this optical quirk can still occur, particularly in low-light conditions or when using a direct flash. Fortunately, fixing red-eye is no longer a complex or time-consuming process, thanks to evolving software solutions. This tutorial will guide you through various methods for eliminating red-eye, from built-in phone features to sophisticated third-party applications, ensuring your photographs always capture the true essence of your subjects.
Understanding the Red-Eye Phenomenon
The culprit behind the red-eye effect is quite straightforward. When a camera's flash fires, its light travels through the eye's pupil. If the flash is close to the lens, the light is reflected directly back from the retina, which is densely packed with blood vessels. This reflection is captured by the camera sensor, resulting in the characteristic red glow. This is more common in dimmer environments where the pupil is dilated, allowing more light to enter the eye and thus increasing the chance of reflection.
Factors Contributing to Red-Eye
- Flash Proximity to Lens: The closer the flash is to the lens, the more direct the reflection path.
- Pupil Dilation: In low light, pupils widen to absorb more light. This larger opening presents a greater surface area for the flash to reflect off.
- Eye Pigmentation: Lighter-colored eyes tend to show red-eye more prominently due to less pigment to absorb the light.
- Subject's Gaze: If the subject is looking directly at the camera, the flash is more likely to hit the retina at an angle that causes reflection.
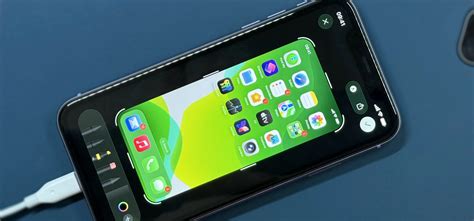
Built-in Solutions: Fixing Red-Eye on Your iPhone
Many smartphone cameras, including iPhones, come equipped with basic red-eye correction tools integrated into their native photo applications. While these solutions are often effective for straightforward cases, they may struggle with more complex scenarios.
Using the iPhone Photos App
The iPhone's own photo software offers a surprisingly capable, albeit manual, way to remove red-eye. This feature allows you to directly edit your photos within the Photos app, making it a convenient first step for many users.
How to Manually Remove Red-Eye on iPhone:
- Open the Photos App: Navigate to your photo library and select the image that has the red-eye effect.
- Enter Edit Mode: Tap the "Edit" button, usually found in the top-right corner of the screen.
- Locate the Red-Eye Tool: Look for an icon that resembles an eye with a slash through it. This is typically found in the editing toolbar at the bottom of the screen.
- Tap the Red-Eye Icon: Ensure the red-eye tool is selected.
- Tap on the Red Eye: Simply tap directly on each red pupil in the photo. The app will attempt to automatically detect and correct the redness.
- Adjust if Necessary: If the automatic correction isn't perfect, you can zoom in on the eye and tap again. For some very specific cases, this built-in feature might be a bit powerless to fix some red-eye photos with blurry faces or very subtle red hues.
- Save Changes: Once you are satisfied with the results, tap "Done" to save your edits.
While this method is quick and requires no additional downloads, it's important to note that its effectiveness can be limited. For particularly stubborn red-eye or when dealing with subjects whose faces are slightly out of focus, the results may not always be satisfactory.
Advanced Solutions: Third-Party Red-Eye Removal Apps
When the built-in tools fall short, third-party applications offer more sophisticated and often AI-powered solutions for red-eye removal. These apps not only fix the red-eye effect but also provide a broader range of editing capabilities, making them a comprehensive tool for photo enhancement.
Fotor: A Powerful and User-Friendly Option
Fotor is a popular online photo editor and design platform that includes a dedicated red-eye removal tool. It's designed to be intuitive, allowing users to achieve professional-looking results with minimal effort. This tool is particularly useful for portrait retouching, ensuring that eyes look natural and captivating.
How to Use Fotor's Red-Eye Remover:
- Access Fotor's Red-Eye Remover: Go to the Fotor website or open the Fotor app and navigate to their "Red Eye Remover" tool.
- Upload Your Photo: Click the "Remove Red Eyes Now" button and upload the photo you wish to edit.
- Automatic Detection (Optional): Fotor’s AI can often automatically detect and correct red pupils caused by flash photography. You might find that the tool makes swift identifications and rectifications.
- Manual Adjustment: If automatic detection isn't perfect or you prefer more control, you can manually adjust the brush size to precisely fit the red area of the eye.
- Apply the Tool: Place the brush over the red eye and click. Fotor will then process the correction, often in just a few seconds.
- Refine and Enhance: You can zoom in to ensure accuracy and make further adjustments if needed. Fotor's tool aims to restore the natural color and shine of the iris and pupil, going beyond simple color replacement.
- Download Your Edited Photo: Once you're happy with the results, download your work in your desired format and quality.
Fotor's strength lies in its ease of use combined with effective results. It's a great option for individuals looking to quickly fix red-eye without delving into complex editing software. The tool is also adept at handling pet photos, where red-eye can be a common issue due to flash photography.

Evoto AI: Intelligent Red-Eye Correction
Evoto AI is another powerful tool that leverages artificial intelligence for advanced photo editing, including a highly effective red-eye remover. This AI-powered solution goes beyond basic correction, aiming to restore the original eye details with remarkable accuracy.
Key Features of Evoto AI's Red-Eye Remover:
- AI-Powered Automatic Detection & Correction: Evoto's intelligent tool automatically detects and corrects red pupils caused by flash photography or lighting issues. No manual adjustments are needed-the AI swiftly identifies and rectifies red eyes, delivering high-quality results in seconds.
- One-Click Precision: With Evoto AI, red-eye removal is effortless. Simply click once to transform your images instantly, eliminating red glow whether editing individually or in batches, ensuring impeccable portraits faster than ever.
- Advanced Red Eye Removal: Evoto’s AI goes beyond basic red-eye correction. It meticulously analyzes each eye to intelligently remove the red glow and reconstructs the natural, intricate eye details-like the original color, texture, and shine of the iris and pupil-that were covered. This delivers authentic, clear, and true-to-life eyes.
- Seamless Integration: Evoto offers a comprehensive suite of eye retouching tools that go beyond red-eye removal, allowing for further enhancements to achieve professional-quality portraits.
To use Evoto's tool, you would typically click "Fix Red Eyes Now," upload your photo, and let the AI work its magic. The software is designed for efficiency and accuracy, making it suitable for both casual users and professional photographers.
How to Remove RED eye from Photo 2026 | Online for FREE | ONE CLICK Solutuin
Retouch4Me Eye Bundle: Professional-Grade Results
For those seeking professional-grade results and advanced control, the Retouch4Me Eye Bundle offers a suite of AI-powered tools, including specific features for red-eye correction. This bundle is designed to automate complex eye retouching tasks, saving significant time for photographers.
Components of the Retouch4Me Eye Bundle:
- Eye Brilliance: This tool automatically detects eyes and enhances them using subtle dodge and burn techniques, adding clarity, depth, and focus to the iris.
- Eye Vessels: This component specifically detects the whites of the eyes and gently retouches them for a cleaner appearance.
- Eyes Masking: Ideal for portraits and group photos, this tool helps maintain a consistent and natural look across all subjects, streamlining high-volume workflows.
The entire Retouch4Me Eye Bundle is designed to offer a one-click solution for common eye retouching issues, including red-eye. It is available as a plugin for popular editing software, allowing for seamless integration into existing workflows. The promise is to remove red eyes in seconds and achieve a natural look, whether you're editing selfies, studio portraits, or event shots.
Photoshop Techniques for Red-Eye Correction
For users who prefer or already utilize Adobe Photoshop for their image editing, there are several effective techniques to combat red-eye. These methods offer a higher degree of control and can yield excellent results, especially for complex images.
The RGB Channel Method
This technique leverages the way colors are represented in digital images. The red-eye effect is predominantly caused by the red channel.
Steps for RGB Channel Correction:
- Open Your Image in Photoshop: Load the photo with red-eye into your Photoshop workspace.
- Access RGB Channels: In the "Channels" panel (Window > Channels), you will notice separate channels for Red, Green, and Blue. Observe how the red-eye area appears intensely in the Red channel but is less pronounced or healthy in the Green and Blue channels.
- Select the Best Channel: Identify either the Green or Blue channel where the eye's details (iris and pupil) appear clearest and least affected by the red glow.
- Make a Selection: Using the "Elliptical Marquee Tool," carefully select the dark part of the eye, which includes the pupil and iris. You can extend the selection slightly to include some of the white of the eye, but be cautious not to select any surrounding skin.
- Copy to Clipboard: With the selection active, copy the selected area to your clipboard (Edit > Copy).
- Navigate to the Red Channel: Go back to the "Channels" panel and select the Red channel.
- Paste the Selection: Paste the copied content into the Red channel (Edit > Paste). This will replace the red information in the affected area with the healthier data from the Green or Blue channel.
- Check for Color Casts: After pasting, you might notice a slight color cast (often green or blue) in the corrected area. This is usually manageable and can be fine-tuned with further adjustments like color balance or hue/saturation.
- Refine and Save: Review the corrected eye. You may need to make minor adjustments to blend the pasted area seamlessly. Save your image.
This RGB channel method is considered one of the fastest and most effective ways to correct red-eye in Photoshop, especially when dealing with a significant number of affected images.
Photoshop Actions for Red-Eye Removal
For even greater efficiency, pre-made Photoshop actions can automate the red-eye removal process. These actions are essentially recorded sequences of editing steps that can be applied with a single click.
Using a Photoshop Action:
- Find and Download an Action: Search for free or paid Photoshop actions specifically designed for red-eye removal. Many websites offer such resources.
- Install the Action: In Photoshop, go to the "Actions" panel (Window > Actions). Click the menu icon (four horizontal lines) and select "Load Actions." Navigate to your downloaded action file (.atn) and load it.
- Run the Action: Select the action you want to use from the list in the Actions panel. Open the image you want to edit, and then click the "Play" button (a triangle icon) at the bottom of the panel. The action will then execute the predefined steps to attempt to correct the red-eye.
While actions can be incredibly fast, their effectiveness can vary depending on the complexity of the image and the quality of the action itself. Some actions may require minor manual adjustments afterward.
Considerations for Different Photographic Situations
Red-eye can appear in a variety of contexts, and understanding these can help in choosing the right correction method.
Pet Photography
Pets, especially those with reflective eye structures, are prone to red-eye. The flash from cameras can bounce off their tapetum lucidum, a reflective layer behind the retina, causing a similar effect. Many of the advanced AI-powered tools, like Fotor and Evoto, are specifically designed to handle pet red-eye effectively, restoring the natural charm of their eyes.

Low Light and Night Photography
As mentioned, low-light conditions often lead to dilated pupils, increasing the likelihood of red-eye. When shooting in such environments, it's advisable to use external flashes that can be positioned away from the lens or to employ ambient lighting whenever possible. If red-eye does occur, a robust third-party app or Photoshop will likely be necessary for correction.
Group Photos
Correcting red-eye in group photos can be tedious if done manually on each person. Batch processing features offered by some AI tools can be a significant time-saver in these situations. Retouch4Me's Eyes Masking, for instance, is designed to handle high-volume workflows efficiently.
Conclusion: Achieving Flawless Eyes in Your Photos
The red-eye effect, once a common frustration for photographers, is now largely a solvable problem. Whether you opt for the convenience of your iPhone's built-in editor, the user-friendly interface of Fotor, the AI-driven precision of Evoto, or the professional capabilities of Photoshop and Retouch4Me, there are effective solutions available for every need and skill level. By understanding the cause of red-eye and employing the right tools, you can ensure that your photographs always capture the true sparkle and emotion in your subjects' eyes, creating lasting memories without photographic imperfections.