The issue of 'media offline' is a common stumbling block for many newcomers to DaVinci Resolve. This persistent error message can halt your creative workflow, leaving you frustrated and questioning your project's integrity. Whether you're a novice or a seasoned user of DaVinci Resolve, understanding the various scenarios that trigger this problem and knowing how to resolve them is crucial for a smooth editing experience. This comprehensive guide aims to demystify the 'media offline' error, offering a detailed checklist to help you quickly identify the root cause and get your project back on track.
Understanding the Core of the "Media Offline" Error
At its heart, when DaVinci Resolve throws the "media offline" error at you, it indicates that there’s a problem decoding a video file’s stream at full resolution. This doesn't necessarily mean the file is gone forever, but rather that Resolve cannot access or properly interpret the data it needs to display and process the clip in your timeline. This can manifest in several ways, from a single clip appearing red and inaccessible to an entire project's media suddenly vanishing.

Scenario I: The Unmanaged Media Conundrum
This represents the most common 'Media Offline' scenario in DaVinci Resolve. When you unintentionally move, rename, or delete any source material from its original location after importing it into your project, it's highly likely that you haven't properly managed your media in DaVinci Resolve. DaVinci Resolve creates links to your media files, and if these links break because the source files are no longer where Resolve expects them to be, the clips will appear offline.
Solutions for Unmanaged Media
- Relinking Media: The most straightforward solution is to relink the offline clips. Right-click on an offline clip in the Media Pool, select "Link Media," and navigate to the new location of your source file. If multiple clips are offline due to the same move, Resolve can often relink them all at once.
- Media Management Best Practices: To avoid this in the future, it's essential to establish a robust media management strategy. This involves creating a clear folder structure for your project files before you even start importing. Always keep your source media organized in dedicated folders and avoid moving or deleting files once they are in your DaVinci Resolve project. For video-heavy projects, using SSDs improves speeds significantly over HDDs. Consider using external drives for your media, ensuring they remain connected to your computer whenever you're working on the project.
Scenario II: The H.265/HEVC Codec Conundrum
Sometimes you may encounter this situation: you can import materials, but they immediately show as offline. This problem is often related to the materials being encoded in H.265 or HEVC. These codecs, while efficient for storage and streaming, can sometimes present decoding challenges for editing software, especially in their free versions. This issue seems more like a problem with the Windows system, where native support for these codecs might be less robust without additional components.
Solutions for H.265/HEVC Files
- Install HEVC Video Extensions (Windows): For Windows users, the most common fix is to download and install the HEVC Video Extensions from the Microsoft Store. Once installed, restart your computer, and then open DaVinci Resolve. This often resolves the decoding issues for H.265/HEVC files.
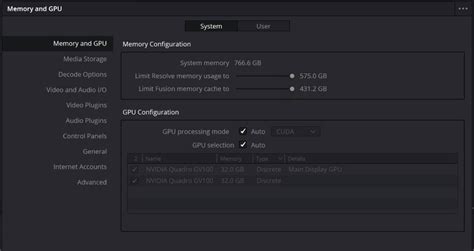
- Upgrade to DaVinci Resolve Studio: If you have a good system setup but still struggle with H.265, you might need to upgrade to the DaVinci Resolve Studio version. This issue doesn't occur with the free version of DaVinci Resolve as frequently because the Studio version includes more robust codec support. In DaVinci Resolve Studio, go to "Preferences" > "System“ > ”Memory and GPU“ page to check and potentially adjust settings related to GPU acceleration for decoding.
- Transcoding: As an alternative solution, if you need to keep that level of video quality but are facing persistent issues, try to transcode your video files to a more Resolve-friendly format like DNxHD (for Windows platforms) or Prores (for Mac platforms). We recommend using the FFmpeg open-source command-line tool for this purpose, as it offers a powerful and flexible way to convert your media.
Scenario III: The Variable Frame Rate (VFR) Challenge
Sometimes, after importing all the clips, they immediately go offline, but there are no issues with the audio (this is the same scenario as described in Scenario II, but with a different underlying cause). Actually, these are common issues after importing Variable Frame Rate (VFR) materials. VFR is common in recordings from smartphones or screen capture software, where the frame rate can fluctuate to save processing power or disk space. DaVinci Resolve, like most professional editing software, works best with Constant Frame Rate (CFR) footage.
Solutions for VFR Footage
- Identify VFR Footage: The fundamental solution to these kinds of issues is converting VFR materials to constant frame rate videos. We'll need two tools for this. One is Mediainfo, a free utility used to check the type of frame rate. Download Mediainfo and analyze your clips to confirm if they are indeed VFR.
- Re-encoding with Handbrake: Once confirmed, download and install Handbrake, another excellent free and open-source transcoder. Use Handbrake to re-encode your VFR footage into a CFR format. Ensure you select a constant frame rate setting within Handbrake's encoder options. After the re-encoding is complete, open Mediainfo again to check the frame rate mode and confirm it's now constant.
- Experiment with Frame Rates: However, some videos may still exhibit variable frame rates even after re-encoding. In such cases, you should try encoding with different target frame rates in Handbrake (e.g., 23.976, 25, 29.97, 30, 59.94, or 60 fps) to see which one works best for your project and maintains stability. The above steps should solve the majority of variable frame rate issues.
How To Use Handbrake For Constant Frame Rate
Scenario IV: Corrupted or Unsupported Files
Before blaming DaVinci Resolve, ensure your source file isn’t corrupt. Play them in different media players like VLC. If the video plays fine in other players, the issue is likely with DaVinci Resolve's interpretation. However, if the file is problematic in multiple players, it might be corrupted.
Solutions for Corrupted or Unsupported Files
- Check File Integrity: If you suspect a file is corrupted, try to re-download or re-export it from the source if possible. If the recording was made on a device, try transferring the file again.
- Codec Compatibility: DaVinci Resolve has excellent codec support, but not all codecs are created equal. One category includes highly compressed and universal encoders, such as H.264, Mpeg-4, etc. The other category includes encoders that are friendly for post-production, such as DNxHD (for Windows platforms) or Prores (for Mac platforms). If a specific codec is consistently causing problems, transcoding to a more post-production-friendly format is the best course of action. FFmpeg is a powerful command-line tool that proved invaluable for transcoding when graphical interfaces failed.
Scenario V: Insufficient System Resources and Configuration Issues
When DaVinci Resolve throws this error at you, it indicates that there’s a problem decoding a video file’s stream at full resolution. Insufficient Resources: High-resolution videos require adequate VRAM and CPU resources. If your system is struggling to process the demands of high-resolution footage, it can lead to decoding errors and media offline issues.
Solutions for Resource and Configuration Problems
- Check System Specs: Make sure your VRAM is sufficient for the resolution and complexity of your project. For video-heavy projects, editing 4K interviews shot with a high camera codec, for instance, requires a capable GPU.
- Update DaVinci Resolve and Drivers: In addition to the above steps, we still recommend updating DaVinci Resolve and your GPU drivers to the latest versions. Outdated software or drivers can lead to compatibility issues and performance problems. If an update is available, go ahead and install it.
- Render Cache Settings: Toggle to Render Cache and set it to "Smart" or "User." This allows DaVinci Resolve to pre-render sections of your timeline, which can significantly reduce the processing load during playback and editing, potentially preventing offline media errors.
- Temporary Files: Sometimes, the issue was linked with temporary files causing a conflict. Clearing DaVinci Resolve's cache and temporary files can resolve unexpected behavior. You can usually find these options within the DaVinci Resolve preferences or by navigating to the cache folder directly.
Specific User Experiences and Troubleshooting
The problem seems to occur on certain particular videos from time to time, though they are recorded using the same phone with the same settings. This has been happening for the past month or so. What's changed in the mean time is that the phone I record most videos with has been updated to the latest IOS (iPhone SE 2). This is quite frustrating. The DaVinci Resolve Studio license is expensive, and the user was hoping that the software they paid for will keep working. They make 2-3 recordings, same phone, same day, all the same. They add them to a project. When they put the same file in a new project (without any other clips), the file renders just fine. Restarting the computer doesn't help. The user has just updated to the latest version (19.1.3 build 7 - from 19.1.2), and that hasn't solved the problem. Other projects (both new and old recordings) are working fine. Colour me puzzled.
Analysis of User's Specific Issue
This particular scenario highlights a nuanced problem. The fact that the same file works in a new project but not in an existing one, and that the issue started after an iOS update on the recording device, suggests a few possibilities:
- Project-Specific Corruption: The existing project file itself might have developed a minor corruption that is now affecting how it interprets certain media.
- Subtle File Variations: Even with identical settings, there can be minute variations in how different video files are encoded by the phone, especially after an OS update. These subtle differences might be triggering a bug or incompatibility within DaVinci Resolve in the context of that specific project.
- Background Processes: While restarting the computer didn't help, it's worth considering if any background processes or system services related to media handling on the iPhone are interfering.
Potential Solutions for the Specific Case
- Proxy Workflow: For recordings from smartphones, especially iPhones, using a proxy workflow can be a lifesaver. Transcode the problematic clips (or all clips from that source) into lower-resolution proxies (like ProRes Proxy or DNxHD Proxy). DaVinci Resolve will then edit using these lighter files, and only switch back to the full-resolution originals for final export. This significantly reduces the strain on your system and can bypass decoding issues.
- Re-importing Media: Try removing the problematic clips from the existing project and re-importing them. Sometimes, the initial import process might have been interrupted or flawed.
- Timeline Duplication: Duplicate the existing project and then try to work with the duplicated project. This can sometimes isolate project-specific issues.
- Check Media Files in Different Locations: I had one video file located on an external drive that DaVinci Resolve didn’t like. While the user indicates the files are from the same phone, ensuring they are on a consistently accessible drive (internal or external SSD) and not on a network drive or a drive with intermittent connectivity is important.
Advanced Troubleshooting and Tools
If you run into any issues or have tips of your own, feel free to drop a comment. Navigating through the “error decoding full resolution media” in DaVinci Resolve can be frustrating, but now you have concrete steps to tackle this issue.
Leveraging Transcoding Software
You can use any transcoding software to process materials that appear offline. The key is to convert them into a format that DaVinci Resolve handles more gracefully. As mentioned, FFmpeg is a highly recommended open-source command-line tool for this. Its flexibility allows for precise control over the transcoding process.
The Role of TourBox
TourBox is a creative tool designed specifically for image and video processing software. In video editing and color grading, every second matters. TourBox makes sure you don't waste any of them. It streamlines complex commands and shortcuts into physical controls, making your workflow faster and more intuitive. You'll love how easy and convenient it feels. While not a direct solution to the 'media offline' error, tools like TourBox can improve overall editing efficiency, allowing you to spend less time troubleshooting and more time creating.
Conclusion
The 'media offline' error in DaVinci Resolve, while common, is usually resolvable by systematically identifying the cause, whether it's media management, codec incompatibility, VFR footage, file corruption, or system resource limitations. By understanding the scenarios outlined above and utilizing the suggested tools and techniques, you can effectively troubleshoot and overcome this hurdle, ensuring a more fluid and productive post-production workflow. Remember to keep your software updated, maintain organized media, and consider transcoding problematic files to formats more conducive to professional editing.