DaVinci Resolve has established itself as a comprehensive post-production powerhouse, seamlessly integrating editing, color grading, visual effects, and audio production into a single, unified platform. Within this robust ecosystem lies Fusion, a sophisticated visual effects and motion graphics suite that, while immensely powerful, can initially appear daunting to newcomers, especially those accustomed to layer-based workflows. This tutorial aims to demystify the fundamentals of Fusion in DaVinci Resolve, providing an accessible entry point into its node-based paradigm.
The Genesis of Fusion: From DOS to Hollywood
The origins of Fusion trace back to a simpler concept: an internal software framework built upon DOS commands. Its initial purpose was to streamline the integration of batch files and various tools, thereby simplifying their operation. The evolution of Fusion took a significant turn in 2014 when Blackmagic Design acquired eyeon Software, the original developers. This acquisition marked a pivotal moment, as prior to this, high-end compositing tools like Fusion were prohibitively expensive, often costing thousands of dollars and thus largely confined to the arsenals of elite Hollywood effects artists. Blackmagic Design's integration and subsequent reforms democratized access to this advanced technology, making its professional-grade capabilities available within the free version of DaVinci Resolve.
Understanding the Fusion Workspace
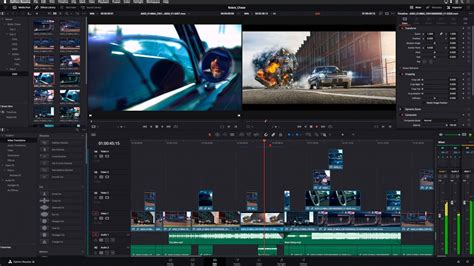
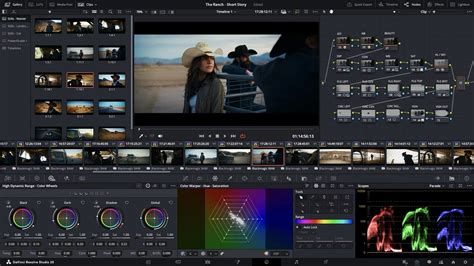
Upon switching to the Fusion workspace in DaVinci Resolve, a user will notice a distinct interface compared to the editing or color pages. The clip intended for editing must be selected, with the playhead positioned over it. Beneath the main Preview Viewer, the clip's timeline is displayed. A key feature of the Fusion page is its capacity to display two clips simultaneously in the Preview Viewer. To direct the output of a specific node to one of these viewers, select the node and then press the corresponding number key. For instance, pressing "1" displays the node's output in Viewer 1, while pressing "2" directs it to Viewer 2.
The upper right corner of the workspace houses several crucial icons for accessing additional panels. These include the Inspector, which displays the parameters of selected nodes; the Metadata panel; the Keyframe editor; and the Spline editor, essential for animating properties over time. Directly below the timeline, a selection of Tool Shortcuts provides quick access to frequently used effects. The primary work area, situated at the bottom of the screen, is the Nodes space. This is where the majority of effects and compositing operations are performed.
The Core Concepts: Nodes, Media In, and Media Out
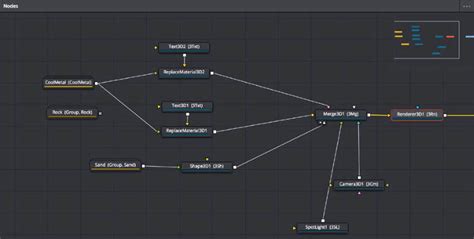
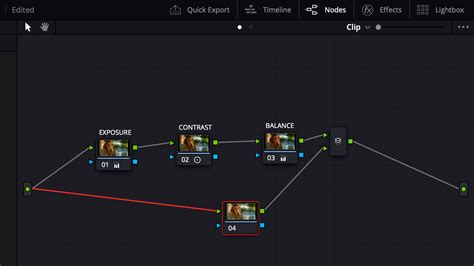
At the heart of Fusion's power lies its node-based architecture. Unlike layer-based systems where effects are stacked sequentially, Fusion utilizes individual nodes, each representing a specific operation or piece of media. These nodes are then connected via "flow lines" to create a visual graph of the compositing process.
Two fundamental nodes are essential for understanding this system: Media In and Media Out. The Media In node represents your input media as it is, before any modifications or effects are applied. It acts as the starting point for your node tree. Conversely, the Media Out node signifies the final output of your media after all the effects and adjustments have been processed. The flow of information is from Media In, through various effect and manipulation nodes, and finally to Media Out.
Building Your First Effect: Adding and Connecting Nodes
To begin altering your clip, the process involves adding other nodes to the workspace. Each effect or operation you introduce will manifest as a distinct node. The Effects Library, accessible by clicking its icon, provides a comprehensive list of all available tools and templates. Within the Effects Library, you'll find various subcategories, allowing you to either construct custom effects from scratch or select from DaVinci Resolve Fusion’s pre-made templates.
Let's start with a simple visual effect. Navigate to Effects Library > OpenFX > ResolveFX Texture. Select "Film Damage" and then click and drag it into your node workspace. The optimal placement is in the center of the arrow connecting your Media In and Media Out nodes. Doing so will automatically insert the "Film Damage" node into the existing flow. You have now successfully added a basic effect to your footage.
Customizing Nodes and Controlling Effects
Many effects within DaVinci Resolve Fusion require parameter adjustments to achieve the desired outcome. This customization is managed through the settings of individual nodes. To gain better control over your effects, you need to access and modify these settings.
As an example, let's add a Color Corrector node. This can be found either in the shortcut toolbar or within the Effects Library. Click and drag the Color Corrector node into the center of the arrow connecting your Media In and Media Out nodes, just as you did with the Film Damage effect. This action will create a new node in your workflow.
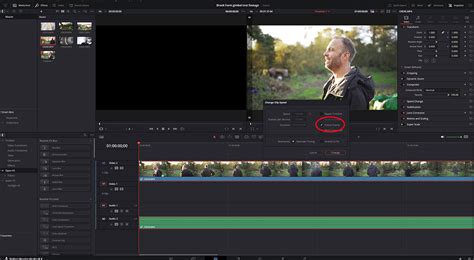
With the Color Corrector node selected (it will be highlighted with a red border), you can adjust its values within the Inspector panel. The Inspector provides a user-friendly interface, including a color wheel, to select your desired color. You also have granular control over other essential values, allowing for precise color manipulation.
Merging Multiple Media Sources
As you become more proficient, you'll encounter scenarios where you need to combine different pieces of media or layers. This is where the Merge node comes into play. For more complex effects that require a slightly longer set of instructions to function correctly, you might need to integrate additional media.
To add a new piece of media, click on the Media Pool icon. If you don't have the desired media readily available, you can right-click within the Media Pool and select "Import Media," then choose your file. Once imported, click and drag your chosen media into an empty space within your node area. This action will automatically create a new node, named after your media file (e.g., "MediaIn3").
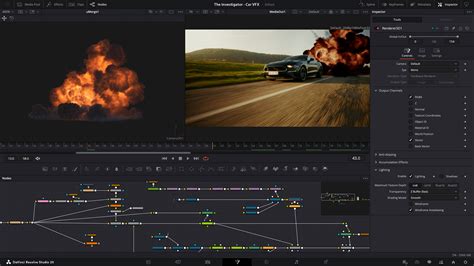
To combine this new media with existing nodes, right-click within your node workspace and select Add Tool > Composite > Merge from the dropdown menu. This will generate a Merge node. Following our initial tip, you can direct the output of your Media In node (representing your new media) and your Color Correction node to the Merge node. The Merge node has two inputs: a foreground and a background. By default, the node you drag first into the Merge node's inputs often becomes the foreground, and the second becomes the background. If your second Preview Viewer changes dimensions after connecting nodes to the Merge node, this is normal. Simply scroll over both arrows flowing into your Merge node to ensure your new Media node is assigned as the foreground and the color correction node as the background. With this, you've taken another step towards mastering DaVinci Resolve Fusion.
Navigating the Nodes: Tools and Techniques
Efficient navigation within the node-based environment is crucial for productivity. The Navigator, which appears as a thumbnail view of your nodes, provides an overview of how your nodes are distributed. The currently selected node is typically highlighted in red, giving you a clear indication of your focus.
Adding new nodes can be achieved through several methods. When creating a new "Merge" node, for instance, you can click on the "Merge" tool icon in the toolbar situated above the Nodes panel. Alternatively, you can click in an appropriate empty area within the Nodes panel and then select the "Merge" tool from the toolbar.
Another efficient method for connecting nodes is by holding down the Alt/Opt key while dragging a connection line from the output port of one node (e.g., "Merge 1") to the input port of another node (e.g., "Merge 2").
For quick access to specific nodes, you can utilize the search bar located within the node editing area. Directly inputting the node's name, such as "Merge," will bring up relevant results. Clicking on the desired node in the search results will automatically populate it in your workspace.
Fusion Nodes Made Easy in DaVinci Resolve
Enhancing Workflow with Creative Tools
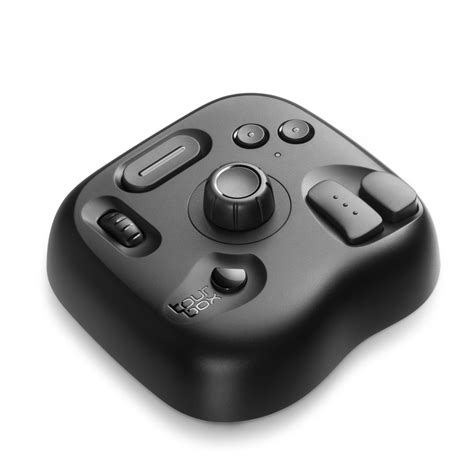
The efficiency of post-production can be significantly enhanced by specialized hardware. The TourBox, a creative tool favored by many video and content creators, offers a streamlined way to navigate between different pages within DaVinci Resolve, including the Fusion page. By mapping common keyboard shortcuts to its physical buttons, users can execute commands much faster than with a traditional mouse and keyboard alone. The TourBox is more than just a hotkey mapper; it incorporates numerous built-in features designed to accelerate creative workflows. Its use can lead to a more streamlined and efficient video post-production process, providing an excellent operational experience.
The Power of Node-Based Compositing
While the node-based system in DaVinci Resolve Fusion might initially present a learning curve for those accustomed to layer-based software, its inherent flexibility and power are undeniable. Each effect or operation is isolated within its own node, allowing for non-destructive editing and a highly organized workflow. This modular approach makes complex visual effects creation manageable and provides unparalleled control over every aspect of the compositing process. By understanding the fundamental concepts of Media In, Media Out, node connections, and the various tools available in the Effects Library and Inspector, users can begin to unlock the full potential of DaVinci Resolve's visual effects suite. As you gain confidence, you will discover how effects that require more intricate setups can be built by chaining together multiple nodes, creating sophisticated and unique visual outcomes.

While this tutorial has covered the introductory knowledge of the Fusion page in DaVinci Resolve, the depth of its capabilities is vast. Further exploration into specific tools, advanced compositing techniques, animation, and 3D integration would reveal the true extent of Fusion's power. Keep an eye out for future updates that delve deeper into these advanced areas.
tags: #fusion #composition #davinci #resolve