Gift certificates and gift cards have evolved beyond simple paper slips into powerful branding tools. They offer a unique opportunity for businesses to strengthen their brand identity, allowing satisfied customers to become brand advocates by sharing the gift of their favorite products or services with others. Beyond their marketing prowess, gift cards are also significant revenue drivers. While a basic gift certificate can be printed by anyone with a printer and paper, the sophistication and impact of a professionally designed gift card can elevate a brand's perception. This tutorial will guide you through creating compelling gift certificate templates using Adobe Photoshop and highlight the convenience of online tools like Adobe Express and Placeit, ensuring your gift cards make a lasting first impression.
The Strategic Importance of Gift Cards
Gift cards are more than just a transactional item; they are a strategic marketing asset. They provide a tangible way for customers to engage with a brand and act as a gateway for new customers to experience a business. For brands, this means an opportunity to reinforce their identity and extend their reach. The physical or digital presence of a gift card can serve as a constant reminder of the brand, encouraging repeat business and fostering customer loyalty. Furthermore, gift cards can be particularly impactful during peak gifting seasons, such as the winter holidays, Valentine's Day, Mother's Day, or Father's Day. By incorporating timely holiday messages and graphics, businesses can effectively tap into the seasonal spending surge and appeal to a broader customer base.
Materiality and First Impressions: Beyond Paper
While a printable gift certificate can be a starting point, the choice of material significantly impacts its perceived value and durability. A plastic gift card, especially one made from recycled PVC or sustainable wood, offers a more premium feel and is reusable, aligning with eco-conscious consumer trends. This durability contributes to a longer-lasting brand impression. When designing physical gift cards, it's crucial to consider their physical attributes. Standard gift card dimensions often mirror those of credit cards or business cards, typically measuring 3.37 inches in width (85.6mm) and 2.125 inches in height (53.98mm). For wallet-sized certificates, a 3.5” by 2” dimension is common, while check-sized certificates might start at 6” by 2.75”. Even letter-sized certificates (11” by 8.5”) are an option, offering ample space for branding and information.
Incorporating functional elements like a barcode or QR code can streamline the point-of-sale (POS) process, enhancing the customer experience. Because these cards are often the first physical interaction a potential customer has with a brand, their design should be meticulously crafted to be both aesthetically pleasing and a true reflection of the brand's identity.
Designing Your Gift Certificate in Adobe Photoshop: A Step-by-Step Approach
Adobe Photoshop is a powerful tool for creating professional and customizable gift certificate templates from scratch. This section will walk you through the process, from setting up your document to adding final touches.
1. Setting Up Your Canvas and Document
Before you begin designing, it's essential to establish the correct document settings for print.
- Page Dimensions: For a standard credit card-sized gift certificate, set your document width to 3.37 inches (85.6mm) and height to 2.125 inches (53.98mm). If you're using InDesign, which is built for print, you can set these dimensions and margins directly. It's advisable to set the project for two pages if you plan to design a double-sided card, ensuring the "Facing Pages" box is unchecked.
- Resolution: For print projects, a resolution of 300 dots per inch (dpi) is recommended. This ensures that your design will have sufficient detail when printed, preventing pixelation or loss of quality, especially when working with raster images.
- Color Mode: For printing, the CMYK color mode is generally preferred over RGB, as it provides a more accurate representation of how colors will appear when printed.
2. Establishing the Background and Borders
The background sets the tone for your gift certificate.
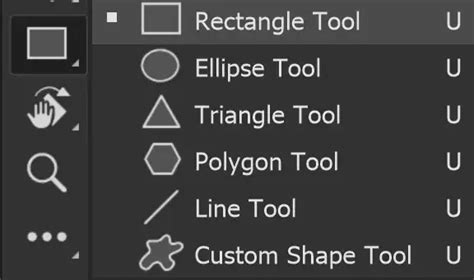
- Background Color: Use the Rectangle Tool to draw a rectangle that covers your entire canvas. Fill this rectangle with your chosen background color. For organization, rename this layer "Background."
- Borders and Fills: If you desire a border, add a stroke color to your background rectangle. Alternatively, if you prefer a solid fill without a border, double-click the Fill box at the bottom of the Tools panel on the left side of your Photoshop interface to select your fill color.
3. Incorporating Your Brand Logo
Your company logo is a key element of brand recognition.
- Creative Cloud Library: To ensure easy access, add your logo file (AI, PNG, or JPEG) to your Creative Cloud Library. This allows you to quickly drag and drop it into your design whenever needed.
- Placing the Logo: Alternatively, you can use "File > Place" to import your logo directly into your Photoshop document. Once placed, use the Move Tool to position and scale it appropriately within your design.
4. Adding Textual Content
This is where you communicate the essential details of the gift certificate.
- Creating Text Layers: Click "Create New Layer" and rename it "Text." Select the Type Tool (T) and click on your canvas to start typing.
- Formatting Text: Use the Character panel (Window > Character) to customize your font, font color, and size. Common elements to include are the gift certificate value, terms and conditions, an expiration date, and contact details.
- Adding Lines for Input: To create lines for handwritten information like the recipient's name or a personalized message, use the Line Tool. Set the height to 3 pixels and draw lines where needed. You can also add accent lines for stylistic flair.
5. Designing the Reverse Side (for Double-Sided Cards)
If you are creating a double-sided gift card, you'll need to design the back as well.
- Duplicating the Artboard: If you're printing, select the Artboard Tool. Hold down the Option key (Mac) or Alt key (PC) and drag a copy of your first side below the original. This creates a new artboard for the reverse side.
- Populating the Reverse Side: Delete the existing text and replace it with terms and conditions, expiration dates, or any other necessary information. You can also add additional branding elements or graphics.
6. Preparing for Print
Ensuring your design is print-ready is crucial for professional results.
- Bleed Area: If you plan to print professionally, inquire about the required bleed area with your print provider. The bleed area is an extra margin of your design that extends beyond the trim line, ensuring that colors and images go all the way to the edge of the finished card without any white slivers.
- Exporting for Print: When ready to print, go to "File > Export > Adobe PDF (Print)." In the Adobe PDF preset menu, select either "High Quality Print" or "Press Quality," depending on your print provider's recommendations. Ensure you select the correct marks and bleed settings.
How To Create A Greetings card Template Using Photoshop, Easy Photoshop Tutorial
Leveraging Online Tools for Effortless Gift Certificate Creation
For those who prefer a more streamlined or less software-intensive approach, online tools offer a fantastic alternative. Adobe Express and Placeit provide user-friendly platforms with extensive template libraries and intuitive editing capabilities.
Adobe Express: Versatility and Ease of Use
Adobe Express is designed to empower users of all skill levels to create professional-looking designs quickly.
- Template Library: Adobe Express offers thousands of stunning, professionally designed templates that can be customized for any occasion. You can start with a template that catches your eye or build your design from scratch.
- Customization: Establish a clear theme for your designs by incorporating photos, icons, logos, and personalized fonts. Adobe Express allows you to make these elements feel entirely authentic to your brand.
- Accessibility: Adobe Express has a free plan that includes core features, making it accessible for individuals and small businesses. You can save your completed certificates directly to your device.
- Marketing Testimonial: As one marketer noted, "Adobe Express helps me to create fast, high-quality content." The platform's versatility is highlighted by another user stating, "I'm all in on Adobe Express. Beautiful, versatile gift certificates."

Placeit: A Browser-Based Design Solution
Placeit offers a simple, browser-based solution for creating gift certificates without requiring any software installation.
- Online Editor: Placeit provides an intuitive online editor where you can easily change text, reposition design elements, and import new ones. You can save drafts and access your work from any device.
- Template Variety: Explore a gallery of mockups, design templates, logos, and video templates. For gift certificates, you can find everything from blank templates to specific business gift certificate designs.
- Image Integration: Easily change background images using Placeit's stock library or upload your own copyright-appropriate imagery.
- Customization Examples:
- Editable Layouts: You can easily adjust and change layouts for blank or business gift certificate templates.
- Dark Themes: Some templates come with a dark background by default, but the layout is fully customizable.
- Tattoo Gift Certificate Template: For niche businesses, you can upload custom artwork to personalize designs like a tattoo gift certificate template.
- Ready-Made Options: Numerous ready-made templates allow you to swap backgrounds and change text for a quick and effective design.
- Pricing Model: Placeit offers a one-time fee for downloading your work, which includes licensing for commercial usage. Subscription options provide unlimited downloads for avid designers.
Design Considerations and Inspirations
Regardless of the tool you choose, several factors contribute to a successful gift certificate design.
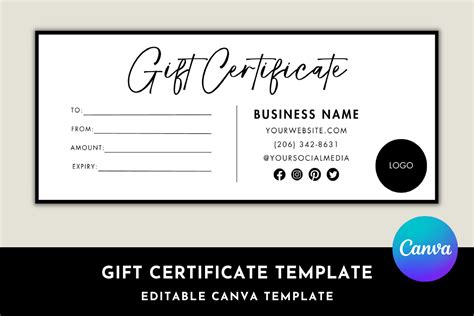
Key Information to Include
Common features on a gift certificate include:
- Your company logo
- The gift certificate value
- Branded or holiday-related imagery
- Contact details (website, phone number, address)
- Terms and conditions
- Expiration date (if applicable)
The amount of content will depend on the size and intended purpose of the gift certificate.
Inspiration and Further Resources
For further inspiration and design ideas, explore platforms like Behance to see creative projects. Envato Tuts+ also offers a wealth of articles, roundups, and tutorials on design, providing continuous learning and creative sparks for your gift certificate projects.
By combining the detailed control of Photoshop with the convenience of online tools like Adobe Express and Placeit, you can create impactful gift certificate templates that not only serve their transactional purpose but also significantly enhance your brand's visibility and customer engagement. The key lies in thoughtful design, attention to detail, and a clear understanding of your brand's identity.
tags: #gift #certificate #template #photoshop